Share this page


Continuous integration with Azure DevOps
Using the LoadRunner Azure DevOps Plugin, you can integrate LoadRunner Professional with Microsoft Azure DevOps CI/CD systems.
Azure DevOps integration overview
You can set up Azure DevOps pipelines to work with LoadRunner Professional tests, to integrate load tests into your CI/CD testing process. LoadRunner Professional provides a plugin for the Azure DevOps agent, enabling the execution of Controller scenarios as part of a build job, and to view the results in Azure DevOps reports.
The following sections describe how to set up the environment to use the LoadRunner Azure plugin.

Installation and environment set up
The following must be installed and configured for the Azure DevOps integration:
Prerequisite installations:
- Windows 8.1, Windows 10 (if using client OS), or Windows 2012 R2 SP1 or higher (if using a server OS).
- PowerShell 5.0 or higher.
- The machine to be used for the job should be configured as an Azure DevOps self-hosted agent (see Self-hosted Windows agents in the Azure DevOps documentation).
- Internet Information Services (IIS) installed and enabled on the Azure DevOps agent machine.
- LoadRunner Professional installed on the Azure DevOps agent machine.
Environment configuration:
-
Ensure that the user that is being used by the Azure Pipelines Agent service has elevated permissions.
- Create your test scenarios and ensure that their location is accessible by the Azure DevOps agent.
Plugin parameters
| General parameters: | |
| Source path (mandatory) | Path for the test, or the folder that contains the tests. |
| Results directory | The directory where the test results are saved. The default value is C:\LoadRunnerResults. |
| Task timeout |
Timeout value for the task execution, in minutes.
Default: -1 |
| LoadRunner Settings: | |
| Controller polling interval |
Polling interval for checking the scenario status, in seconds. Default: 30 seconds. |
| Scenario execution timeout | The maximum time allotted for scenario execution, in minutes. |
| Analysis template | Applies a template for the build (path to a .tem file). Leave blank to use the default template. |
| Treat failures as errors | When marked as true, if a test scenario fails, the task is marked as failed. |
| Results Handling Settings: | |
| Publish scenario results |
When selected, the results are available as a web application hosted by the agent used for the job. Note: IIS must be available on the agent. |
| Publish artifacts manually |
If this is not selected, the results are uploaded automatically as build artifacts. If it is selected, you can choose whether or not to upload the results manually at a later time. For more information, see Publish Build Artifacts task in the Azure DevOps documentation. |
| Build artifacts directory |
Directory used for build artifacts. The scenario results are stored here. This directory will not be cleaned (all the contained files are not deleted). Default: $(Build.ArtifactStagingDirectory)\LoadRunnerArtifacts |
| Publish test reports manually |
If this is not selected, the test reports are published automatically. If it is selected, you can choose whether or not to publish the results manually at a later time. For more information, see the Publish Test Results task in the Azure DevOps documentation. |
| Build test reports directory |
Directory used for reports. The scenario reports are stored here. This directory will not be cleaned (all the contained files are not deleted). Default: $(Build.ArtifactStagingDirectory)\LoadRunnerReports |
Set up a pipeline job
This task describe how to set up a Azure DevOps pipeline to run your tests.
To set up a job:
- Enter the path to the LoadRunner tests (*.lrs) in the Source path box.
-
Configure the LoadRunner settings. The tests are executed sequentially.
- Define the Results directory. The results are stored on the Azure DevOps agent used for the job at <Results Directory>\<BuildLabel>.
-
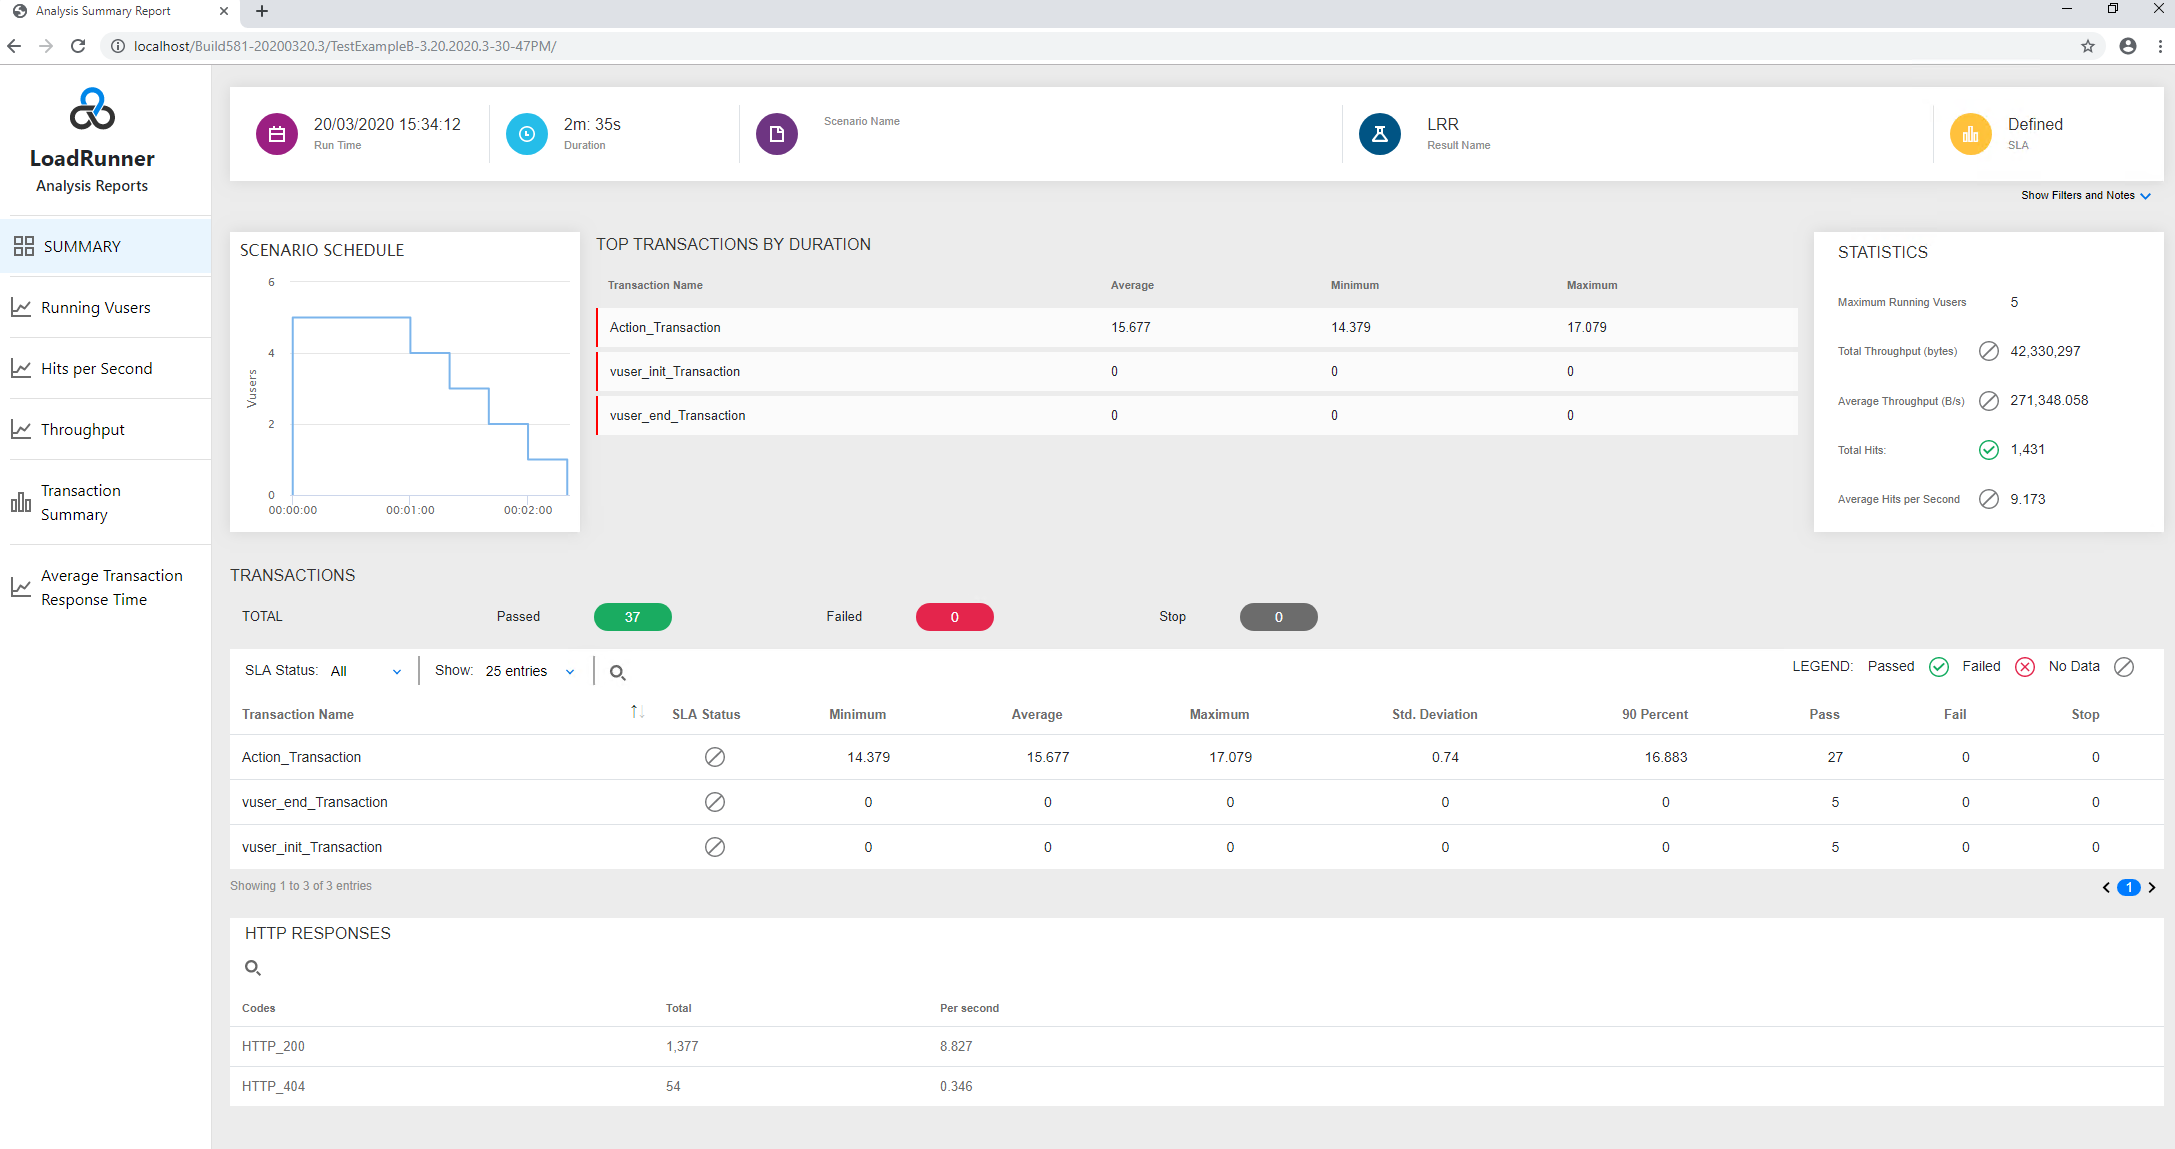
If Results Handling Settings > Publish scenario results is selected, the plugin creates a new web application hosted by the Azure DevOps agent (using IIS), based on the <Results Directory>\<BuildLabel>.
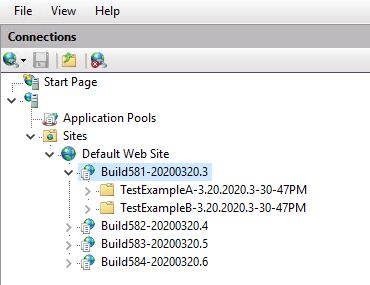
You can then view the report in the Azure dashboard.
Note: If there are multiple Execute LoadRunner Professional tests tasks during the same pipeline using different <Results Directory> addresses, then multiple web applications are created—one for each different <Results Directory>.
-
Results Handling Settings > Publish artifacts manually parameter:
-
If the parameter is not selected, the results are uploaded as build artifacts automatically.

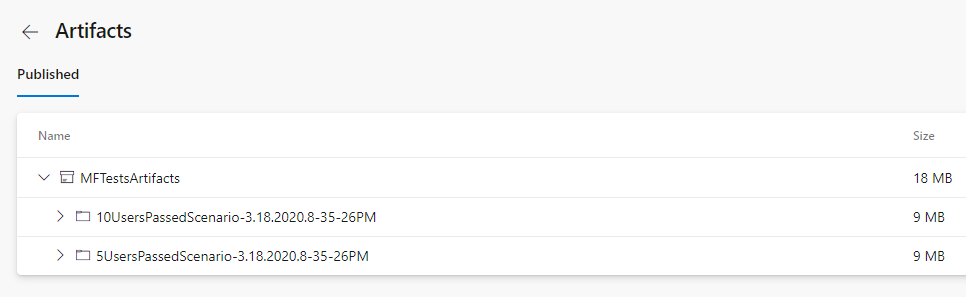
- If the parameter is selected, you can choose later whether or not to upload the results as build artifacts. If uploading, you can set the path where the build artifacts are saved. For example: $(Build.ArtifactStagingDirectory)\LoadRunnerReports
-
-
Results Handling Settings > Publish test reports manually parameter:
- If the parameter is not selected, test reports are published automatically.
-
If some tests are failing, click on the failing tests link to see the reasons for the failure. You can also find the test reports at Test Plans > Runs.
- If the parameter is selected, you can choose later whether or not to upload the test reports. If uploading, you can set the path where build test reports are saved. For example: $(Build.ArtifactStagingDirectory)\LoadRunnerReports