
Share this page


Configure AccuRev with Pulse Code Review
In order for AccuRev users to perform code reviews in Pulse, configuration must first be done in both AccuRev and Pulse.
AccuRev Configuration
Check settings.xml
Ensure that the settings configured in file <ac-install>/storage/site_slice/dispatch/config/settings.xml include a Pulse URL and ID. (Both settings are installed by default with AccuRev 7.5.)
<settings>
 <webui url="http://myserver:8080/accurev"/>
 <pulse url="http://myserver:8080/pulse"
        id="b9c4cb28-ff59-41a6-9b42-d81bf3a1bed5"/>
</settings>
Note: The ID can be any 128-bit globally unique identifier (GUID or UUID).
Install User Schema
Install a user schema to support email and display name:
-
Create a file
userSchema.xmlwith the following contents:<?xml version="1.0" encoding="utf-8"?> <properties> <property kind="config" propertyName="userSchema"> <fields> <field name="Display Name"/> <field name="Email Address"/> </fields> </property> </properties> -
Install the userSchema with the following command:
# accurev setproperty -c -r userSchema -l userSchema.xml -
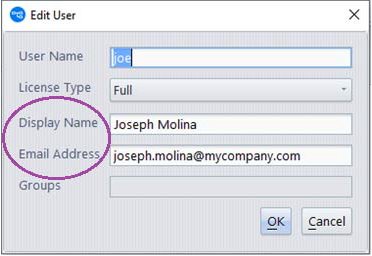
Start (or restart) the AccuRev GUI and open the list of users (located under Admin | Security). Edit all the users and ensure that each has a Display Name and Email Address:
Note: If you use field names other than "Display Name" and "Email Address", please update the following values to match in
<ac-install>/pulse/conf/startup.properties:accurev.displayname.propname=Display Nameaccurev.emailaddress.propname=Email AddressThese values default to "Display Name" and "Email Address".
Create "PulseCodeReview" Schema Field
Use AccuRev’s Schema Editor to create a PulseCodeReview schema field:
-
For any depot that you want to configure for Pulse Code Reviews, use the Schema Editor to add a field called "PulseCodeReview" to the depot’s schema:
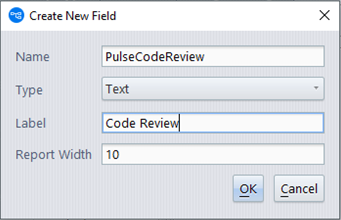
The field must be named "PulseCodeReview", and it must be of type "Text". The display name can be anything that is appropriate.
- In the Schema Editor’s Layout tab, add the PulseCodeReview field to the issue layout. Then Save the schema.
In AccuRev’s issue form, the PulseCodeReview field will display the code review status (if available) of the current issue, and it will have a button link that takes the user directly to the review in Pulse.

Create accurev-admin User in AccuRev
You must be a Pulse administrator in order to execute the Pulse configuration steps described in the following section called Pulse Configuration . A Pulse administrator can also disable or lock other users out from accessing Pulse.
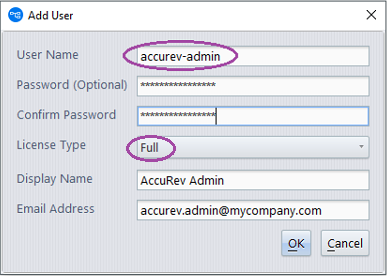
The AccuRev installation process creates a single Administrator user named "accurev-admin" in Pulse. Pulse users are authenticated against AccuRev, so you must create the "accurev-admin" user in AccuRev also.
In the AccuRev GUI, under Admin | Security, add a new user called "accurev-admin". Be sure to assign a full license to this user.

Pulse Configuration
When working with the Pulse web application, keep in mind the following terms:
|
Pulse term |
Equivalent term in AccuRev |
|---|---|
| Product | Depot |
| Changeset | Transaction |
| Request | Issue (or Change Package) |
If you need further information about any Pulse functionality, you can click on the question mark icon located in the upper-right corner of every Pulse page to bring up the online help for Pulse:
Also, you can find additional information about using Pulse Code Review with AccuRev in the Pulse Code Review FAQ .
Configure the AccuRev Repository in Pulse
- Log into
http://myserver:8080/pulseas a Pulse administrator. -
Click on the top bar of the Pulse page to open the main navigation bar:
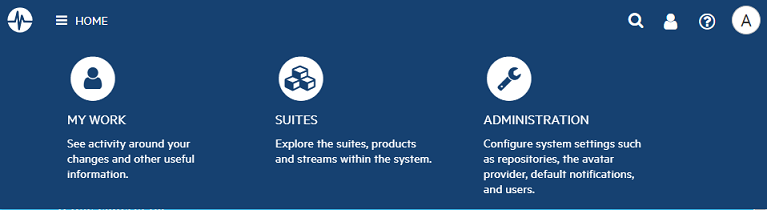
Note: If you do not see Administration in the navigation bar, you are not a Pulse administrator.
- Navigate to Administration | Repositories and click on the ’+’ sign to create a new repository.
-
Enter the following data:
- Title for the repository, e.g., myserver
- Host:port for the AccuRev server, e.g., myserver:5050
- Username and password for an AccuRev admin user. (Click the Set Password button to enter the password.)
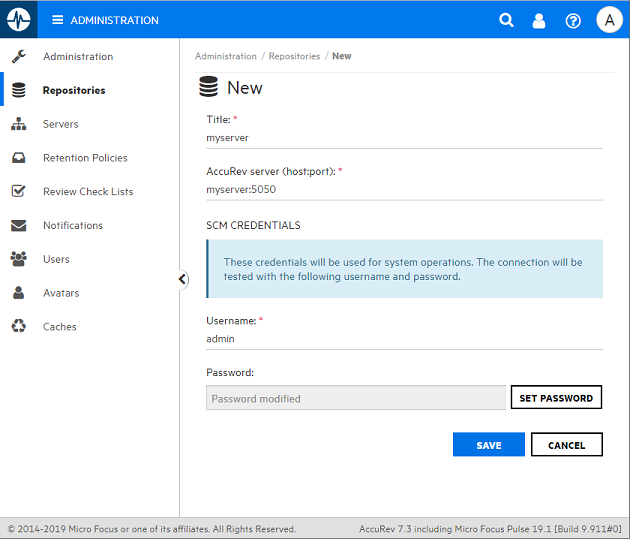
- Click Save.
If the repository was created successfully and Pulse was able to authenticate with AccuRev using the configured username and password, then the AccuRev repository will be listed under Repositories, as shown here:

Register the Depot
In order for users to be able to do code reviews in an AccuRev depot, you must register the depot in Pulse:
-
First, create a Pulse Suite, which is a grouping of depots:
Using the main navigation bar at the top of the page, navigate to Suites | Create a Suite.
If you have only one depot that will perform code reviews, you could title the Suite simply "AccuRev".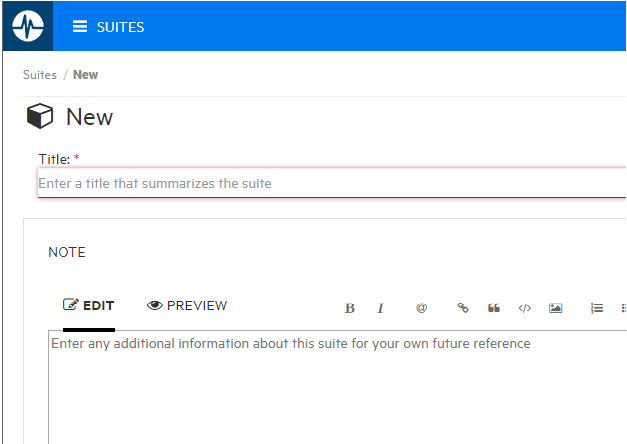
-
Next, Register a Product for each AccuRev depot that will perform code reviews. You can register a Single Product (depot) at a time, or you can bulk-select depots and register Multiple Products):
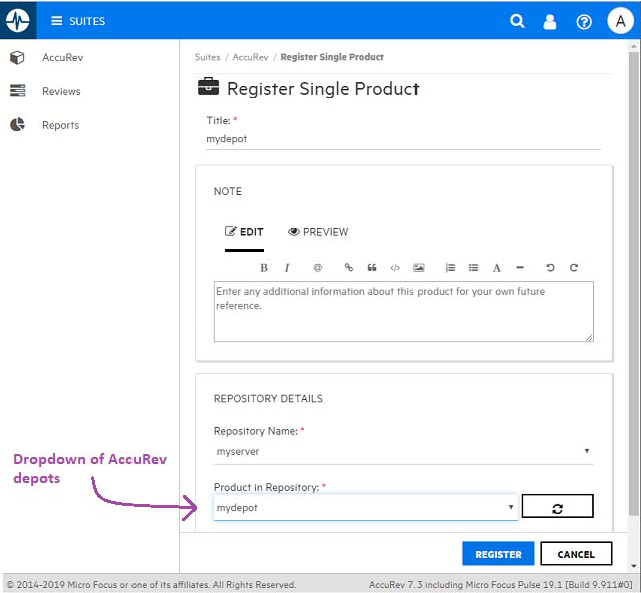
After you click Register, you will see a page like this:
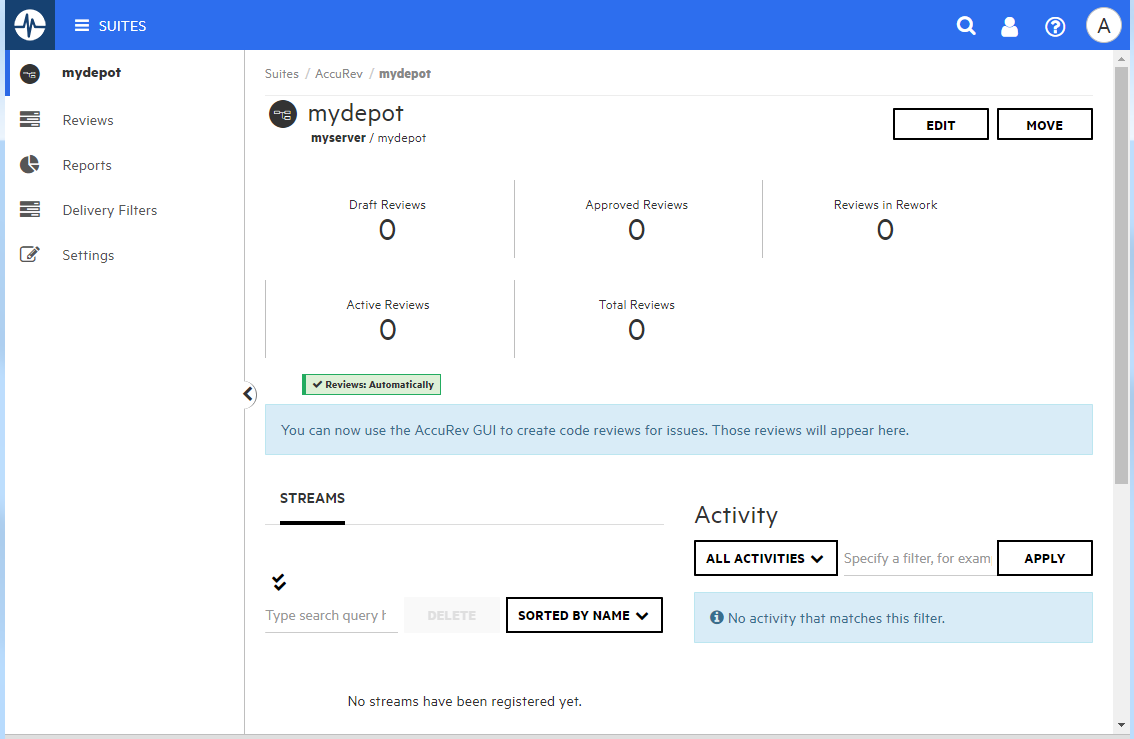
Ask Users to Login to Pulse
Users who will be configured as Pulse administrators or designated as code reviewers must first be registered in Pulse. You should encourage such users to login to Pulse as soon as possible. Each user’s first login automatically registers them in Pulse.
Configure Additional Pulse Administrators (optional)
The accurev-admin user can designate other Pulse users as administrators.
Be sure that all users who are designated as Pulse administrators have a "full" license in AccuRev. You can check this by editing the user in the AccuRev GUI or by executing "accurev show -fv users" on the command line.
To designate a Pulse user as a Pulse administrator, follow these steps:
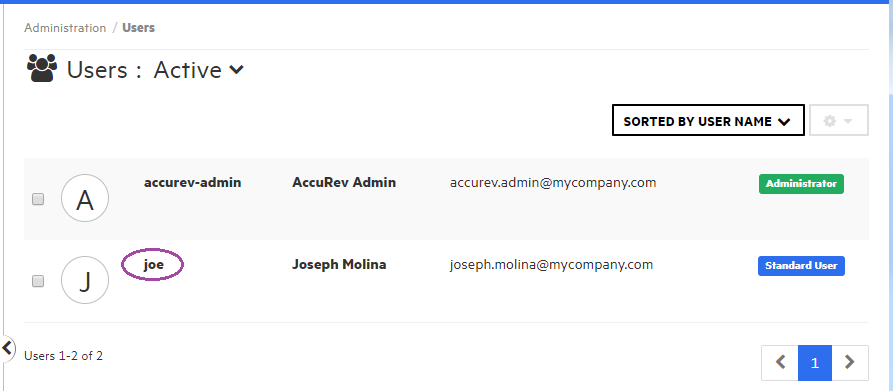
- Navigate to Administration | Users.
-
Click on the User Name of the user whom you would like to make an administrator:
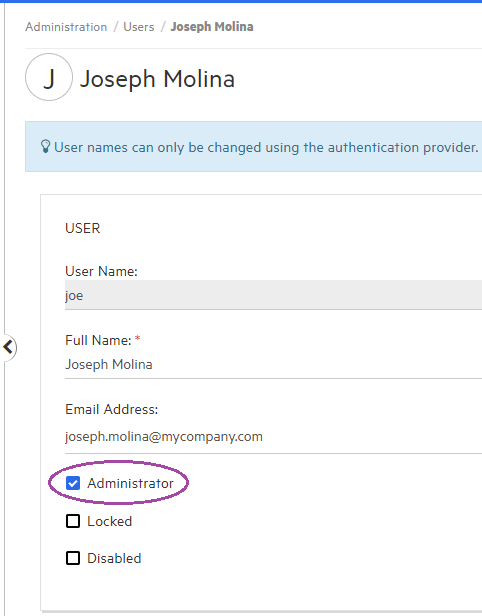
-
In the User dialog that opens up, check the Administrator checkbox and then click Save:
Once other administrators are configured, you can "retire" the accurev-admin user, if desired, by having another Pulse administrator edit the accurev-admin user in Pulse and check the Disabled checkbox.
Configure Email Notifications
Pulse uses email notifications to inform users of changes in code reviews that they are involved in. The Pulse administrator must first configure SMTP email settings for the system and then configure what notifications are enabled for the organization. Then individual users can configure what notifications they want to receive.
-
The SMTP email settings are configured by manually editing the file
<ac-install>/pulse/conf/startup.properties. You must configure these settings once after installation and then restart the AccuRevTomcat service in order for Pulse to pick up the new values. The minimum settings are:server.mail.channels=smtp
server.mail.from=myserver@mycompany.com
server.smtp.host=smtp.mycompany.com
server.smtp.port=25
server.smtp.auth=false
The other, optional settings depend on your organization’s SMTP server configuration:
server.smtp.username=<username>server.smtp.password=<password>server.smtp.quitwait=<true or false>server.smtp.starttls.enable=<true or false>server.smtp.starttls.required=<true or false>
Note:
- Contact your IT department to confirm that your settings in startup.properties match the SMTP server settings for your organization.
- Remember to restart AccuRevTomcat so that Pulse picks up the new settings.
-
Login to Pulse as an administrator and navigate to Administration | Notifications. Use the dropdowns to select what kinds of notifications will be available to users in your organization. By default, all notifications are enabled.
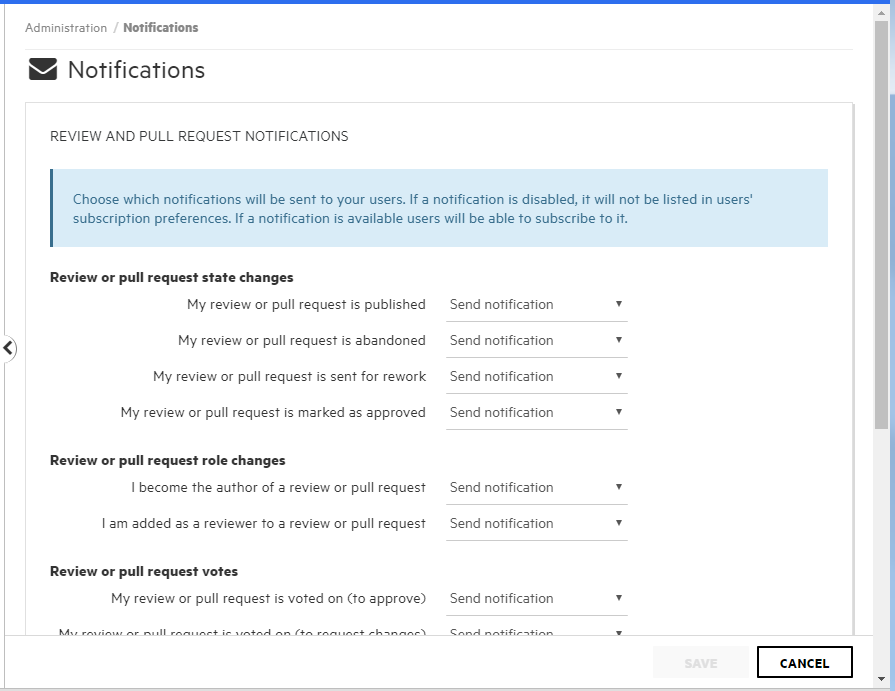
- Send notification means that the notification is sent to users by default, but users can choose to unsubscribe from it.
- Do not send notification means that the notification is not sent to users by default, but users can override this setting by subscribing to the notification.
- Disabled means that the notification is not available for users to subscribe to.
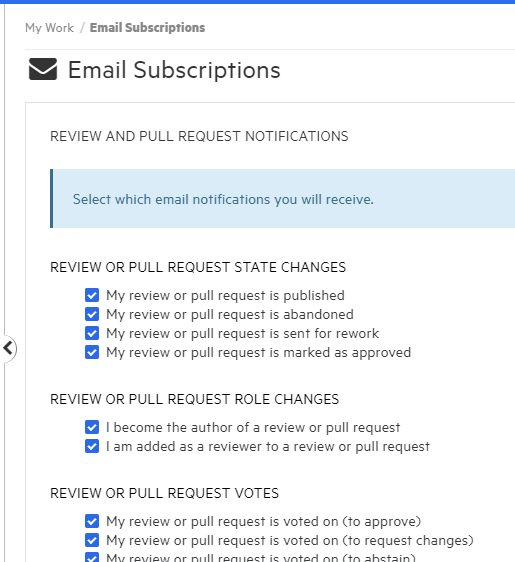
-
Individual users can then control which code review notifications they receive by navigating to My Work | Email Subscriptions in Pulse and selecting the appropriate checkboxes:
Rollout to Users
Once you have completed the above configuration steps for AccuRev and Pulse, users can begin using Pulse Code Review with AccuRev. Notify AccuRev users that they should login to Pulse as soon as possible (using their AccuRev credentials) so that they can be designated as code reviewers. Information about how to use Pulse Code Reviews can be found in Pulse Code Review .
Using Pulse Code Review with Replica AccuRev Servers
If you will be using Pulse with a replica AccuRev server, you can use one of two configurations:
-
Run Pulse on the same machine as the master AccuRev server. Configure the Pulse repository to use the master AccuRev server. Copy the master server’s
<ac-install>/storage/site_slice/dispatch/config/settings.xmlfile onto the replica server.This setup is appropriate if users use the GUI to connect to both the replica and the master AccuRev servers. Code reviews can be created with GUIs connected to either the master or replica servers.
-
Run Pulse on each replica AccuRev server. Configure the Pulse repository to use the replica AccuRev server on the same machine. Each replica server will have its own Pulse instance with its own set of code reviews.
This setup is appropriate for geographically disparate teams that connect to different replica servers. It is still possible, however, for one code review to include reviewers from different locations. That is, a user on one replica server can participate in reviews created in the local Pulse instance and in reviews created in Pulse instances on other replica servers.
Setting up Pulse to Run on a Standalone AccuRev Web Server
The best way to configure Pulse to run on a standalone AccuRev Web Server (separate from the AccuRev Server) is first to set up Pulse to run on the AccuRev server machine, and then to set up Pulse to run on the Web Server machine (shutting down Tomcat on the AccuRev server).
The proper sequence of steps is:
-
On the AccuRev server machine:
- Follow all the steps in AccuRev Configuration to prepare AccuRev to work with Pulse running on the AccuRev server machine.
- Follow all the steps in Pulse Configuration to set up Pulse to run on the AccuRev server machine.
- Create some test users in AccuRev and have them login to Pulse. Confirm that they can start a code review from AccuWork, click the Pulse button to view the code review in Pulse, publish the code review in Pulse, and see the updated code review status ("In Review") in AccuWork.
- Shut down Tomcat on the AccuRev server.
-
On the AccuRev web server machine:
- Do a Web Server-only AccuRev installation (if not already done).
- Start Tomcat on the Web server machine.
- On the AccuRev server machine, configure files to enable communication between Pulse on the web server and Postgres on the AccuRev server:
-
Examine the file <ac-install>/storage/site_slice/dispatch/config/settings.xml and confirm that it has a url for webui and a url and id for pulse. The URLs should include the AccuRev server hostname, e.g.:
<settings>
<webui url="http://<accurev_server_hostname>:8080/accurev"/>
<pulse url="http://<accurev_server_hostname>:8080/pulse"
id="da2c56a9-691e-46ff-9a82-802fc0e57dc4"/>
</settings>
-
Edit the file <ac-install>/postgresql/9.5/db/postgresql.conf.
Uncomment listen_addresses and set it to ’*’:listen_addresses = '*’ # what IP address(es) to listen on;
# comma-separated list of addresses;
# defaults to 'localhost'; use '*' for all
# (change requires restart)
-
Edit the file <ac-install>/postgresql/9.5/db/pg_hba.conf to allow connections from the web server host. Add a line that contains either "<web_server_IP>/32" or "<web_server_hostname. domain>".:
# TYPE DATABASE USER ADDRESS METHOD
# IPv4 local connections:
host all all 127.0.0.1/32 md5
host all all <web_server_IP>/32 md5
#host all all <web_server_hostname.domain> md5
# what IP address(es) to listen on;
# comma-separated list of addresses;
# defaults to 'localhost'; use '*' for all
# (change requires restart)
- Restart the AccuRev DB Server on the AccuRev server machine.
At this point, you should be able to use Pulse on the web server.
Setting up Pulse to Run on a Secure Port
In order to run Pulse on secure port 8443 instead of the default port of 8080, take the following steps:
-
Configure the AccuRev Tomcat Server to run with SSL enabled: Login to the AccuRev Web Server machine using the account that the Tomcat service runs on and execute:
accurev enable_ssl -H <host>:<port>
-
In file
<ac-install>/storage/site_slice/dispatch/config/settings.xml,
set webui and pulse as follows:<settings>
<webui url="https://<accurev_server_hostname>:8443/accurev"/>
<pulse url="https://<accurev_server_hostname>:8443/pulse"
id="da2c56a9-691e-46ff-9a82-802fc0e57dc4"/>
</settings>
where id is any 128-bit globally unique identifier (GUID or UUID).
-
In file
<ac-install>/pulse/conf/startup.properties,
 set server.mail.linkprefix as follows:
server.mail.linkprefix=https://<accurev_server_hostname>:8443/pulse


