
Share this page


Sharing an Eclipse Project with AccuRev
Sharing is the process of placing files associated with an Eclipse project under AccuRev control. You might want to share a project with AccuRev to use the configuration management capabilities of AccuRev for a project that already exists in Eclipse.
Note: Project sharing functionality is available for Eclipse 3.4 and later.
How Shared Eclipse Project Files Populate AccuRev Workspaces
The Sharing process places files from Eclipse projects in an AccuRev workspace in a way that is consistent with how the AccuRev workspace was initially created.
If your Eclipse project is not located within an AccuRev workspace prior to sharing, then a workspace is created for you during the Sharing process and you choose which files you want to place in the workspace. The new workspace is initially populated with only the files you select. Note that the basis stream of the workspace might include other files and an AccuRev Update command will populate the new workspace with all the files from the basis stream.
If your Eclipse project is already located within a AccuRev workspace, then the Sharing process depends on how the AccuRev workspace was initially created:
- If your Eclipse project is located within an AccuRev workspace that was created with the InitialContents – Same as Basis Stream option, then all the files from the Eclipse project are promoted to the workspaces’s basis stream during the Sharing process.
- If your Eclipse project is located within an AccuRev workspace that was created with the Initial Contents – Pick and choose from Basis stream option, then you choose the files from the Eclipse project that you want to promote to the basis stream of the workspace.
How to Share an Eclipse Project with AccuRev
- In the
Eclipse Navigator or
Project Explorer view, right-click the project you want to share and select
.
The Share Project dialog box appears.
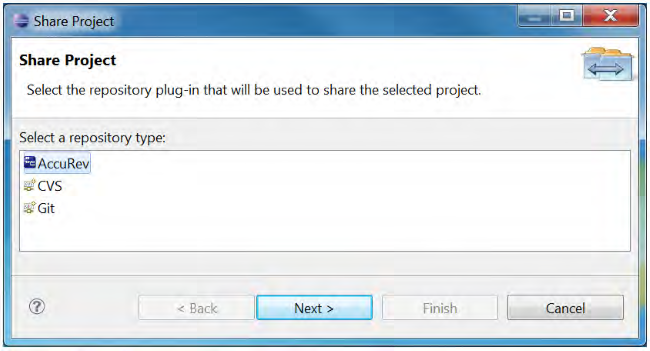
- Select
AccuRev and click
Next.
The Share Project with AccuRev page appears.

- Select the
AccuRev stream in which you want to create the new workspace for your
Eclipse project.
Note: This stream should not contain any files that have the same filenames as files within the Eclipse project that you are sharing.
- Click Next. The Create New Workspace page opens.
- Optionally, change the default values for locking options and end-of-line (EOL) convention for the new workspace. If you choose either Exclusive Locking or Anchor Required locking options, you will need to perform an Anchor command on a file before editing it. See Anchor for more information.
- Click
Finish.
The workspace is created and the Keep dialog box appears. This dialog box allows you to add the files in the shared project into the AccuRev depot.

- Enter a comment or select a comment from the
Choose a previously entered comment field. Click
OK.
The External Elements to Add dialog box appears with all elements selected.
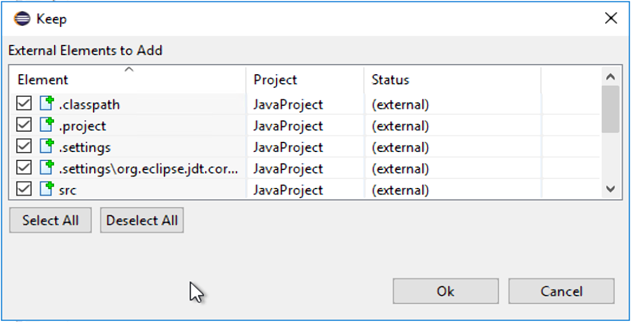
- Click OK.


