This section describes how to verify a single project.
-
In Site Administration, click the Site Projects tab.
-
In the Projects list, select a project.
-
Click the Maintain Project
 button and choose Verify Project. The Verify Project dialog box opens.
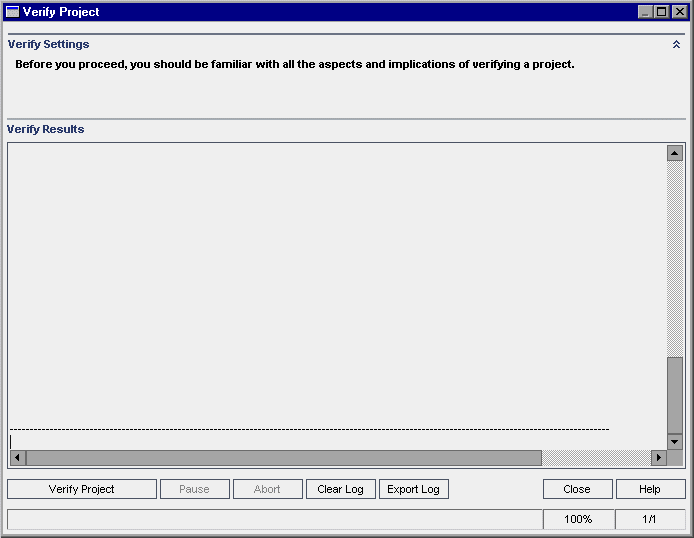
-
Click the Verify Project button to start the verification process. In the Verify Results pane, log messages are displayed.
If an error occurs while running the process, a message box opens. Click the Abort or Retry buttons accordingly.
-
To pause the verification process, click the Pause button. To continue, click the Resume button.
-
To abort the verification process, click the Abort button. Click Yes to confirm.
-
To save the messages displayed in the Verify Results pane to a text file, click the Export Log button. In the Export Log to File dialog box, choose a location and type a name for the file. Click Save.
-
To clear the messages displayed in the Verify Results pane, click the Clear Log button.
-
When the verification process completes, the Verify Results pane displays the location of the verification report. By default, the file is located in the following directory: <ALM Repository Path>\sa\DomsInfo\MaintenanceData\out\<Domain Name>\<Project Name>.
-
Analyze the verification report. The report indicates both problems that can be repaired by ALM automatically, and the problems that you need to repair manually.
-
Click Close to close the Verify Project dialog box.