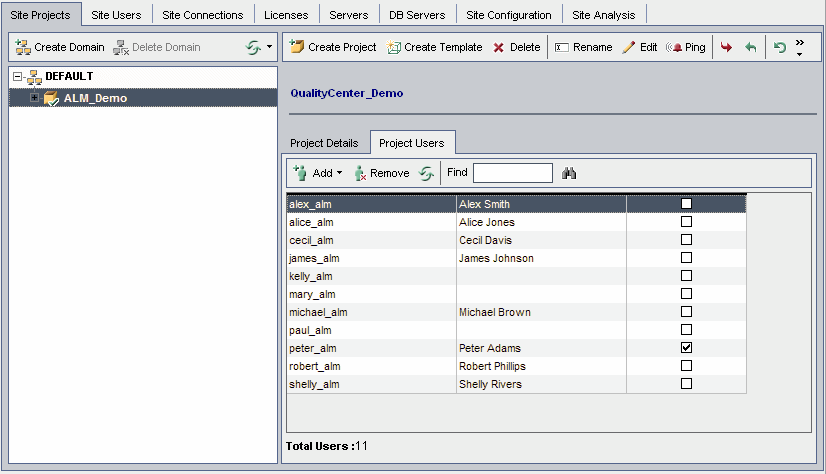
As a site administrator, you can control access to projects or template projects by defining the users that can log on to the project. You can assign users to projects from the Users list, or copy users from existing projects. You can also assign users as project administrators. For details on assigning project administrators, see Assigning Project Administrators.
When a user is no longer working on a project, remove the user from the project to ensure project security. Removing a user from a project does not delete the user from the Users list. To remove the user from the Users list, you must delete the user from the Site Users tab, as described in Deleting Users.
Note:
-
As a project administrator, you can assign and remove users from projects, and change user privileges from the Project Customization window. For details, see Managing Users in a Project.
-
You can assign projects to users from the Site Users tab. For details, see Assigning Projects to Users.
-
Automatic email notification is sent to project administrators when users are assigned or removed from a project in Site Administration. You can make automatic notification unavailable by adding the AUTO_MAIL_USER_NOTIFICATION parameter in the Site Configuration tab. For details, see Setting ALM Configuration Parameters.
Cross Project Customization: If you are working with a template project, you assign users from the Template Users tab.
ALM Editions: Template projects are not available for Quality Center Enterprise Edition. For more information about ALM editions and their functionality, see the Micro Focus Application Lifecycle Management User Guide
-
In Site Administration, click the Site Projects tab.
-
In the Projects list, select a project. In the right pane, select the Project Users tab.
The users for the selected project are displayed.

You can click the User Name or Full Name column headers to change the sort order of user names or full names in the Project Users list from ascending to descending. You can also click the Project Administrator column header to group users by project administrators.
-
Click the Add button, and choose one of the following options:
-
Add From The Users List. The Users list is displayed to the right of the Project Users tab. Select the users that you want to assign to the project. You can search for users by typing a search string in the Find box above the Users list, and clicking the Find button
 .
. -
Copy From Another Project. The Projects list is displayed to the right of the Project Users tab. To copy a user, click a project to expand the project directory, and select the user name check box. To copy all users from a project, select the project's check box. To clear all selected users, click Clear All.
-
-
Select users from the Users list or Projects list, and click the Add Selected Users button
 . Alternatively, double-click a user. The selected users are displayed in the Project Users list.
 -
To remove a user from a project, select the user in the Project Users list and click the Remove button. Click Yes to confirm. The user is removed from the Project Users list.
-
To refresh the Project Users list or Users list, click the Refresh button
 above the appropriate list.


