Generate workflow scripts
You can use the script generators to perform customizations on the Defects module field lists and dialog boxes.
Customize Defects module field lists
You can specify that a different field list be used for a field of the Defects module, depending on the value of another field. For example, you can set the Detected in Versions list to change depending on the value in the Project field.
-
In the Project Customization window, in the left pane, click Workflow.
-
Click the Script Generator - List Customization for Defects Module link.
-
Under Primary/Secondary Rule, select the primary field and the secondary field.
When a primary field value is changed, the list of values in the secondary field changes automatically. For example, you can select Project as the primary field and Detected in Versions as the secondary field.
-
To set a rule, click <select primary> and select a field name. Click <select secondary> and select a field name.
-
To add a new rule, click the Add Primary/Secondary Rule button
 . Select field names for <select primary> and <select secondary>.
 -
To delete a rule, select the rule and click the Delete Primary/Secondary Rule button
 . Click Yes to confirm.
-
-
Under Primary/Secondary Rule, select the primary/secondary rule for which you want to set list match rules.
-
Under List Match Rule, select the field list to be used in the secondary field for specific values entered into the primary field:
-
To set a rule for a defined primary field value, click <select list> and select a list name.
-
To set a rule for an undefined primary field value, click <enter value> and type a primary field value. Press Enter. Click <select list> and select a list name.
-
To add a new list match rule, click the Add List Match Rule button
 . Click <enter value> and type a primary field value. Click <select list> and select a list name.
 -
To delete a list match rule, select the rule and click the Delete List Match Rule button
 . Click Yes to confirm.
-
-
To save your changes, do one of the following:
-
Click the Apply Script Changes button to save your changes and close the script generator.
-
Click the Apply & View button to save your changes and view the generated script in the Script Editor.
-
If you use the Script Editor to modify a script that was created by a script generator, your modifications are overwritten the next time you run that script generator. It is recommended that you name the generated script before you modify it. For details on the Script Editor, see Working with the Workflow Script Editor.
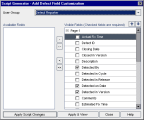
You can modify the appearance of the New Defect and Defect Details dialog boxes by setting different fields to be visible for specific user groups. You can also sort the order in which the fields are displayed on the dialog box for each user group.
For example, you may want the Assigned To and Priority fields to display only for a user that has developer privileges. Also, you can customize the Assigned To field so that it is displayed before the Priority field for this user group.
To customize Defects module dialog boxes by user group:
-
In the Project Customization window, in the left pane, click Workflow. The Workflow page opens.
-
To modify the appearance of the New Defect dialog box, click the Script Generator - Add Defect Field Customization link.
To modify the appearance of the Defect Details dialog box, click the Script Generator - Defect Details Field Customization link.
-
From the User Group list, select the user group to which the customizations are to apply.
-
From the Available Fields column, select the fields you want to display in the target dialog box, and click the right arrow.
Click the double arrow buttons (>> and <<) to move all the names from one list to the other. You can also drag the field names between lists.
-
In Visible Fields, to set a field as a required field, select the checkbox next to it.
For a required field, a value is mandatory. Its title is displayed in red in the Add Defect or Defect Details dialog box.
-
To set the order in which fields are displayed for the selected user group, use the up and down arrows
 .
. You can also drag the field names up or down.
-
To set the Add Defect and Defect Details dialog boxes to include one or more input pages, use the up and down arrows to move fields to the appropriate page.
By default, all fields are displayed on one page.
-
To save your changes, do one of the following:
-
Click Apply Script Changes to save your changes and close the script generator.
-
Click Apply & View to save your changes and view the generated script in the Script Editor.
-
If you use the Script Editor to modify a script that was created by a script generator, your modifications are overwritten the next time you run that script generator. It is recommended that you rename the generated script before you modify it. For details on the Script Editor, see Working with the Workflow Script Editor.
 See also:


