Share this page


Designing Test Steps
After you add a test to the test plan tree and define basic test information, you define test steps—detailed, step-by-step instructions that specify how to execute the test. A step includes the actions to be performed on your application and the expected results. You can create test steps for both manual and automated tests. For manual tests, you complete test planning by designing the test steps. Using your plan, you can begin test execution immediately. For automated tests, you create automated test scripts using OpenText testing tools, custom testing tools, or third-party testing tools.
In this exercise, you add test steps to the Credit Cards test. This test verifies the credit card type used to book a flight.
To design a test step:
-
Make sure the Test Plan module is displayed.
If the Test Plan module is not displayed, on the ALM sidebar, under Testing, select Test Plan.
-
Display the Credit Cards test.
Expand the Payment Methods folder, and select the Credit Cards test.
-
Open the Design Step Details dialog box.
-
Click the Design Steps tab.
-
Click the New Step button. The Design Step Details dialog box opens.
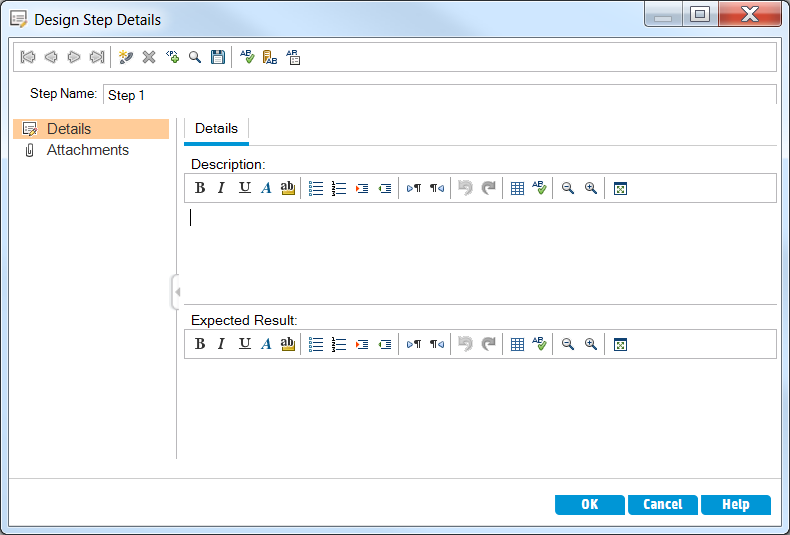
In the Step Name box, a step name is displayed. The default name is the sequential number of the test step.
-
-
Define the first test step.
In the Design Step Details dialog box, type the following:
Step Name: Step 1: Log in to Mercury Tours.
Description:
1. Enter URL.
2. Log in.
Expected Result: User is logged in to Mercury Tours.
-
Close the Design Step Details dialog box.
Click OK.
-
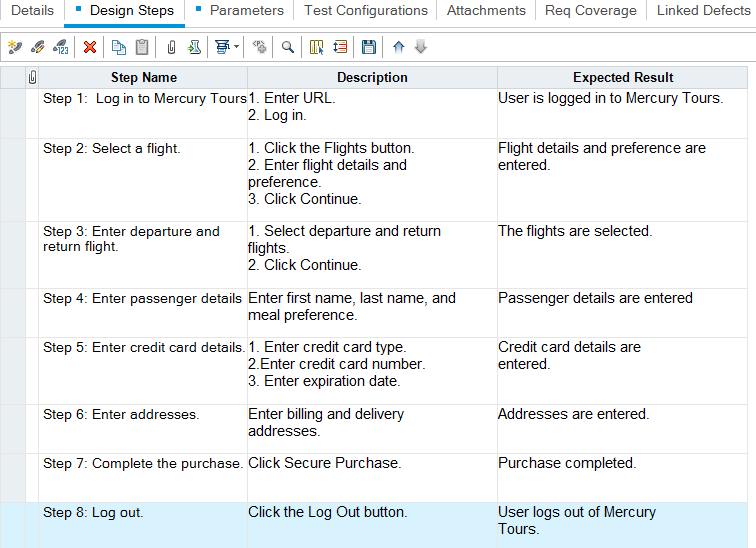
Add the remaining test steps.
For each of the following test steps, click the New Step button to open the Design Step Details dialog box, type the required information, and click OK to close the Design Step Details dialog box:
| Step Name | Description | Expected Result |
|---|---|---|
| Step 2: Select a flight destination. |
|
Flight details and preference are entered. |
| Step 3: Enter departure and return flight. |
|
The flights are selected. |
| Step 4: Enter passenger details. |
Enter first name, last name, and meal preference. |
Passenger details are entered. |
| Step 5: Enter credit card details. |
|
Credit card details are entered. |
| Step 6: Enter addresses. | Enter billing and delivery addresses. | Addresses are entered. |
| Step 7: Complete the purchase. | Click Secure Purchase. | Purchase completed. |
| Step 8: Log out. | Click the Log Out button. | User logs out of Mercury Tours. |
The Design Steps tab displays the design steps.