Share this page


OData support for extended reporting
This section describes how to work with OData and ALM.
In this topic:
- Overview
- Supported OData versions
- Supported ALM entity types
- Prerequisites
- Authenticate
- Connect to ALM data from a BI tool
- Process retrieved ALM data before analysis
- Troubleshooting
Overview
ALM supports OData (Open Data Protocol), the OASIS REST-based standard for consuming ALM REST APIs. You can use business intelligence (BI) tools that support OData to connect to ALM data and generate charts and reports. This enables you to visualize and analyze ALM data using extended reporting capabilities, beyond the functionality provided by ALM reports and graphs.
Here is the workflow of working with OData and ALM.
-
Prepare for the OData connection, as specified in Prerequisites.
-
Retrieve ALM data over OData using BI tools that support OData (such as Power BI and Tableau).
For details, see Connect to ALM data from a BI tool.
-
Use the BI tool to generate reports and charts for the ALM data.

Supported OData versions
ALM supports OData version 4.0.
Any tool that supports OData version 4.0 is likely to work well with ALM.
Note: For a list of tools that support OData, go to OData Ecosystem and select Consumers.
ALM OData support has been tested with Power BI and Excel.
Supported ALM entity types
After connecting to an ALM project from a BI tool, you can retrieve the following project data:
-
Releases
-
Cycles
-
Requirements
-
Test folders
-
Tests
-
Test design steps
-
Test set folders
-
Test sets
-
Test instances
-
Test runs
-
Users
-
Defects
Prerequisites
Before working with OData, gather the following connection information:
| Prerequisite | Details |
|---|---|
| Enable OData support |
To enable the OData support, set the IS_ODATA_SERVICE_ENABLED parameter to Y. For details, see ALM Site Parameters. |
| ALM's OData data source URL |
ALM data can be accessed through a unique OData data source (or OData feed), allowing users to seamlessly connect to ALM data through different BI tools.
|
| Sign-in credentials |
You use API keys to connect to an ALM OData data source. Complete the following for your ALM account:
For details, see API key management. |
| Enable full name support |
Required only if you want to retrieve users' full names. By default, only usernames are retrieved for users. If you also want to obtain the full names, set the IS_ODATA_SHOW_FULL_NAME site parameter to Y. Note: Consider your organization's policy before you enable the full name support. |
| Install private certificate |
If a private certificate is used in your ALM environment, make sure the certificate is also installed on the machine where your BI tool is running. |
Authenticate
Authentication is required the first time you connect to an ALM OData data source from your BI tool.
Use the basic authentication option in your BI tool.
You authenticate with the client ID and API key secret associated with your ALM account.
| Field | Description |
|---|---|
| User name |
Enter the Client ID. |
| Password |
Enter the API key secret. |
| Select which level to apply these settings to |
Varies on BI tools. Specify the level where the username and password can be shared for authentication:
|
Note: If your client ID or API key secret is no longer valid, the authentication fail. Edit or clear permissions to authenticate with your new credentials.
Connect to ALM data from a BI tool
You can use any business intelligence tool that supports OData to connect to ALM data, such as Power BI, Tableau, and Excel.
Example: Connect to ALM data from Power BI
-
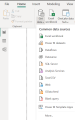
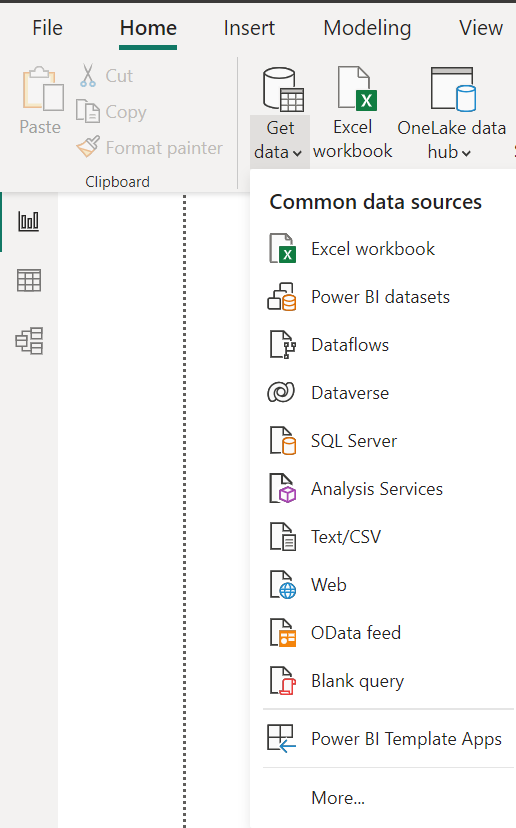
Open Power BI. Select Home > Get Data > OData feed.
-
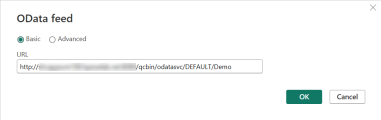
In the OData feed dialog box, select Basic, enter your ALM OData data source URL, and click OK.
-
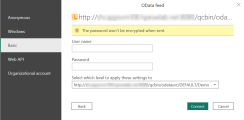
Select Basic, and enter your sign-in credentials.


Example: Connect to ALM data from Tableau
-
Open Tableau. From the side menu > Connect > To a Server, select More and then OData.
-
In the Server field, enter your ALM OData data source URL.
-
In the Authentication field, select Username and Password.
-
Enter your sign-in credentials.
Example: Connect to ALM data using Excel
-
Open an Excel worksheet. Select Data > Get Data > From Other Sources > From OData Feed.
-
In the OData feed dialog box, select Basic, enter your ALM OData data source URL, and click OK.
-
Select Basic, and enter your sign-in credentials.
Process retrieved ALM data before analysis
This section lists some recommendations about processing ALM data before you work on them using your BI tool.
If you want to work on narrowed-down ALM data, you can filter retrieved data by table columns of the following types:
-
ID. For example Defect ID.
-
Time. For example Actual Fix Time.
-
Date. For example Closing Date.
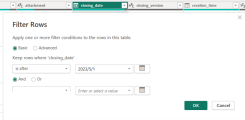

Note: When using filters, only the And operator is supported.
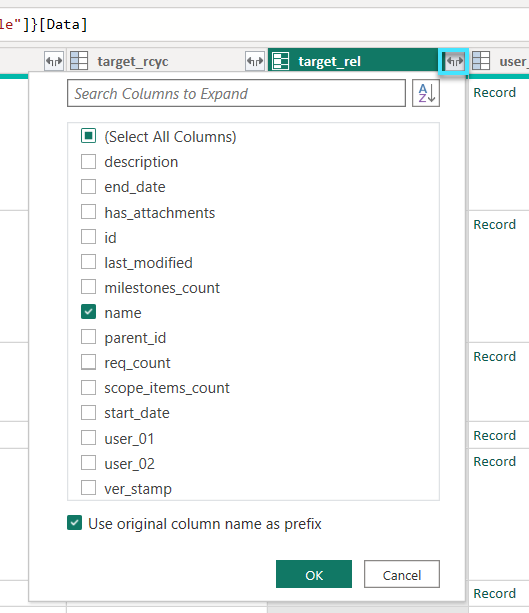
When connecting to an ALM's OData data source with multiple tables, you can use the expand option on a table column to add additional columns from the related table. This helps you build queries across tables.
Note: The expand option is recommended for one-to-one entity relationships only.
For example, the Defects table contains references to several related tables, with the Releases table among them. You can use the expand option on the target_rel column of the Defects table to add more columns related to releases, for example, the name column. After the target_rel column is expanded, one more column named with target_rel.name is added in the Defects table.
Here is another example about expanding the detected_by_user column of the Defects table. Select full_name, and then the detected_by_user.full_name column is added.
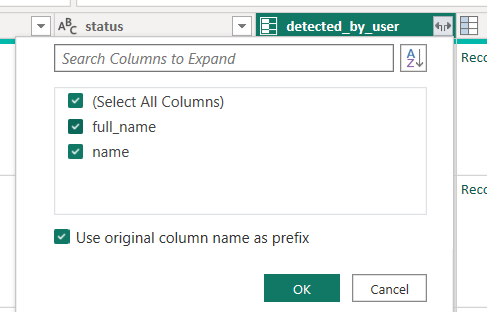
Note: Whether you can add users' full names depends on whether the support for retrieving full names is enabled. For details, see Enable full name support.
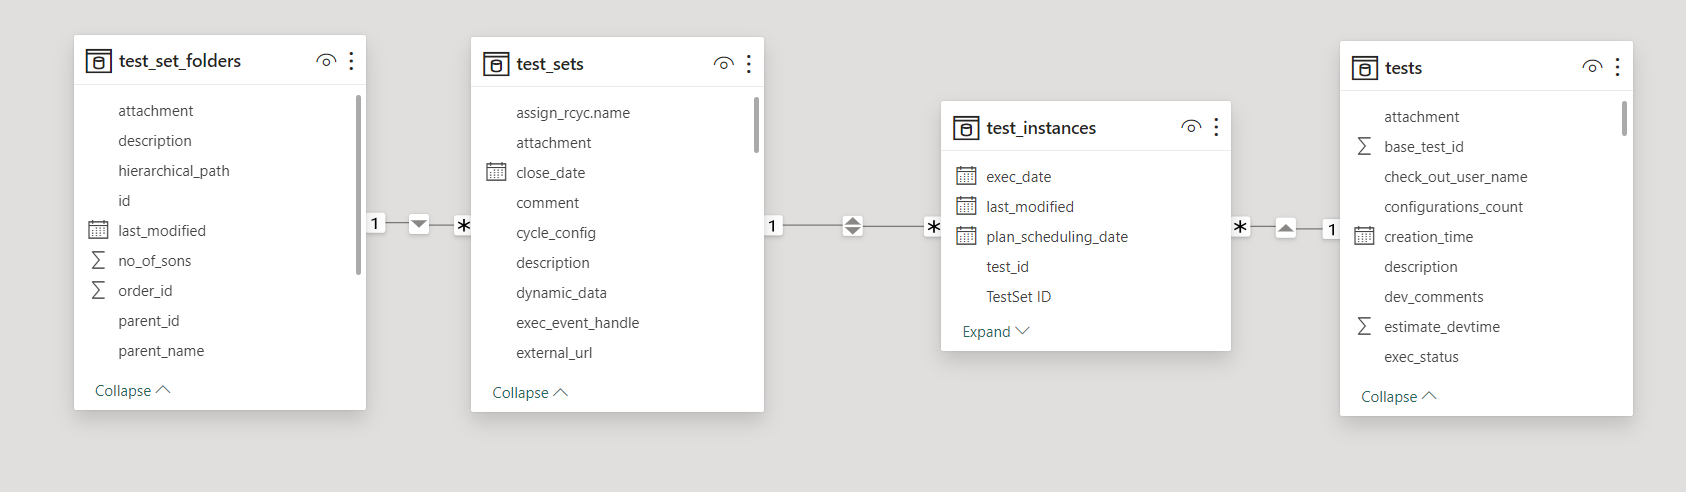
Create relationships between tables to accurately calculate results and display the correct information in your analysis. This is especially necessary when you are dealing with ALM one-to-many, many-to-many, or multiple-level entity relationships.
Below is a relationship for test set folders, test sets, test instances, and tests.
Troubleshooting
The following table list the issues you may encounter when using OData.
| Issue | Solution |
|---|---|
OData: Request failed: The underlying connection was closed: Trust could not be established for the protected SSL/TLS channel
|
This may happen because you use a private certificate on your ALM environment but do not install the same certificate on the machine where your BI tool is running. |