Share this page


Install on Linux
Before installing, consider the following:
-
Verify that you meet the various installation prerequisites. For prerequisite information, see the relevant chapters in Installation prerequisites.
-
If you are working in a clustered environment, you must mount the file system repository before you start the installation process. The mount should not use any cache mechanisms. For details, contact your network administrator.
-
By default, the installation processes run in console mode. Navigating from one wizard step to the next requires familiarity with the various console mode command types. For explanations of the various command types and the methods for entering configuration settings, see Work in Console Mode.
-
If you are planning to upgrade a copy of the existing Site Administration schema, the database server of the existing Site Administration schema and the database server of the existing Lab_Project must be supported. If these database servers are not supported, you can disable the validation check. For details, refer to Disabling validation checks for the installation wizard.
Note: For the most up-to-date supported environments, see the Support Matrix.
-
If you encounter problems during the installation process, see Troubleshooting the installation for troubleshooting suggestions.
- If you want to reconfigure after the installation and configuration is complete, you must run the installation procedure again.
-
If an error occurs during the installation procedure, you must uninstall and restart the installation procedure.
-
If an error occurs during the installation procedure and the installation log file is not found, ensure that enough disk space is available for installation and deployment to the selected locations, and that system settings such as the open file resources limit are set to the maximum allowable value.
-
$ is a reserved character in the installation procedure. For non-password fields use $DOLLAR$. For example, $admin$ should be entered as $DOLLAR$admin$DOLLAR$. Password fields can continue to use $.
To install:
-
Log in to the host machine with the appropriate permissions. For a list of required permissions, see Required Permissions: Linux.
-
If OpenText Application Quality Management is installed on the machine, uninstall it. For information on uninstalling, see Uninstall.
Cluster environment: Uninstall ALM from all nodes.
-
The installation process can be run in console mode only.
-
Create an installation directory on the server. For example: /usr/Install/ALM.
Note: The installation cannot be executed using a path that contains "..", such as ./../../ALM/ALM_installer.bin
-
Navigate to the /mnt/dvd/ALM-Linux installation subfolder.
-
Copy the entire contents of the subfolder to the installation directory you created on the server.
-
Run the following chmod command to allow permissions for the installation files: chmod -R 777 <installation directory>.
-
From the installation directory on the server, navigate to the folder with the ALM_installer.bin file and run ALM_installer.bin.
Note:
-
The configuration settings are saved in the qcConfigFile.properties file.The file is created in the /var/opt/ALM/conf directory. The file should not be moved from this location.
-
Also, the repid.txt file is created in the <ALM Repository path>/qc folder. The file should not be moved from this location.
-
If you are installing on a secondary node of a cluster, some of the configuration dialog boxes that are needed only for the primary node are not displayed.
-
-
The Setup Wizard page opens, displaying the Welcome page.
Click Enter to continue.
-
The License Agreement page is displayed.
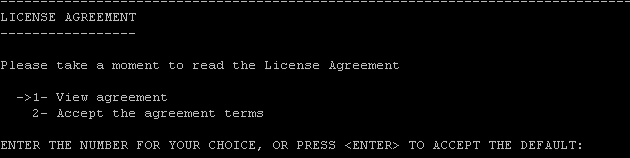
Read the agreement. To accept the terms of the agreement, select 2.
-
If the wizard detects settings from a previous installation, the Existing Settings page is displayed.
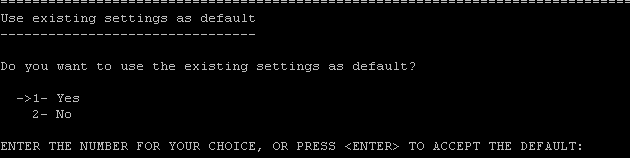
By default, existing settings are used. The existing settings appear as defaults in subsequent wizard screens. You can then make changes to any of the settings.
Choose to keep or clear the existing settings, then proceed to the next page.
-
The JDK/JRE Path page is displayed.
Enter the JDK or JRE folder path.
Note: ALM requires Java JDK or JRE to be installed prior to installing ALM. For details, see Prerequisites: General.
-
The Choose Install Folder page is displayed, displaying the default location for the installation files.
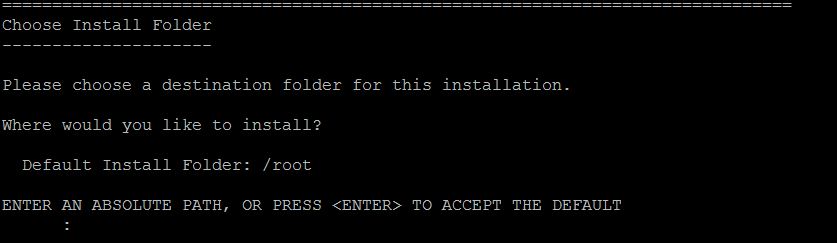
To keep the default installation folder, click Enter, or enter an absolute path to define another destination folder.
Note: If you change the default, a soft link (symbolic link) with the default directory path is created that points to the directory you define.
-
The Database Server page is displayed.
-
Select the database type.
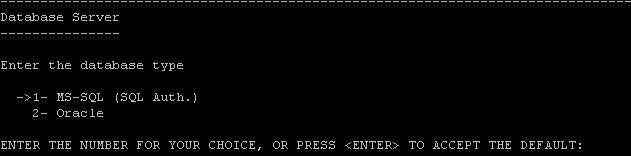
For details on database requirements, see Prerequisites: Oracle Database Servers or Prerequisites: Microsoft SQL Database Servers.
-
Select a database connection method.
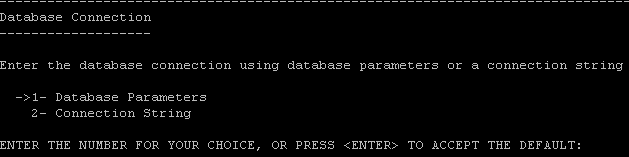
Select one of the following:
-
Database Parameters. Enables you to enter database server information.
-
Connection String. Enables you to type a formulated database server connection string.
Oracle RAC database Select Connection String, and enter a connection string, specifying the folder that contains the tnsnames.ora file, and the TNS server to which ALM should refer. Use the following example:
jdbc:oracle:thin:@OrgRAC;oracle.net.tns_admin=/opt/oracle/tnsnameFolder
For details on prerequisites for Oracle RAC support, seeOracle RAC Support
Microsoft SQL Server database
If your database requires SSL/TLS access, see Configure a secure database connection for a new installation.
-
-
Enter Database Parameters.
If you selected the Database Parameters connection method above, enter the following information:
-
DB host name. Type the database server name.

-
DB port number. Type the database server port number, or accept the default port number. To accept the default click Enter.

-
Oracle service name. Type the Oracle service name.

-
-
Enter Database Administrator Login information.
Specify the following:
-
DB admin user name. The name of the user with the administrative permissions required to connect to the database server.

-
DB admin password. The database administrator password.

-
-
-
The Site Administration Database Schema page is displayed.
-
Select a Site Administration database schema option.
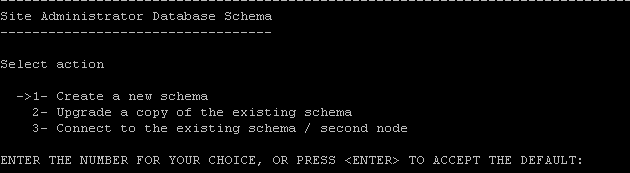
Select one of the following:
Create a New Schema Creates a new Site Administration database schema and a new Lab_Project. This is the default option.
Note: The installation log and the enable_extensions.txt file contain error messages stating "Schema differences were found". These errors can be ignored, they are generated as part of the schema enable extension mechanism and the upgrade mechanism.
Upgrade a copy of the existing schema Creates a copy of the existing Site Administration database schema, and upgrades the copy. For details, Upgrade the Site Administration database schema.
If you select this option, you are prompted to add an exception file to the upgrade process. If you have defined an exception file, enter the location of where it was saved prior to the installation process. For details about exception files, see Manage schema changes.
When working in a cluster environment, select this option if you have an existing primary node and you want to install OpenText Application Quality Management.
Note: When you upgrade a copy of the existing Site Administration schema, OpenText Application Quality Management tries to copy LAB_PROJECT to the database server where the original LAB_PROJECT exists. If LAB_PROJECT is successfully copied, the new upgraded Site Administration schema points to the new copy of LAB_PROJECT. If LAB_PROJECT is not copied, a new empty LAB_PROJECT is created in the database server where the new Site Administration database schema is created. For details, see LAB_PROJECT installation considerationsLAB_PROJECT installation considerations
Connect to existing schema / second node This option can be used in two scenarios:
-
If you are reinstalling and would like to reconnect to the same Site Administration database schema.
-
If you have an existing node and you want to install on another node to create a cluster. For details on cluster configuration, see Clustering: Linux.
Note: This option enables you to connect to a 26.1 Site Administration database schema only. To connect to an earlier version of Site Administration, you must first upgrade the schema. For details, see Upgrade the Site Administration database schema.
-
-
When creating a new schema, in Database Name, enter the name of the database.
-
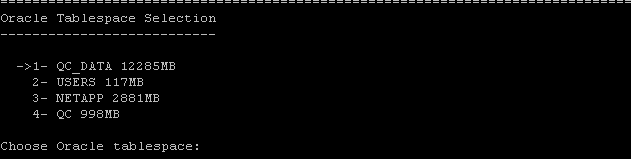
Enter Oracle Tablespace information.
If you are using an Oracle database, enter the following information. If you are using a Microsoft SQL database, skip this step.
Note: If you are installing on a secondary node or if the Site Administration database already exists, the new Site Administration database schema is created in the same tablespace as the existing schema. Continue with the Security step below.
-
Default Tablespace. The Default Tablespace is the location on the database where database objects will be created.
-
Temporary Tablespace. The Temporary Tablespace is the location on the database where temporary tables are created to facilitate internal database functionality, such as large sorting tasks. We recommend that you accept the default location.

-
-
Enter Site Administration database schema details.
Enter the following information:
-
Schema name. Enter a name for the Site Administration database schema, or accept the default. The Site Administration database schema name can only contain English characters or numbers.

If you selected Upgrade a copy of the existing schema above, the New Schema Name option appears. Type a name for the upgraded copy of the Site Administration database schema.
Note: When upgrading an existing Site Administration database schema to work in 26.1, you must use the same name that you used before the upgrade.
-
Schema password. Enter the following information, depending on your database type:

-
Oracle. The default tdtdtd password is created, which you can accept or change.
-
Microsoft SQL Server (SQL Auth.).OpenText Application Quality Management uses the td user to create the Site Administration database schema. For more details on the td user, seeUser Permissions for Connecting to a Microsoft SQL Database Server.
Type a password for the td user that complies with your organization’s password policy, or keep the default tdtdtd password.
-
-
-
-
The License Key page is displayed.
Note: If you selected Connect to existing schema / second node in the previous step, the License Key step is skipped. Continue with the Security step below.
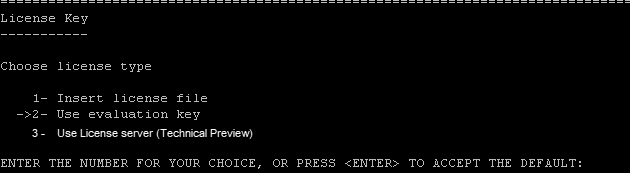
Select one of the following options:
Insert License file Select 1 to enter the License file path. Enter the ALM License file path.
Use Evaluation Key Select 2 to use an Evaluation Key.
If you do not have a License key, you can use an evaluation key for a 30-day trial version .
A list of available editions is displayed. From the editions list, choose the edition you want to use.
Note: If you install OpenText Quality Center Community Edition, you must assign named licenses to your users. Only then can the users successfully log in to ALM and see the appropriate modules. For details on assigning named licenses, see the ALM online help.
Use License Server
(Technical Preview)
Select 3 to use the AutoPass License Server (APLS).
- Enter the license server address.
-
Enter the license server port.
- Enter license server protocol.
Alternatively, you can also configure APLS after the ALM installation. Perform the following steps:
- From the ALM server machine, navigate to
/var/opt/ALM/repository/sa/Admin/MaintenanceData/conf - Edit
clusterSettings.properties - Define values for the following fields: AUTOPASS_SERVER_PROTOCOL, AUTOPASS_SERVER_PORT, AUTOPASS_SERVER_NAME.
- Save and restart the ALM server.
-
The Security page is displayed.
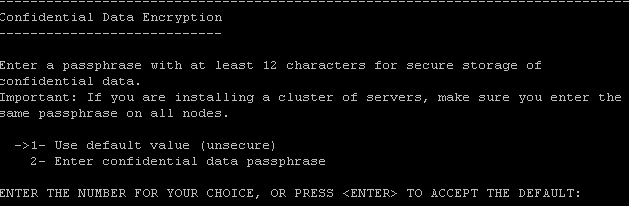
Passwords for accessing external systems (databases and LDAP) are stored after encryption. Enter a Confidential Data Passphrase that OpenText Application Quality Management uses to encrypt the information or choose to use the default value. If you use the default value however, the encrypted information is more vulnerable to unauthorized access.
Make a note of the passphrase for future support calls. You will also need the passphrase if you choose to redeploy or choose to upgrade a copy of the existing Site Administration Database Schema, or whenever you upgrade the version.
Confidential Data Passphrase Considerations
-
You must enter the same passphrase that was used for the previous installation. If you do not know the passphrase, there is a workaround to recover it. However, you have to abort the configuration process and then begin again once the workaround is complete. For details, see Recover a lost confidential data passphrase.
-
If you are planning to migrate, restore, or import extension-enabled projects (such as LoadRunner Enterprise and/or Lab Management enabled projects)onto the server on which you are performing the installation, you must use the same Confidential Data Passphrase that was defined on the server on which the projects were created.
-
If you are installing on a cluster, you must use the same passphrase for all nodes.
-
After completing the server installation wizard, you cannot change the confidential data encryption passphrase.
-
The passphrase is case-sensitive. Check that there are no empty spaces before or after the passphrase. The passphrase must contain only alphanumeric characters.
Caution: If you use a different passphrase than that for the previous version, stored information such as API key secrets, SMTP passwords, and database server passwords become invalid and cannot be restored. This results in connection failures to all ALM projects and the corresponding systems.
-
-
Enter a Communication Security Passphrase.
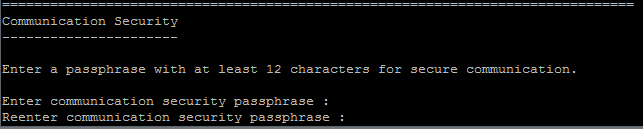
Communication between OpenText Application Quality Management and other OpenText applications is enabled after authentication by a Single Sign-On (SSO) token. Enter a Communication security passphrase that is used to encrypt the SSO token.
Note:
-
The communication security passphrase is stored as the value of the COMMUNICATION_SECURITY_PASSPHRASE site configuration parameter. For details, refer to the online help.
- The passphrase must contain only alphanumeric characters, and must contain at least 12 characters.
-
LoadRunner Enterprise: You must use the same communication security passphrase for the LoadRunner Enterprise server configuration.
Communication Security Passphrase considerations
-
You must enter the same passphrase that was used for the previous installation.
-
If you are planning to migrate, restore, or import extension-enabled projects onto the server on which you are performing the installation, you must use the same passphrases that were defined on the server on the original server.
-
If you are installing on a cluster, you must use the same passphrase for all nodes.
Caution: If you use a different passphrase than that for the previous version, stored information such as API key secrets, SMTP passwords, and database server passwords become invalid and cannot be restored. This results in connection failures to all projects and the corresponding systems.
-
-
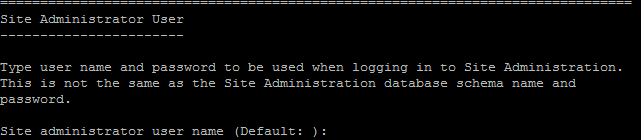
Enter Site Administrator Login information.
Specify the following:
-
Site Administrator user name. The Site Administrator user name.
-
Site Administrator password. The Site Administrator password.

After entering the Site Administrator password, you are prompted to re-enter the password.

You use the site administrator name and password that you define here to log in to Site Administration. After installation, you can change the site administrator or add other site administrators. Enter a site administrator user name (maximum length 60 characters) and password, and retype the password to confirm.
If you are upgrading a copy of the existing Site Administration database schema, by default the same user and credentials are applied to the upgraded Site Administration database schema. The Create additional Site Administrator user option is displayed, enabling you to ignore this default and create an additional user.
Note:
-
The user name cannot include the following characters: \ / : * ? " < > |
-
The password cannot be longer than 20 characters.
-
It is important that you remember the site administrator user name and password as otherwise you cannot log in to Site Administration.
-
-
The File Repository Path page is displayed.

Accept the default path or enter a new path. If you choose to ignore the default, make sure to enter a unique case-sensitive path.
Note:
-
Make sure you select a path where you have full read and write permissions.
-
To work with cluster nodes, make sure that all nodes have access to the file repository path and that the path is UNC. All nodes in the cluster must have the same repository path.
- The length of the file repository path cannot exceed 200 characters.
- The file repository path cannot reside on the root folder.
Using the BASE_REPOSITORY_PATH site configuration parameter, you can create a location for a repository path where new projects will be located. Performing this action, results in the creation of two repository paths - the previous path containing older projects, and a second path containing projects created subsequently. For details, refer to the online help.
-
-
The Application Server page opens.
-
Enter Deployment Path information.

Enter a Deployment Path, where you specify the location in which you want to deploy application files. We recommend that you keep the default.
Note: The length of the deployment path cannot exceed 200 characters.
-
Enter Web server information.

Change or keep the default HTTP port number. The default port is 8080.
Note: If an error message is displayed that the default port is unavailable, it may be the port is in use by another application running on the server machine. Either locate the application and stop it, or enter a different port number. To enter a different port number, you must first change the port number on the application server. For details, see . Then proceed with the configuration as normal.
-
The Advanced Options page opens.
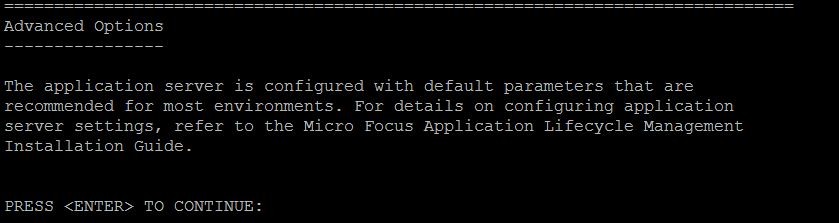
Click Enter to continue.
-
-
The Mail Server page is displayed.
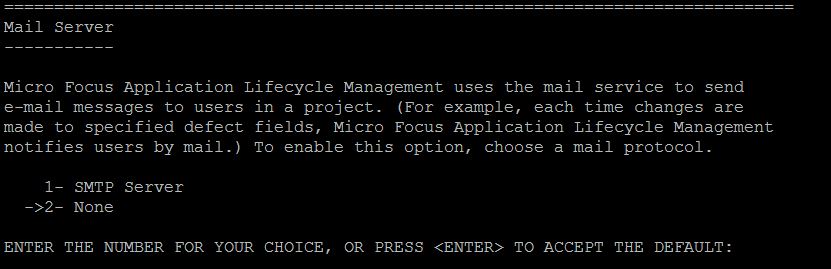
To enable OpenText Application Quality Management to send emails to users in a project, choose SMTP Server. Then when prompted, enter the server name.
Note: The Mail Server can be configured after installation in Site Administration. For details, refer to the ALM online help..
-
The Start ALM Server page is displayed. To keep the default option, click Enter.
-
The ALM Client Launcher page is displayed.
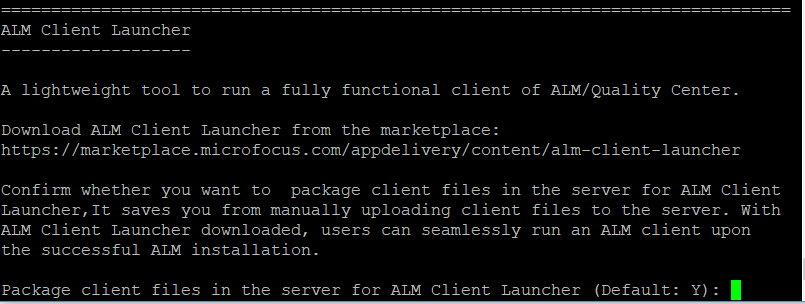
From this page, you can:
-
Use the marketplace link to download ALM Client Launcher and learn more about the tool.
You can also download ALM Client Launcher after the ALM installation.
-
Enter
Yin the Package client files in the server for ALM Client Launcher option to have client files automatically packaged in the server.We recommend that you package client files if you want to use ALM Client Launcher. It saves you from manually uploading client files to the server. Users that have downloaded ALM Client Launcher can seamlessly run an ALM client upon the successful ALM installation.
-
-
The Installation Summary page is displayed. To change any settings, enter Back.
Understand the breaking changes in this version and acknowledge all the breaking changes to continue.
To apply the settings and start the configuration process, click Enter.
-
The Finish page is displayed.
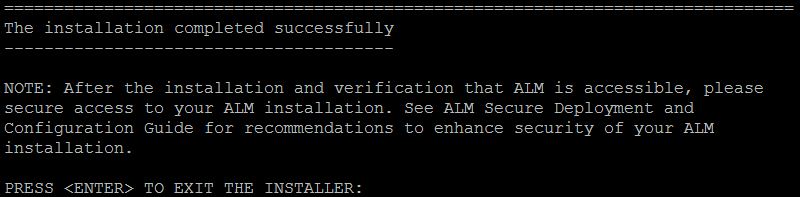
If the installation process fails, check the installation logs for details. For details, see Checking the installation and configuration log files.
If you selected to upgrade a copy of the existing Site Administration database schema, it is possible that an upgrade related issue caused the configuration to fail. Check the following files located in the <file repository path>/sa/Admin/maintenancedata/out directory for more information:
-
upgrade.txt
-
verifyreport.html
If the failure was due to changes made to the existing Site Administration database schema and the upgraded server will work properly with these Site Administration database schema changes, you need to create an exception file that excludes these changes from the upgrade process. Then run the installation again, using the current settings. For details, see Manage schema changes.
-
-
If you are prompted to restart your machine you can choose to restart at a later time but you must restart before you use OpenText Application Quality Management. You must also restart before you install any related files, such as integration add-ins.
If choose not to restart the ALM server during installation, make sure to run
source /etc/profileto prevent the ALM service from failing to start. Alternatively, re-login with a new session. -
If you are using an Oracle RAC database, verify that the ORACLE_RAC_SUPPORT site configuration parameter is set to Y. For details, refer to the online help.
-
The installation is now complete. Proceed to Starting the system