
Share this page


Aviator setup
This section details how to install your license and configure Aviator to work with your preferred large language model (LLM).
Relevant for: Web Client on-premises
Note: Refer to the Support Matrix to make sure that your preferred LLM is supported, and use an Aviator trial license to validate the configuration process.
Upload your license
To work with Aviator, you require a valid license.
To upload your Aviator license:
-
Go to Site Admin > Licenses > License Management.
-
In the toolbar, click Modify Licenses > Upload Licenses.
-
Upload your Aviator license file.
Assign licenses to projects
Before you can start using Aviator, you need to assign licenses to projects.
To assign a license to a project:
-
Go to Site Admin > Licenses > License Management.
-
In the License Assignments tab, view the list of domains and projects.
-
Assign Aviator licenses to the domains and projects you want to enable.
For more details on projects and adding users to projects, see Project management.
Configure site parameters
To use Aviator, you need your own LLM. Add a site parameter for the LLM provider.
To add the custom LLM provider parameter:
-
Go to Site Admin > Site Configuration > Parameters.
-
Configure your LLM provider/s by adding the CUSTOM_AI_CONFIG site parameter. Specify the parameter values by providing the configuration data for your specific LLM.
Copy code{
"customAiConfig": [
{
"customAIModelName": "MISTRAL_AI",
"configData": {
"baseUrl": "",
"modelName": "",
"apiKey": ""
}
},
{
"customAIModelName": "OPEN_AI",
"configData": {
"modelName": "",
"apiKey": ""
}
},
{
"customAIModelName": "VERTEX_GEMINI_AI",
"configData": {
"projectId": "",
"location": "",
"modelName": "",
"createScoped": "",
"mediaBucketName": "",
"credFile": true
}
}
]
}
For more details on adding site parameters, see Configure parameters and mail settings
Configure prompt chips
The prompt chips displayed in the Aviator Smart Assistant are controlled by a site parameter.
Use the AVIATOR_CHIPS_IN_REQUIREMENT parameter to control which chips are displayed. By default, all three chips are displayed. For more details on site parameters, see Site Parameters.
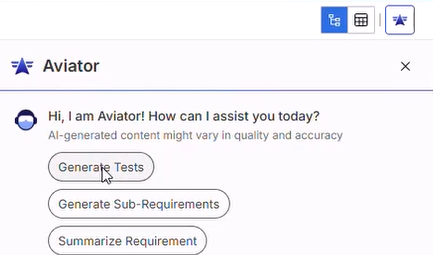
Choose from the following options.
| Chip | Value |
|---|---|
| Generate Tests | Tests |
| Generate Sub-Requirements | Sub-Requirements |
| Summarize Requirement | Summarize |
To display chips for users in the Viewer group, set the SKIP_PERMISSION_CHECK_PARMLIST_LIST site parameter to its default value of AVIATOR_CHIPS_IN_REQUIREMENT. Without this setting, users in the Viewer group cannot see the Aviator chips. The default value also allows users who lack permissions to create test folders, tests, or test coverage to create tests from Aviator-generated suggestions
Aviator configuration
After adding the site parameter for your custom LLM, configure Aviator.
To configure your AI model to work with Aviator:
-
In Site Admin, select ALM Aviator from the menu.
-
Select your domain and click on a project to configure AI settings. Only Aviator-licensed projects can be configured.
-
Choose your LLM model provider.
-
Enter the configuration details required for your LLM.
These vary depending on the LLM provider and include settings such as model name and API key or credentials file.
-
Click Save.
Copy the configuration to multiple projects
After configuring one project, you can assign the same configuration to other projects.
To copy the LLM configuration to other projects:
-
In Site Admin > ALM Aviator, select the configured project.
-
Click Assign Configuration to Projects.
-
In the list of projects in the Domain, select the projects to which you want to assign the configuration. Click Assign.
-
The configuration is copied automatically to the selected projects.


