Share this page


Automatically create user maps
Synchronizing data sources involves also synchronizing the users defined in the data sources. The same user may be defined differently in each data source.
To cope with this, you can define user maps.
If you have a small number of users in each system, you may be able to defined the user maps manually.
For a large amount of users, you can use utilities that automate the user mapping process.
Process outline
Automatically creating user maps involves the following high-level steps. The steps are described in detail in the sections below.
-
Extract user data tables from the data sources.
The extraction utility supports the following data sources: ALM Octane, ALM/QC, Jira, Azure DevOps, Rally, VersionOne, ServiceNow.
If you connect to your data sources via proxy servers, define the proxy details in property bag files.
- In the extracted user data tables, identify key and identifier columns for each data source.
-
Repeat the user data extraction, this time specifying only the key and identifier columns from each data source.
You specify the key and identifier columns in the property bag files.
- Run the UserMaps script to create and import user maps from the user data tables. For details, see Batch utility scripts.

Extract user data tables from the data sources
You use the DataSourceUsers utility to extract user data tables from the data sources.
The utility extracts the user information in the data sources.
Note: In Jira, ALM Octane and ALM/QC data sources: The utility extracts only those users who participate in the projects defined in the connection.
To extract the user data: In Windows, right click the mfcDataSourceUsers.bat file and run as administrator.
The files are saved in: <Micro Focus Connect directory>/UserMaps.
The script runs without stopping the Micro Focus Connect server.
Include or exclude data sources
Follow these steps to include or exclude specific data sources from the data extraction process.
-
Create a file called datasourceusers.property.bag.txt in the ..\Micro Focus\Connect\UserMaps folder.
- Add one line for each data source that you want to exclude, making sure to use the exact name with case sensitivity:
{name of data source}=-datasourcename -
Add one line for each data source that you want to include, making sure to use the exact name with case sensitivity:
{name of data source}=+datasourcenameNote: You cannot use both
+datasourcenameand-datasourcenamein the property bag.-
If you exclude specific data sources using
-datasourcename, all other data sources are included. -
If you include specific data sources using
+datasourcename, all other data sources are excluded.
-
-
To track, audit, or analyze the REST executing commands, add one or more of the following arguments:
Argument Description restheaders=true
Returns all the headers sent and received to and from the program and endpoint system. resturls=true
Returns the fully qualified URLs sent to the endpoint systems. rawdata=true
Returns all of the JSON data returned by the endpoint system for each REST URL. - Save and close the file.
Specify proxy servers
If you connect to your data sources via proxy servers, you need to specify the proxy details in the property bag files. This is only required if the endpoint requires a proxy. You can specify the proxy information in the individual property bags files, or once globally.
To specify proxies in individual property bag files:
-
Create a text file using the following naming convention: <datasourcename>.property.bag.txt where
<datasourcename> needs to exactly match one of the data source names defined in Micro Focus Connect.
-
In the file, define the proxy parameters for Tomcat. For details, see Proxy setup.
- Save the property bag file in the <Micro Focus Connect>/UserMaps folder..
- Run the mfcDataSourceUsers utility. For details, see DataSourceUsers and UserMaps.
To specify global proxy information:
-
Create a text file using the following naming convention: datasourceusers.property.bag.txt.
-
In the file, define the proxy parameters for Tomcat. For details, see Proxy setup.
- Save the file in the <Micro Focus Connect>/UserMaps folder.
- Run the mfcDataSourceUsers utility. For details, see DataSourceUsers and UserMaps.
Specify Key and Identifier columns for each data source
The data sources include user information which is not necessary for the user mapping.
For the user mapping, you need to identify two fields in each data source: a key and an identifier.
- The key is a user field that has a common value for a given user across all data sources.
- The identifier is the field that contains the label (example: name or email address) by which the user is known in the data source. For example, in ALM Octane, users can be identified by their email addresses, full name or log in name. In Jira, users are identified by their display name.
In some cases, the key and identifier in a data source may be the same field.
To instruct the utility to extract only the key and identifier fields, create a property bag for each data source that specifies the relevant columns.
To specify key and identifier columns for data sources:
- Create a property bag file for each data source. For details, refer to the previous section.
-
In the file, list the following parameter:
columns=key,identifier
key and identifier must exactly match names from the headers. A header name may be repeated twice.
-
Extract the user keys and identifiers from the data sources: Right click the mfcDataSourceUsers.bat file and run as administrator.
The user data files are saved in: <Micro Focus Connect directory>/UserMaps.
To specify whether to extract all users or a subset:
- Create a property bag file for each data source. For details, refer to the above sections.
-
In the file, add the allusers parameter and set it to true:
allusers=true.- If set to true, all users are extracted from the endpoint server instance.
- If set to false, or if it is not listed in the file, only those users who actively participate in the project are extracted.
-
Add these optional features for Jira data sources and property bags:
-
Set the tablescan property to true to allow all Jira users, even if their emails are not unique. To only allow users with a unique email address, the default behavior, leave out the tablescan property or set it to false.
-
Use the groups property to extract additional users of specific groups, with their projects. Separate multiple group names with commas. This property is only effective if allusers is not set to true.
-
Set the roles property to true to extract additional users of all roles in their respective projects contexts. This property is only effective if allusers is not set to true.
-
Set the projectusers property to true to extract additional users from all project-specific issues. This property is only effective if allusers and roles are not set to true.
-
-
For LDAP enabled environments, add these LDAP-specific properties, if you want to link data source user extracts to LDAP attributes:
java.naming.provider.url=
java.naming.security.principal=
java.naming.security.credentials=
basedomain=
java.naming.security.protocol=
java.naming.security.authentication=
The first four attributes are required. The protocol and authentication attributes are optional. For assistance, open a support ticket or see the JAVA API documentation.
Create and import user maps
The UsersMaps script does the following:
- Identifies matching users in the data files, based on their identical key values.
-
Creates a user map for each user with its various identities.
Note: In the Jira environment, user uniqueness is based solely on the email address, regardless of which user field was selected. If multiple users have the same email address in an endpoint system, the first enabled user is used.
- Imports the user maps to Micro Focus Connect.
For details, see Batch utility scripts.
To create and import user maps:
-
Open the mfcUserMaps.bat file and edit the following line:
"%JRE_PATH%\java.exe" -jar "%UTILITIES_PATH%\mfcUserMaps.jar" "%CONNECT_PATH%" "|" {"incremental" | "pairs" | "orphans" | "removeall"} "%UTILITIES_PATH%\Jira" "%UTILITIES_PATH%\Oct1"
The following table explains the command's arguments:
Argument Details {"incremental" | "pairs" | "orphans" | "removeall"} "incremental", "pairs", "orphans" and "removeall" are all optional and mutually exclusive.
- incremental. Takes any set of data source maps, with any subset of users, and import them in the context of the existing user map in the database.
-
pairs. Imports pair user maps. For details, see Pairs and orphans.
-
orphans. Imports orphan user maps. For details, see The 'orphans' argument.
- removeall. Empties the database of all user maps.
If no argument is provided, the script removes all the existing user maps and replaces them with the newly generated ones.
"%UTILITIES_PATH%\{DataSourceName}" The paths and file names of the user data files. The data files are generated by the mfcDataSourceUsers utility.
- List all the data files that you want to include in the user maps.
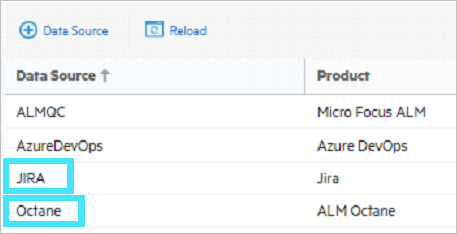
- The file names must match the data source names precisely as they are defined in Micro Focus Connect. For details, see Create a data source.
-
Right click mfcUserMaps.bat and run as administrator.
-
Re-export data source users on a periodic basis and re-import the user maps into Micro Focus Connect to stay up to date with changes made to the LDAP/Active Directory systems. This allows Micro Focus Connect to be current with new added users, user name corrections, and users that left the organization.
Pairs and orphans
This section describes the usage of the 'pairs' and 'orphans' arguments for creating and importing user maps. For details, see Create and import user maps.
The pairs argument imports pair user maps. This argument takes a pair of user map files, where each member of the pair is equivalent to a connection running across the two data sources. When using this option, the script only imports those users with matching keys in both user map files. As a result, there will be no ‘orphan’ user maps in the Micro Focus Connect database, with a user representation from one product and not the other. For a sample scenario, see Pairs and Orphans example.
To import the user maps, use the following syntax:
"%JRE_PATH%\java.exe" -jar "%UTILITIES_PATH%\mfcUserMaps.jar" "%CONNECT_PATH%" "%USER_MAPS_PATH%" "|" "pairs" "%USER_MAPS_PATH%\JIRA" "%USER_MAPS_PATH%\OCTANE" ["OCTANE=DefaultOctaneUserRepresentation" “JIRA=DefaultJiraUserRepresentation”]
The orphan argument imports orphan user maps. This argument takes a pair of user map files, where each member of the pair is the equivalent to a connection running across the two data sources.
When using this option, the script only imports users with no matching keys in either of the user map files. As a result, there will only be orphan user maps in the Micro Focus Connect database, with a user representation from one product, and not the other.
To import orphan user maps, you must append both sets of DATASOURCENAME=userrepresentation to the end of the command. As a result, Micro Focus Connect assigns a default user representation to the missing key-value pairs on the 'other' data source. This prevents synchronizations from breaking, for artifacts last modified by a user who may have been disabled in the product endpoints. You must specify both default user representations, in order to import the orphan user maps. To import the user maps, use the following syntax:
"%JRE_PATH%\java.exe" -jar "%UTILITIES_PATH%\mfcUserMaps.jar" "%CONNECT_PATH%" "%USER_MAPS_PATH%" "|" "orphans" "%USER_MAPS_PATH%\JIRA" "%USER_MAPS_PATH%\OCTANE" "OCTANE=DefaultOctaneUserRepresentation" “JIRA=DefaultJiraUserRepresentation”
For example, let's say you have Jira and Octane data source user accounts named MFConnectJira and MFConnectOctane.
In ALM Octane, the account has two real users, John Smith and Bob White. In Jira, the account also has two real users, John Smith and Ted Brown.
The following table shows the entries in the user map for each of the cases.
| Argument | Entries in user map for 'pairs' | Entries in user map for 'orphans' |
|---|---|---|
| No default representation pairs | John Smith=John Smith |
- |
| Representation only on Octane side |
John Smith=John Smith |
- |
| Representation only on Jira side |
John Smith=John Smith |
- |
| Representation on both sides | John Smith=John Smith Bob White= MFConnectOctane |
Bob White= MFConnectOctane |
User mapping exceptions
In Jira and ALM Octane, users are generally created through LDAP integration. As a result, the same users exist on both sides of the connection. However, there may be additional users that do not use LDAP. These users exist in only one of the systems. This section describes how to create user maps for the non-LDAP users, usin the UserMap script from the Batch utility scripts.
To map the non-LDAP users:
-
Locate the UserMaps folder in your Micro Focus Connect installation.
-
Create a text file with no extension in this folder with the following name: <DataSourceName1>=<DataSourceName2>. For example, to map between the following data sources, set the file name to Octane=Jira.
-
Enter the non-LDAP users in the following format: <Unique iD>|<user>=<user email>. For example:
ABCDEFG|John Smith=john.smith@acme.com
HIJKLMNO|Tom Conway=tom.conway@acme.com
-
In the utilities folder, open the mfcUserMaps,bat file in a text editor.
-
Uncomment the exceptions option (remove REM) and add a reference to the file you created above. For example
"%JRE_PATH%\java.exe" -jar "%UTILITIES_PATH%\mfcUserMaps.jar" "%CONNECT_PATH%" "%USER_MAPS_PATH%" "|" "exceptions" "%USER_MAPS_PATH%\Octane=JIRA"
-
If you are also using the Purge batch script, add the above command to the end of the file, before the Micro Focus Connect service restart.