Share this page


Enhance a load test
This topic explains how to enhance a load test with SLAs and rendezvous points. You can also enhance a load test by adding disruption events. For details, see Disruption events.
Configure SLAs
Service level agreements (SLAs) are specific goals that you define for your load test run. After a test run, these goals are compared against related performance data gathered during the run to determine whether the SLA passed or failed. Both the Dashboard and Report show the run's compliance with the SLA.
You can set the following goals on the SLA page.
| Goal | Description |
|---|---|
| TRT (nth percentile) |
The expected transaction response time, in seconds, for the specified percentage of transactions to complete. By default, the expected TRT is 3 seconds. If the percentage of completed transactions exceeds the SLA value, the SLA is considered "broken". For example, assume you have a transaction named "Login" in your script, where the 90th percentile TRT value is set to 2.50 seconds. If more than 10% of successful transactions that ended during a 5-second window have a response greater than 2.50 seconds, the SLA is considered "broken" and shows a Failed status. For details about how percentiles are calculated, see Percentiles. Note: The percentile goal for SLAs and all transaction measurements is set in Test settings > Run configurations. This is the percentage of transactions expected to complete successfully. By default, this value is 90%. For details, see Run configurations. |
| Failed transactions (%) | By default, the allowed percentage of failed transactions is 10%. If the percentage of failed transactions exceeds the SLA value, the SLA is considered "broken" and shows a Fail status. |
You can set a separate SLA for each run. You can also select multiple SLAs at a time and use bulk actions to apply one or more actions to the set.
You can configure one or more SLAs (service level agreements) for each load test:
To configure the SLA:
-
In the Load tests tab, choose a test and click the SLA button
 in the sidebar.
 -
By default, all transactions for the selected test are displayed, grouped by script name. If you want to remove the grouping and display transactions by transaction name, click the Group by button
 , and clear the Script name selection.
 -
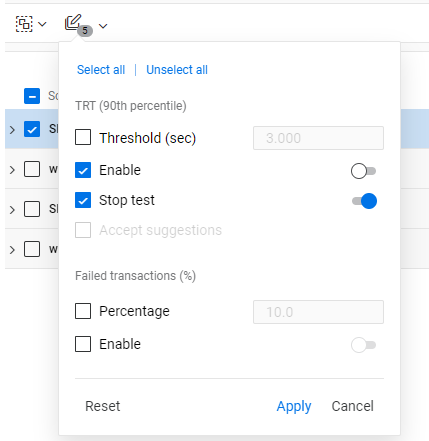
Set transaction response time (TRT) settings:
-
Set the expected time for the specified percentage of transactions to complete. The default TRT goal is 3 seconds.
The percentage of transactions expected to complete successfully is shown by the read-only value displayed in the TRT (nth percentile) column header. This value is set in Test settings > Run configurations. For details, see Run configurations.
Example: For example, if the TRT percentile is set to
90and the TRT time value is set to2.500seconds, then if more than 10% of successful transactions that ended during a 5-second interval have a response time higher than 2.50 seconds, an SLA warning is recorded (using the average over time algorithm). For details, see Percentiles.
-
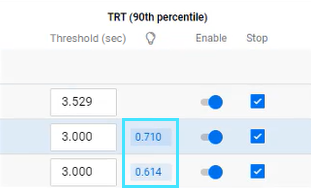
If you have run your test more than once, a suggested TRT goal value is displayed.
-
To use the suggested goal value for a particular transaction, click the adjacent value button.
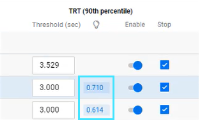
-
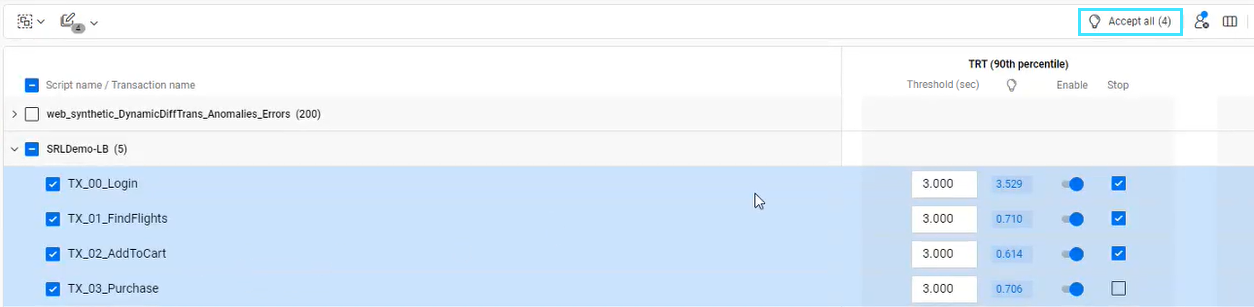
To use multiple suggested TRT goal values, select the required transactions in the grid, and click Accept all.

-
-
Select the Stop checkbox to stop the test if the SLA is broken.
-
If you do not want the TRT (percentile) goal to be used during the test run, turn off the Enable switch adjacent to the TRT (nth percentile) column.
Note: For tenants created from January 2021 (version 2021.01), SLAs are inactive by default. You can enable them manually or click the Configure settings for multiple transactions button
 to enable SLAs for multiple scripts. To change this behavior and have all SLAs enabled by default, submit a service request.
-
-
Set failed transaction settings:
-
If you want the Failed transactions (%) goal value to be used during the test run, turn on the Enable switch.
-
Set the Failed transactions (%) goal value. The default goal value is 10%. If the number of transaction failures exceeds this value, the SLA is assigned a status of Failed.
-
-
If you are not using the TRT (nth percentile) or Failed transactions (%) goal, you can hide the goal's column in the grid. To do this, click the Select columns button
 , turn off the switch of the unused goal, and then click Hide.
Note: Hiding a column turns off the Enable switch for all transactions. If you later show the column, you need to turn on the Enable switch for all the transactions that you want to use (the setting values are retained).
-
If you want your SLAs to depend on Vuser success, click the Vuser failure button
 and turn on the Set test status to Failed if one or more Vusers fail switch. The icon changes to
  when this option is on. If even one Vuser fails, the test gets a Failed status.
 -
You can make bulk updates to your SLA settings.
-
Select multiple SLAs at one time, and then click the Configure settings for multiple transactions button
. The icon number indicates the number of SLAs selected. -
Select the checkbox for each field that you want to update.
-
Apply one or more settings to the selection by entering a setting value or changing the Enable switch settings.
Tip: You can save values without updating them by clearing the checkbox.
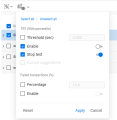
-
Click Apply to update the SLA settings.
-

Set rendezvous points
When performing load testing, you need to emulate heavy user load on your system. To help accomplish this, you can instruct Vusers to perform a task at exactly the same moment using a rendezvous point. When a Vuser arrives at the rendezvous point, it waits until the configured percentage of Vusers participating in the rendezvous arrive. When the designated number of Vusers arrive, they are released.
You can configure how rendezvous points included in scripts are handled.
If scripts containing rendezvous points are included in a load test, open the Rendezvous pane and configure the following for each relevant rendezvous point:
-
Activate or deactivate the rendezvous point. If you deactivate it, it is ignored when the script runs. Other configuration options described below are not valid for deactivated rendezvous points.
-
Set the percentage of currently running Vusers that must reach the rendezvous point before they can continue with the script.
-
Set the timeout (in seconds) between Vusers for reaching the rendezvous point. This means that if a Vuser does not reach the rendezvous point within the configured timeout (from when the previous Vuser reached the rendezvous point), all Vusers that have already reached the rendezvous point are released to continue with the script.
Note:
-
The Rendezvous tab is displayed only if a script containing rendezvous points is included in a load test.
-
When you select a rendezvous point in the list, all scripts in which that rendezvous point is included are displayed under the configuration settings. If the script is unavailable, its name appears unavailable.
-
If no rendezvous points are displayed for a script that does contain such points, go to Assets > Scripts and reload the script.