Share this page


Design forms
Forms are the pages in which users create and edit entities in ALM Octane. Admins can choose which fields are included in a form, and design the form’s layout.
Overview
Admins can:
-
Create or modify forms so that users see only what they need.
-
Create rules so that ALM Octane uses the relevant forms. For details, see Design business rules.
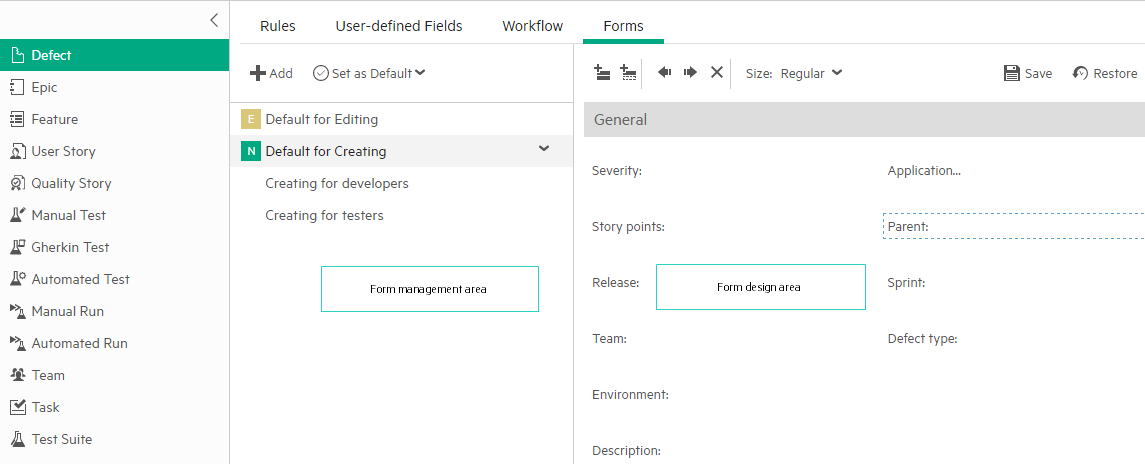
Use the form designer to create and edit your forms. The form designer has a form management area and a design area.
Note: Name and Type fields cannot be accessed in the form designer.
You can design different forms for the same entity type:
-
You can design different forms based on context. For example, you can design a form for use when creating a new user story and another form for editing a user story. These forms include different fields.
-
You can also create forms for users with different roles. For example, a dev team manager is interested in different fields than a tester.
Tip: Non-admin users can add and remove fields to forms when creating or editing an entity. For details, see Customize forms.

Share forms between spaces
Forms can be defined for shared spaces ![]() and workspaces. This overview describes how to work with shared and non-shared forms.
and workspaces. This overview describes how to work with shared and non-shared forms.
Isolated spaces
Forms cannot be defined at the space level when the space is isolated.
Instead, admins for a workspace can define forms in that individual workspace.
The forms, including predefined default forms, are available in that individual workspace only.
Shared spaces (Enterprise Edition)
This table summarizes the actions admins can perform when defining forms in shared spaces and associated workspaces.
| Shared space | Associated workspaces |
|---|---|
|
The space admin can add and modify forms defined in the shared space. Predefined default forms are available only in the shared space. The forms are available to all associated workspaces. |
|
Unique form names
Within a shared space or a workspace, form names must be unique.
However a shared form may have the same name as a form defined for an associated workspaces.
You can distinguish between the forms because ALM Octane displays the shared ![]() icon for the shared forms.
icon for the shared forms.
Predefined forms
For each entity type, ALM Octane provides predefined forms. ALM Octane uses these forms by default when you create and edit entities.
- Default form for Edit
- Default form for New
Note: Some entities do not have a Default form for New.
You can make other forms the default forms instead of these.
You can modify these forms, but you cannot rename them.
Work with forms
This section describes how to create and work with forms.
Forms can be defined on a space level and a workspace level.
Before working with forms, define any custom fields you need. For details, see Add custom fields.
To work with forms:
-
In Settings
 > Spaces, select a shared space or workspace where you want to create a new form.
 -
Click Entities and select an item.
- Click Forms. The form designer is divided into the management area and the design area.
-
In the management area, modify the attributes for each field or section using the design area toolbar.
You can also duplicate a form, rename a form, and reset a form's layout.
-
In the design area, do one of the following:
-
Choose the relevant section, and the item before which you want to add a field, and click
 Add field.
 -
Choose the section before which you want to add a section, and click
 Add section.
Choose either Regular or Full in the Size drop-down to determine if the field takes up an entire row or if ALM Octane can put it on a row with other fields.
When finished adding fields, click outside the list to close the list.
Note: Required fields must be on the form, ALM Octane automatically adds them. You can move them but you cannot delete them.
-
-
Click Set as default if you want to use this form as the default.
 Next steps: