Share this page


Grids
Select your view and perform common grid actions.
Views
The following views are available in the different modules.
| View | Description |
|---|---|
 Smart List View Smart List View |
Each item is displayed as a formatted bar with its essential information. Some entities can be expanded to display more information, such as a test's steps. You can't select or move columns in the Smart List view. |
|
|
A standard grid of rows and columns listing your filtered items. This view allows you to choose and move columns.
|
|
|
A condensed grid with less vertical space between items. |
 Board View Board View |
You can view items, such as epics, features, and backlog items, as cards on a board. For details, see Board view. |
|
|
A timeline Gantt chart for work items and their phases in the selected releases, also available for release processes and the process flows. You can display the Timeline in the following view modes:
For details, see Timeline view. |
 Grid View
 Slim Grid View
 Timeline
Tip: You can save your display settings as favorite views. For details, see Favorites.

Filter options
You can apply several types of filters to grids. For details on filter options, see Filters.
Choose columns
You can select the columns displayed in grid views and their order. Use the Choose columns  button to select the columns you want to display in the grid. Drag the columns to change their position.
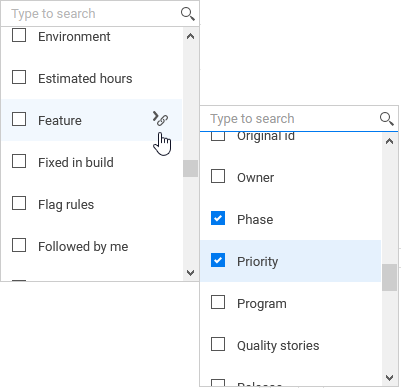
You can also display cross fields. Cross fields are properties of one of the item's fields.
Example: Feature is a field in backlog items. In the Backlog Items grid, you can select to display the feature's Phase or Priority fields.
To select cross fields, click on the cross-field  icon alongside supported fields, and select a field from the sub-menu:
Sort
In Grid View or Slim Grid View, you can sort the displayed items in several ways:
To sort by displayed columns:
- In Grid View or Slim Grid View, click a column header to sort the items by that field's values.
- Click again to reverse the sort order.
- Shift-click another field to sub-sort by that field.
To sort by any field:
- In Grid View, Slim Grid View and Smart List View, click the Sort toolbar button and select a field to sort by.
- Select up to three fields to sort and sub-sort by.
- Click the direction icon in each selected field to reverse the sort order.
Note:
- Sorting is not possible on memo fields, long string fields, or multi-select fields.
- Sorting by Rank allows you to reorder entities in Grid View or Slim Grid View, by drag and drop. If this column is hidden, show it to enable reordering by rank.
Assign colors
To help break up the visual number of entities on the board or grid, create color codes based on filters. You can save the color preferences as a Favorite.
Color preferences can be applied to:
- Epics, features, and backlog items
- Release processes and their items
To assign colors based on filters:
- Click the Assign color
 button. The Assign color dialog box opens.
 - Click the + Add Filter button and define a filter that you want to apply a color to.
- From the Select color drop-down menu, select a color, and click Apply.
The filter colors are displayed as left vertical colored bars on the relevant items.
- To save the color settings as an attribute of a favorite, use the Favorites
 menu. For details, see Grids.
Note: If a work item matches multiple color conditions, the first color condition assigned is the one applied to the item.
Group
Group using one of the following options:
- Click the Group By
 button, and select a field to group by. Select up to three fields to group and sub-group by.
 -
Click the down arrow in the column header, and select the Group by option.
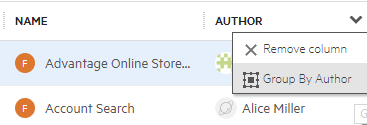
Grouping this way overrides any previous grouping you have made.
If you sorted your view, items within each group are sorted accordingly.
Fields to group by
- You can group system fields of type String, List , Release, Team, and User.
- You can group user-defined fields of type List , Release, Team, and User.
- Grouping is possible on multi-select fields.
Cross-field grouping
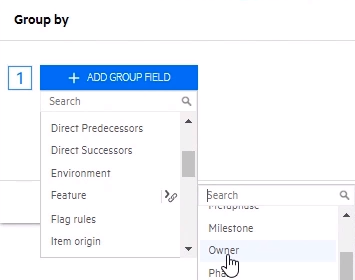
Depending on your context, some fields enable cross-field grouping by related entities, in addition to standard grouping. This is indicated by a link dropdown icon next to the field name.
For example, within the Backlog grid you can group backlog items by the owner of their related feature:
Cross-field grouping is available in grids, boards, and summary graphs. Each context enables specific cross-grouping, based on performance considerations.
 See also: