
Share this page


Configuring User Data
Configure user data fields for time sheet lines in the User Data Workbench, as follows:
-
Log on to PPM.
-
From the menu bar, select Open > Administration > Open Workbench.
The PPM Workbench opens.
-
From the shortcut bar, select Configuration > Validations.
The Validation Workbench opens.
-
Validations determine the acceptable input values to be supported. In this step, create as necessary the validations with supported values that you will later assign to the user data fields you plan to add.
For example, if you want to create the user data fields Initiative Type, Department, and # Staff Affected at the XYZ Corporation, you could do the following:
-
For the Initiative Type user data field, create a new validation named XYZ Initiative Type, and specify that it is a drop-down list with validation values of Internal and External.
-
For the Department user data field, create a new validation named XYZ Department, and specify that it is a drop-down list with validation values of IS and R & D.
-
For the # Staff Affected user data field, create a new validation named XYZ Number of Staff Affected, and specify that it is a text field with a numeric data mask.
-
-
From the shortcut bar, select Configuration > User Data.
The User Data Workbench opens.
-
Click List.
The Results tab lists the available user data types.
-
Select Time Sheet Line User Data and click Open.
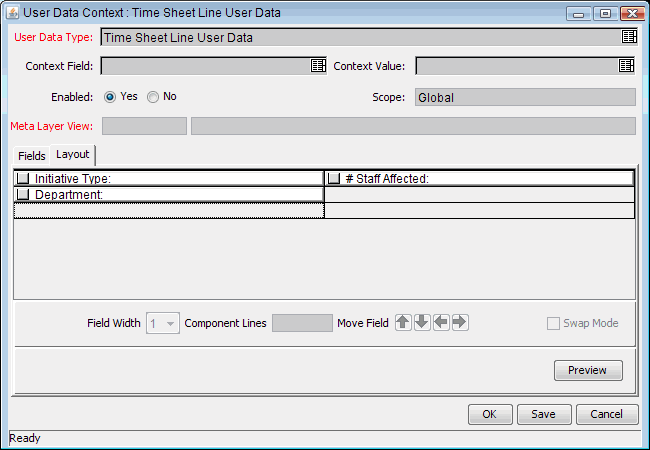
The User Data Context : Time Sheet Line User Data window opens.
-
To add a new field for users to complete, click New.
The Field: New window opens.
-
As needed, complete the fields, including any Validation field you created in step 4 and click OK.
-
Repeat To add a new field for users to complete, click New. step 8 and step 9 as needed to define all the user data fields for time sheet lines. In the example, the fields Initiative Type, Department, and # Staff Affected are meaningful for users' time sheet lines.
-
Use the Layout tab as needed to rearrange the fields as you want the user to view them.
-
After configuring the user data fields you need, click OK in the User Data Context : Time Sheet Line User Data window.

