
Share this page


Use work plan files for scheduling integration
You can use work plan files for the project scheduling integration. This integration mode enables you to upload and download files with supported format in a project work plan, to synchronize the project scheduling information between PPM and the scheduling tool.
In this topic:
- Supported file formats
- Enable work plan file integration mode
- Select control mode
- Upload files to PPM
- Download work plans as files
- Map resources
- Map PPM external predecessors and successors
- Map MSP baseline data
- Limitations
Supported file formats
To synchronize project information between PPM and the scheduling tool, you can upload and download files with the following formats:
-
Microsoft MPP file
Note: In addition to using Microsoft MPP files, you can also use Microsoft Project plug-in. For details, see Use Microsoft Project plug-in for MSP-PPM integration.
Compared with the Microsoft Project plug-in , using MPP files has the following advantages:
- Linked tasks information can be updated to Microsoft Project when you download a work plan as an MPP file from PPM.
- PPM external predecessors and external successors can be inserted in custom text fields of Microsoft Project when you download a work plan as an MPP file from PPM.
- Microsoft Project baseline work, start, finish, and duration can be updated to PPM task user data fields when you upload an MPP file to PPM.
- Microsoft Project XML file
-
Oracle Primavera P6 XER file (Beta supported)
- Oracle Primavera P6 XML file (Beta supported)

Enable work plan file integration mode
To enable using work plan files for the project scheduling integration, set the ALLOWED_MSP_INTEGRATION_MODE parameter to MPP_FILE or BOTH (case insensitive) in the Administration Console.
For details, see Select integration mode.
Select control mode
When using work plan files for the integration, you need to select a control mode (synchronization mode). The control mode defines which information is updated between PPM and the scheduling tool.
Overview of control modes
The following table describes how information is updated between PPM and the scheduling tool in different control modes.
|
Control mode |
Details |
|---|---|
|
PPM control mode |
Uploading a file to PPM Creates a work plan from a Microsoft or an Oracle Primavera project if the PPM project does not have a work plan. Downloading a work plan file from PPM
The following information is updated:
|
|
Scheduling tool control mode |
Uploading a file to PPM
Downloading a work plan file from PPM Gets an updated Microsoft or Oracle Primavera project. The following information is updated:
|
|
Shared control mode |
Uploading a file to PPM
Downloading a work plan file from PPM Gets an updated Microsoft or Oracle Primavera project. The following information is updated:
|
Select control mode
To select the control mode:
- Open a target PPM project.
- In the upper-right corner of the project details page, click ... > Project Settings.
- In the Project Settings page, go to Project Scheduling Integration > Integration Mode.
-
In the Upload & Download work plan file from PPM area, select a control mode.
Note: By default, all the control modes are available for selection in the project settings. However, PPM administrators can use the DISPLAYED_SCHEDULING_INTEGRATION_MODES parameter to restrict the control modes that are available for the project scheduling integration. For details, see Server parameters.
-
Click Save.
Upload files to PPM
When you upload a file to PPM, the project information is synchronized from the scheduling tool to the project work plan. The control mode defines the project information to be synchronized. For details, see Select control mode.
To upload a file to PPM:
- Open the project in PPM.
-
On the Summary tab, from the Work Plan portlet, do the following:
Scenario Details If the project does not have a work plan To upload a file to PPM to create a work plan for the project:
-
Click the Create work plan from a file link, and then select the target file with the supported format. For details, see Supported file formats.
Alternatively, you can drag and drop a file with the supported format to the link location in the Work Plan portlet.
-
Do resource mapping if the file includes unmapped resources. For details, see Map resources.
A work plan is created for the project.
If the project has a work plan To upload a file to PPM to update the information in the work plan:
-
Click Upload Work Plan to PPM
 .
.Alternatively, you can drag and drop a file to this button in the Work Plan portlet.
Note: If the project is in PPM-control mode and already has a work plan, the
button is disabled. - Select the file with the supported format. For details, see Supported file formats.
-
Do resource mapping if the file includes unmapped resources. For details, see Map resources.
-
Download work plans as files
When you download a PPM project work plan as a file, the project information is synchronized from PPM to the scheduling tool. The control mode defines the project information to be synchronized. For details, see Select control mode.
Define the file format
By default, PPM work plans are downloaded as MPP files.
PPM administrators can set another default format for the downloaded file, or allow users to select the format from the project settings.
| Option | Description |
|---|---|
| Set another format as default |
To set a different default format for the downloaded file, specify only one value for the AVAILABLE_WORK_PLAN_FILE_FORMAT_FOR_DOWNLOAD parameter. The valid values include the following:
|
| Allow users to select the format |
To allow users to select the format for the downloaded file, specify two or more values for the AVAILABLE_WORK_PLAN_FILE_FORMAT_FOR_DOWNLOAD parameter. The Format of the work plan file to download from PPM section is enabled in the project settings, where users can select the format for the downloaded file. To select the format from the project settings:
|
Download a project work plan as a file
To download a project work plan as a file:
- Open the project in PPM.
-
On the Summary tab, from the Work Plan portlet, or in the work plan page, click Download work plan as a file
 .
.If the project is in shared control mode, the Different Actual dialog pops up and lists the tasks that have changes in actual information. Confirm the changes and click
in the top right corner to download the work plan. -
In the Export to Work Plan File window, click the Click here to download the file link.
If a task is linked to an Agile project or to another PPM project, when downloaded to a file, this task is prefixed as [!linked!].
If a task has external predecessors or external successors, when downloaded to a file, the predecessors and successors are displayed in the MSP custom data fields that you mapped. For details, see Map PPM external predecessors and successors.
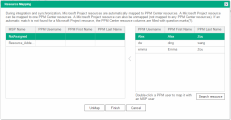
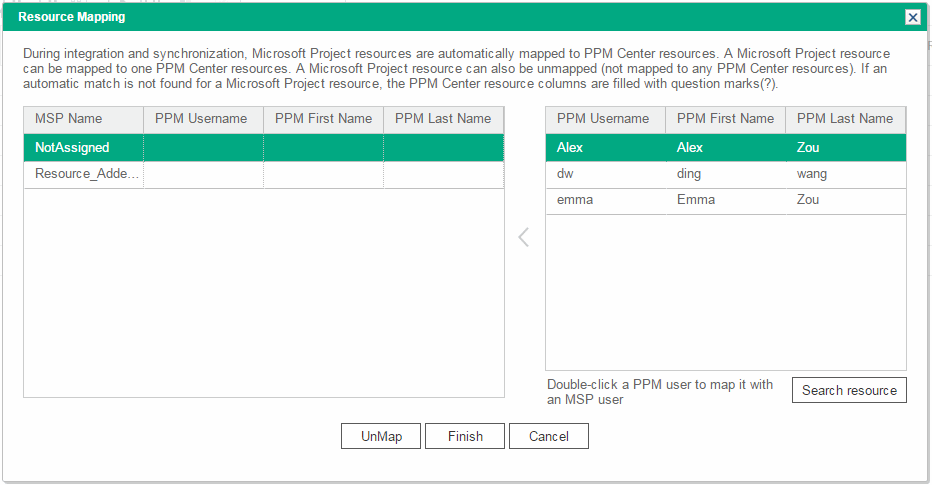
Map resources
When you upload a file to a PPM work plan, and the file includes resources that cannot be automatically mapped to PPM resources based on their email or username, the Resource Mapping dialog pops up and lists the resources to be mapped.
Before mapping resources
Consider the following before you map the resources:
- If you cancel the resource mapping during the MPP file upload, you cancel the whole MPP file upload process.
- If you skip resource mapping (click Finish without mapping resources), efforts of unmapped resources are treated as unassigned efforts in PPM.
- If you want to redo resource mapping after an MPP file is uploaded, click
 in the work plan toolbar.
To map an MSP resource to a PPM resource:
-
In the Resource Mapping dialog box, in the table on the left, select an MSP resource.
-
In the table on the right, double-click a PPM resource that is mapped to the MSP resource .
The PPM Username, PPM First Name, and PPM Last Name columns are predefined with the PPM user information. If you then double-click another PPM resource, the above three column values are updated with the newly-selected resource information.
If you want to unmap an MSP resource, click Unmap.
Note: The right table lists resources that are project participants. If you want to map an MSP resource to a PPM resource that is not yet a project participant, click Search resource.
- Repeat step 1 and step 2 to complete the mapping for the other MSP resources.
- Click Finish to save the mapping and close the Resource Mapping dialog.
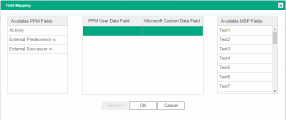
Map PPM external predecessors and successors
PPM external predecessors and external successors can be exported to MSP only when they are mapped to MSP custom data fields.
To map PPM external predecessors and successors:
-
Go to Project Settings > Project Scheduling Integration > User Data & Activity fields mapping.

-
Click Edit to open the Field Mapping dialog.
-
From the Available PPM Fields list, double-click External Predecessor or External Successor, and then from the Available MSP Fields list, double-click a field where you want external predecessors or external successors to be displayed in MSP.
- Click OK and Save to save the mapping.

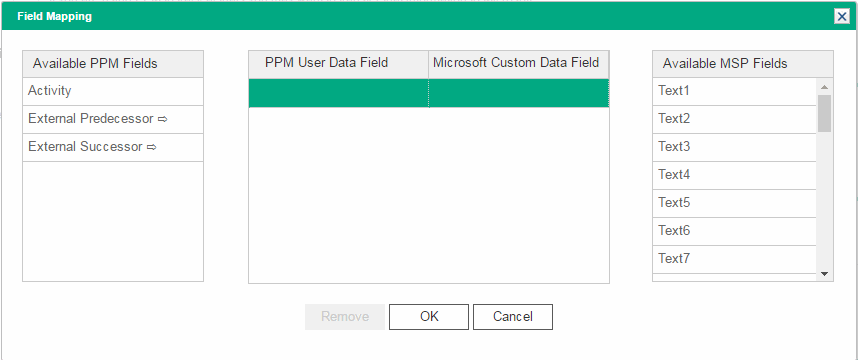
Map MSP baseline data
MSP baseline finish, duration, work, and start information can be imported to PPM only when they are mapped to PPM user data text fields.
To map MSP baseline data:
-
Go to Project Settings > Project Scheduling Integration > User Data & Activity fields mapping.
-
Click Edit to open the Field Mapping dialog.
-
From the Available MSP Fields list, double-click a baseline field, and then from the Available PPM Fields list, double-click a field where you want the baseline data to be displayed in PPM.
- Click OK and Save to save the mapping.
Limitations
Using work plan files for scheduling integration has the following limitations:
-
When you download an MPP file in the PPM-control mode, all tasks are created with a fixed duration, and a date constraint is set to ensure that the start date of the task is the same in MSP as it is in PPM. Otherwise, MSP will try to reschedule the work plan to ensure all tasks start as early as possible.
- When you download an MPP file in the PPM-control mode, leaf tasks' data does not roll up to the summary task automatically. You have to click Calculate Project in Microsoft Project to correct the data.
 See also:

