
Share this page


Assign team resources
This topic describes how to assign team resources, and adjust team assignments from the team Demand tab.
Prerequisites
To assign team resources to a resource request, you must meet the following requirements:
-
You must have the Edit Resource Pools or Edit All Resource Pools access grant.
-
You are the team manager, or the manager of its parent team.
-
The position specified your team in the Resource Pool column.

Assign resources to a resource request or promised allocation
You can assign resources in your team and its sub-teams to a resource request or a promised allocation.
Note: To assign a resource to a promised allocation:
-
You must have the Resource Mgmt: Promise Unspecified Resources access grant.
-
The parameter ENABLE_PROMISE_RESOURCE_ALLOCATION must be enabled.
To assign a resource to a position or a promised allocation:
-
Open your team and go to the Demand tab.
-
Do either of the following to assign a resource to a position:
Option Details Quick assign
Use quick assign if you know which resource to assign and are clear about this resource's remaining capacity.
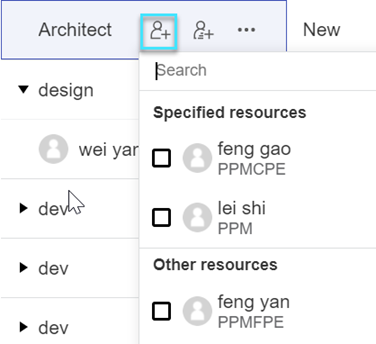
Click
 next to the position or promise to assign.
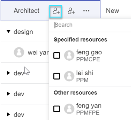
-
All the resources (in your team and its sub-teams) that are enabled during the position period are displayed.
By default, only resources whose end period is later than the current date are displayed for selection. If you want to see all resources, select Show all resources from the dropdown list.
-
If one or more specific resources were requested, they are listed in the Specified resources section. You can select the specified resource(s) or select other resources to assign.
-
If a resource belongs to more than one team, this resource is listed on multiple lines, one for each team. Selecting the resource of a specific team calculates the resource's allocation to that team.
-
To find the preferred resource more quickly, type the resource name in the Search field.
Advanced assign
If you want to assign a resource whose skill and role best suit a position and make sure this resource is not overloaded, you can use the Advanced assign.
To use Advanced assign to search for a resource:
-
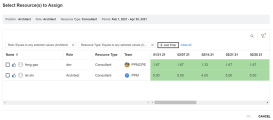
Click
 next to the position or promise to assign.
 The Select Resource(s) to Assign dialog box opens.
-
By default, the resources with the same role and resource type as the position or promise are displayed.
-
By default, only the resources whose end period is later than the current date are displayed for selection. If you want to see all resources, clear the Show enabled resources check box.
-
If one or more resources were specified, they are marked with
 and are always listed on top, regardless of the sorting order or filter criteria.
-
-
If needed, you can use the filter panel to find the target resources.

Fields that support filter are: Resource Type, Role, and Team.
Alternatively, you can type the resource name in the Search field to find a specific resource.
-
If desired, you can sort resources by clicking a column header.
Columns that support sorting are: Name, Role, Resource Type, and Team.
-
You can view the resource's remaining capacity from the table's colored cells.
The cell color indicates the utilization of the resource's capacity.
-
-
Select one or more resources to assign.
-
(Optional) Check the option Commit selected resources if you want to commit the selected resources after they are assigned.
This option appears only when the ENABLE_COMMIT_RESOURCES_IN_RESOURCE_FINDER parameter is set to true. If you want this option to be checked by default, set the CHECK_COMMIT_RESOURCES_IN_RESOURCE_FINDER parameter to true in the Administration Console.
-
(Optional) Check the option Distribute demand evenly to selected resources if you want to distribute the position's demand or the promised allocation evenly to the selected resources.
This option appears only when you select at least two resources and the ENABLE_DISTRIBUTE_RESOURCES_IN_RESOURCE_FINDER parameter is set to true. If you want this option to be checked by default, set the CHECK_DISTRIBUTE_RESOURCES_IN_RESOURCE_FINDER parameter to true in the Administration Console.
If you do not check this option, the allocated efforts of the resources are used in the order that the resources are selected. For example, if you select Elva and then select Johnson to assign to a position or promise, the allocation of Elva is used first.
-
Click anywhere on the Demand tab, or click OK if you are in the Select Resource(s) to Assign dialog box to save the changes.

Promise an allocation
You can promise an allocation without specifically naming the resource, and assign a specific resource at a later time.
To promise an allocation:
-
Prerequisites:
-
You must have the Resource Mgmt: Promise Unspecified Resources access grant.
-
The ENABLE_PROMISE_RESOURCE_ALLOCATION parameter must be set to true.
-
-
Open your team and go to the Demand tab.
-
Click ... next to the position to promise and select Promise.
A new line appears with Promise as the resource. The status defaults to Soft Booked and the promised allocation defaults to the position's unmet demand. You can edit the promised allocation value if needed.
-
Your changes are saved automatically.
Reject and forward a demand
If your team cannot fulfill a resource demand, you can reject the demand. You can also forward a demand to another team where this is a more suitable resource.
To reject a resource demand:
-
Open your team and go to the Demand tab.
-
Click ... next to the position to reject and select Reject.
The Reject request for unmet demand dialog box opens.
-
Provide a reason for rejecting the demand in the Comments field.
-
Click Done.
To forward a resource demand:
-
Open your team and go to the Demand tab.
-
Click ... next to the position to forward and select Forward.
The Forward request to another team dialog box opens.
-
Specify a team in the Forward to Team field.
-
Provide a reason for forwarding the resource demand in the Comments field.
-
Click Done.
Adjust allocation of an assignment
You can adjust the allocation of an assignment for Month or Week period types. For details, see Period type.
To adjust the allocation of an assignment:
-
Open your team and go to the Demand tab.
-
Editable assignments are marked with an Edit
 icon. Locate the assignment that you want to adjust.
 -
Double-click the time period cell whose allocation you want to adjust and provide a new value, and then click anywhere on the page to save your changes.
Shortcuts when editing allocation
Arrow keys to move cursor
Press the Arrow keys to move your cursor to the right, left, previous line and next line. EnterandEsckeys to enter and exist Edit mode-
Place your cursor on a cell.
-
Press the
Enterkey to enter the Edit mode and make the changes. -
Press the
Enterkey to save the changes.Press the
Esckey to discard the changes.
Shift+ click to copy a cell value to the same line-
Click the cell whose value is to be copied.
-
Press the
Shiftkey and at the same time click another cell on the same line.The cells in between are filled with the copied value.
Ctrl+Dto copy a range down-
Select more than one line.
-
Press the
CtrlandDkeys at the same time.The values in the first line are copied to all the other lines down.
Ctrl+CandCtrl+Vto copy cell values-
Select one or more cells whose values are to be copied.
-
Press
CtrlandC. -
Select the cells that you want to copy the values to.
-
Press
CtrlandD.
Delete values in multiple cells -
Select one or more cells whose values are to be deleted.
-
Press Delete.
-
-
Alternatively, click the assigned resource for the target assignment to open the Resource Capacity with Assignments dialog box and adjust the assigned effort.
Remove an assignment or change its status
When a resource (either a named resource or a promise) is assigned to a position, you can remove the assignment, or change its status.
To remove an assignment or change its status:
-
Open your team and go to the Demand tab.
-
To remove a resource or promise, click the Delete
 icon next to it. The changes are saved automatically.
 -
To change the assignment status, in the Status column of the resource or promise, select Committed or Soft Booked.
Alternatively, click the assigned resource for the target assignment to open the Resource Capacity with Assignments dialog box and adjust the status.
-
Click anywhere on the page to save the changes to the status.
 See also:


