Share this page


Define what-if layout templates
A what-if layout template lets you apply consistent analysis standards across diverse portfolios, ensuring uniformity in What-if Analysis. A what-if template facilitates easy comparisons and evaluations across multiple portfolios. You can define specific what-if layout templates tailored to different business focuses.
Configure what-if layout templates
Create a what-if layout template before creating your what-if scenarios. The predefined templates: Product Roadmap Planning View, Strategic Planning Gantt View, and Strategic Prioritization Planning View are provided for you to use.
To create a what-if layout template:
-
From the ValueEdge platform menu, select Portfolio & Strategy > Portfolio Management.
Tip: The Hamburger menu is located at the top left of the screen.
- In the upper-right corner, click What-if Analysis
 .
. - In the upper-right corner of the What-if Analysis page, click What-if layout templates.
- In the What-if Layout Templates page, click
 to add a new template.
 -
In the Add Template window, provide a name and description for the template.
-
Click Done. The template is created and opens for editing.
-
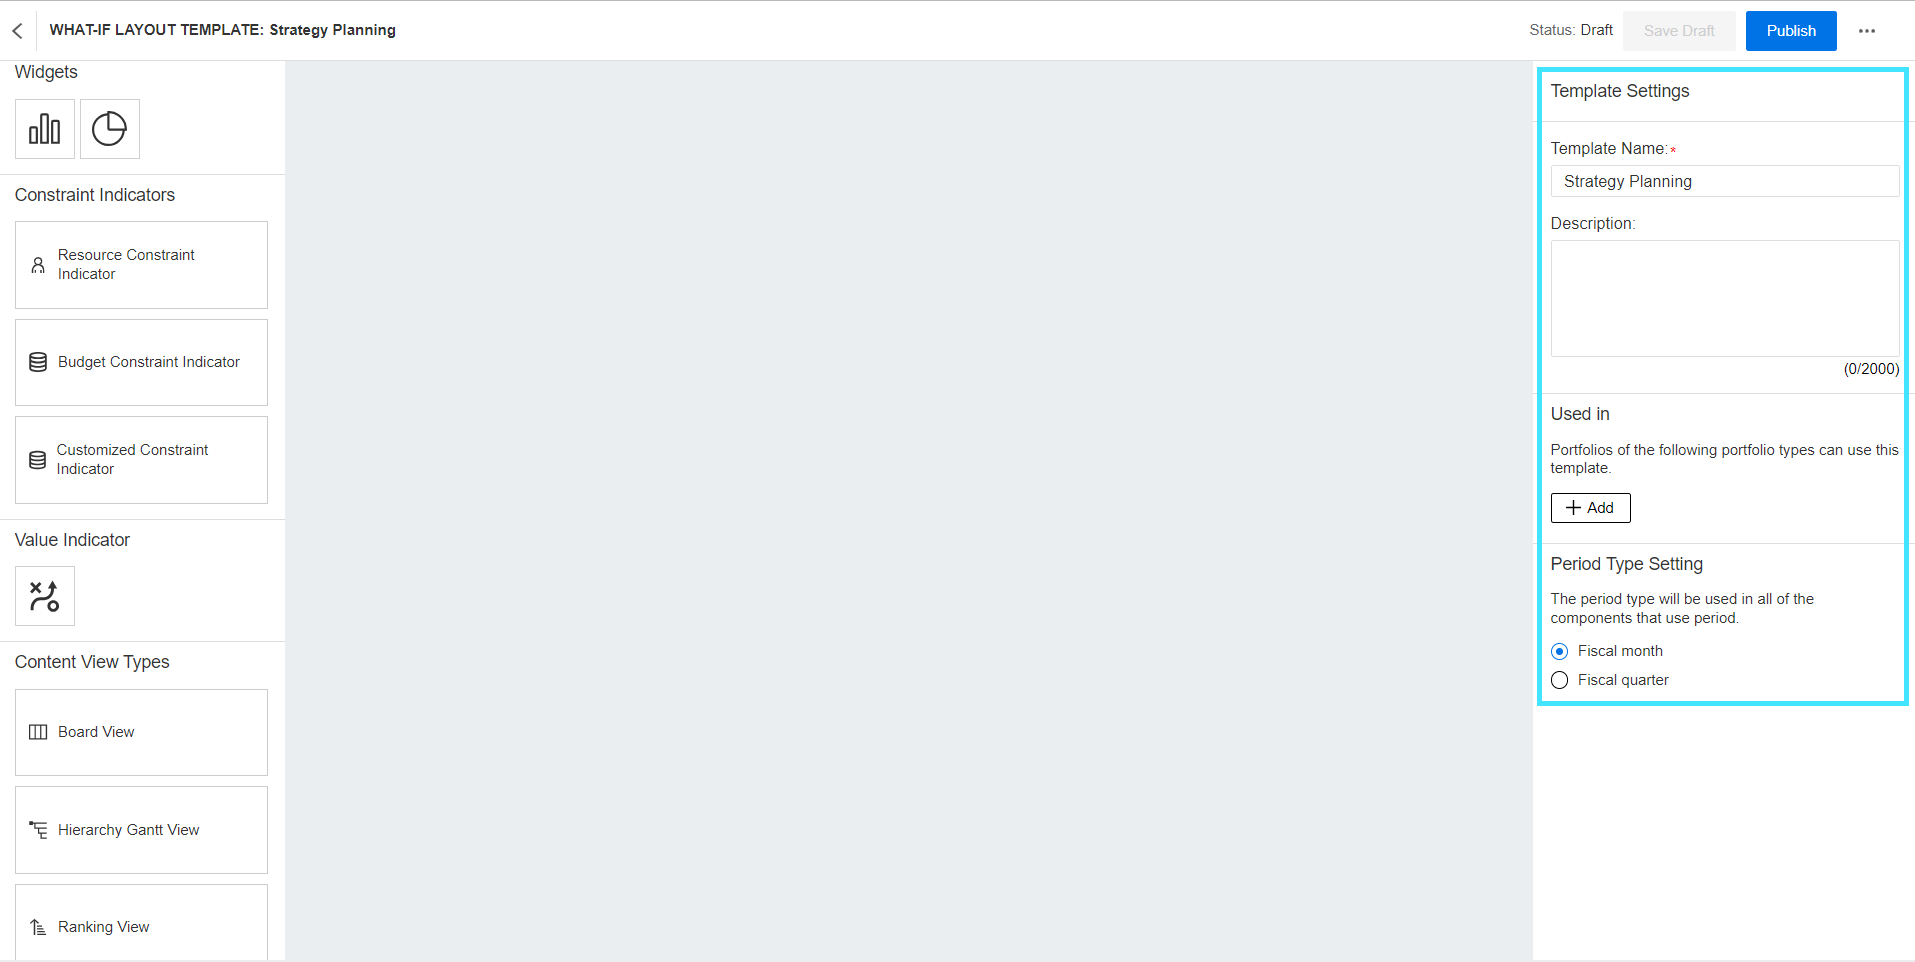
In the configuration area, Template Settings tab, configure the following settings for the layout template:

-
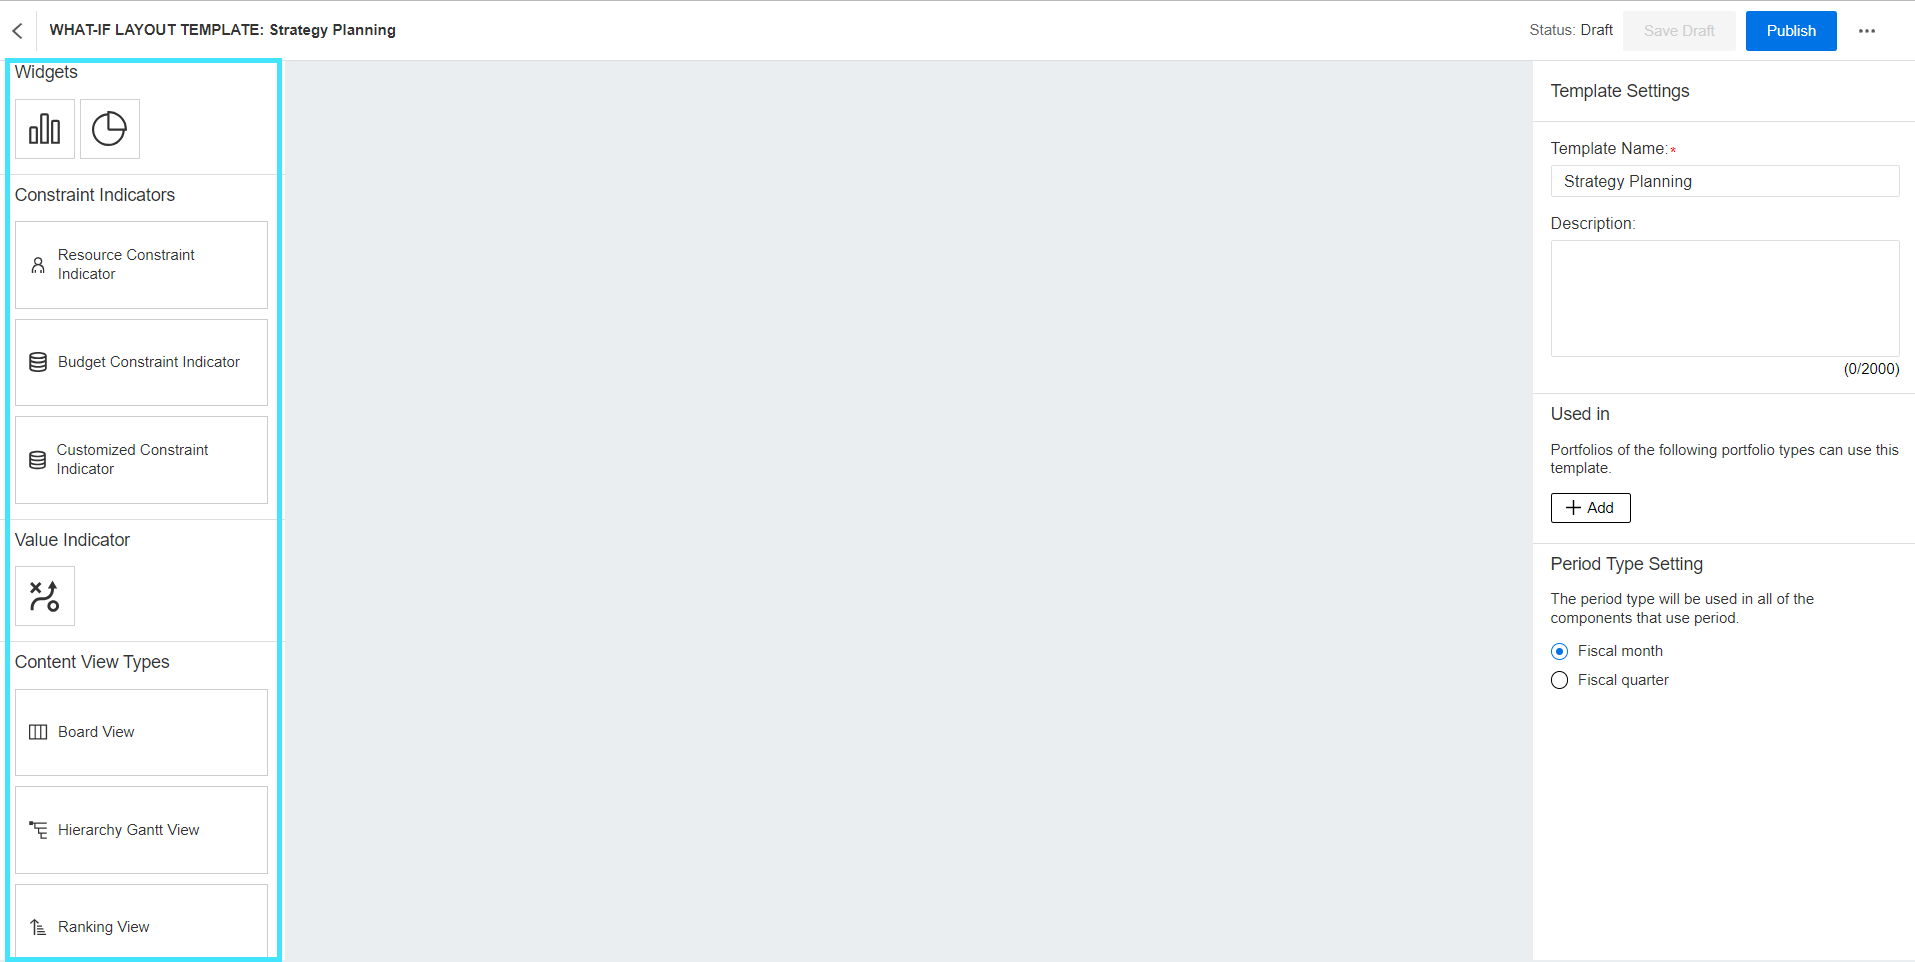
Add components to the layout template and configure the settings for the components.
-
From the components area, click the component you want to add to the template and drag it to the preview area (the area in the middle of the screen). You can add multiple components to the template.
-
Configure the settings for each selected component. For details, see the following:
-
To change the size of a component, click the component and drag its border.
-
To rearrange the positioning of a component, drag and drop it to the target place in the preview area.
-
To delete a component, click the Delete button on it.
-
-
Click Save Draft to save your changes, or click Publish to publish the what-if layout template. For details, see Publish a layout template.
 .
.

Configure widgets in the template
This section explains the usage of widget components in a what-if scenario and provides instructions on their configuration.
To configure widgets in a template:
-
From the components area, the Widgets section, drag one or more widgets to the preview area.
The following widgets are available for use:
Option Description Trend Chart Visualizes the changes in budget, cost, or custom values over a specific time period. Pie Chart Illustrates the distribution of cost, resource, or custom values. Indicator Chart Displays the grand total of budget, cost, resource demand, or custom values, providing an overview of the overall state. -
Follow the steps below to configure the settings for a widget:
-
In the preview area, select a widget. The widget settings tab is displayed in the configuration area.
-
The configuration varies depending on the chart type, as described in the table below:
Chart Configuration Trend Chart To configure a trend chart:
-
In the Title field, provide a name for the chart.
-
In the Values field, select the value to display on the chart.
The available options include: Approved Budget, Forecast Resource, Forecast Cost, and user-defined aggregable fields available in all the portfolios types that can use this template.
Note: The Axis field is determined by the period type setting of the what-if layout template, and is non-editable. For details, see Period Type Setting.
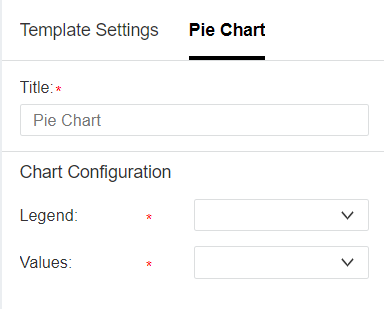
Pie Chart To configure a pie chart:
-
In the Title field, provide a name for the chart.
-
In the Legend field, select the labeling for each segment in the chart.
The available options include: Name, Program, Portfolio, Strategic Theme, Status, Type, Overall Health, Cost Health, Issue Health,Schedule Health, and user-defined fields that can be grouped and are available across all the portfolios types that can use this template.
-
In the Values field, select the value to display on the chart.
The available options include: Forecast Resource, Forecast Cost, and user-defined aggregable fields available across all the portfolio types that can use this template.
If the template has custom numeric fields in the Ranking View component, they are also available for selection. For details, see Custom fields.
Indicator Chart To configure an indicator chart:
-
In the Title field, provide a name for the chart.
-
In the Values field, select the value to display on the chart.
The available options include: Forecast Cost, Forecast Resource, and user-defined aggregable fields available across all portfolios types that can use this template.
If the template has custom numeric fields in the Ranking View component, they are also available for selection. For details, see Custom fields.
-
-
-
Click Save Draft to save the changes, or click Publish to publish the layout template. For details, see Publish a layout template.
Configure constraint indicators in a template
You can use the Resource Constraint Indicator and Budget Constraint Indicator in a what-if scenario to analyze the resource and budget utilization. You can also add customized constraint indicators to analyze other capacity indicators that meet your requirements.
To configure the Resource and Budget constraint indicators:
-
From the components area, the Constraints Indicators section, select Resource Constraint Indicator or Budget Constraint Indicator and add it to the layout template.
-
In the preview area, select the constraint indicator component. The component settings tab is displayed in the configuration area.
-
Configure the following display settings for the constraint indicator:
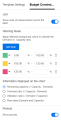
Settings Details Unit Shows the units of measurement in the indicator. Warning Rules To configure background colors to show the Demand vs. Capacity ratio:
- Click Add Rule.
-
Define the color that should be displayed for a specific set of ratio values.
Information displayed on the chart Select the data to be displayed in the chart:
- Remaining capacity = Capacity - Demand
- Overload ratio = Capacity / Demand
- Utilization ratio = Demand / Capacity
- Plain data. Shows the demand and capacity in the chart.
Periods Turn on the toggle if you want to show time periods in the chart. The period type is determined by the period type setting configured in the what-if layout template. For details, see Period Type Setting. -
Click Save Draft to save the changes, or click Publish to publish the layout template.

To add and configure a customized constraint indicator:
-
From the components area, the Constraints Indicators section, select Customized Constraint Indicator and add it to the layout template.
-
In the preview area, select the customized constraint indicator. The settings tab is displayed in the configuration area.
-
Configure the capacity to be displayed in the constraint indicator:
Field Details Label Provide a label to describe what the constraint indicator shows. Capacity Select how the capacity is calculated in the scenario:
- Calculated from portfolio budget. The capacity is automatically calculated from the portfolio budget.
- Manually entered. The capacity needs to be manually entered in the what-if scenario.
Demand Calculated by Configure how to calculate the demand:
- Count. The demand is calculated based on the number of entities included in the portfolio.
-
Sum. The demand is calculated by aggregating a custom field value. Select Sum, and then select the field whose value you want to aggregate. The available fields for selection are the user-defined aggregable fields available in all the portfolios types that can use this template.
Note: If no common aggregable fields are available in all the portfolio types, only the Count method is available.
Unit Turn on the toggle to show the units of measurement in the component, and then provide the units of measurement in the Unit field. - Configure the display settings of the customized constraint indicator.
-
Click Save Draft to save the changes, or click Publish to publish the layout template.
Configure value indicator in a template
You can use a value indicator in a what-if scenario to evaluate the feasibility of achieving the portfolio's business goals.
To configure a value indicator in a layout template:
-
From the components area, select the Value Indicator component and add it to the layout template.
-
In the preview area, select the value indicator component. The KPI Indicator tab is displayed in the configuration area.
-
To show time periods in the KPI indicator, turn on the Show Periods toggle. The period type is determined by the period type settings configured in the what-if layout template. For details, see Period Type Setting.
-
Click Save Draft to save the changes, or click Publish to publish the layout template. For details, see Publish a layout template.
Configure content view types in a template
Use the content view types to display contents within a scenario, perform what-if simulations, and find the optimal scenario.
Available content view types
The following content view types are provided, offering diverse capabilities for conducting various what-if simulations:
| Content view type | Details |
|---|---|
| Board View | Portfolio contents are displayed as cards. You can reschedule the contents within a scenario to accommodate budget and resource constraints. |
| Hierarchy Gantt view | Portfolio contents are displayed in a hierarchical Gantt chart. You can reschedule the contents within a scenario to accommodate budget and resource constraints. |
| Ranking View | Portfolio contents are listed in a prioritized order. You can prioritize contents within a scenario and remove lower priority items from the scenario. This helps you to better allocate limited budgets and resources. |
Configure content view types in a template
To configure the content view types in a template:
-
From the components area, the Content View Types section, select the target view type and add it to the template. You can add only one content view type.
-
In the preview area, select the view type. The settings tab is displayed in the configuration area.
-
The configuration varies depending on the view type.
-
To configure the layout settings for the Board View and Hierarchy Gantt View:
Configuration Details Show Content Type Icon on Card/Gantt Displays the content type icons on the card/gantt to help identity the type of the portfolio contents.
Information Included on Card/Gantt Select the information to be displayed on the card/gantt: resource data for each period, cost data for each period, or no information to be displayed.
Show Color on Card/Gantt Select the color for the card/gantt:
- Default color. The card/gantt is displayed in light blue.
- Strategic theme color. The card/gantt color represents the color of the strategic theme aligned with the portfolio content.
- Overall health color. The card/gantt color represents the overall health of the portfolio content.
-
To specify the available fields in the Ranking View:
-
-
To configure the layout settings of the Board View and Hierarchy Gantt View:
-
To select the columns to be displayed in the Ranking View:
- Click the ranking view component in the preview area.
- In the upper-right corner of the component, click Choose columns.
- Select the columns to be displayed in the scenario.
-
Click Save Draft to save the changes, or click Publish to publish the layout template.
 on the field.
  , make required changes, and then click OK.
 Publish a layout template
To enable the use of a what-if layout template, you must publish it.
To publish a layout template:
- From the PPM menu, click Open > Portfolio Management.
- In the upper-right corner, click What-if Analysis.
- In the upper-right corner of the What-if Analysis page, click What-if layout templates.
-
Open the target layout template.
Note: Make sure the status of the layout is Draft or Published and Modifying. For details about the layout template status, see What-if layout template status.
-
Review and modify the template as necessary.
-
In the top-right corner, click Publish. The status of the layout template is set to Published.
The following happens when you publish a what-if layout template:
- The template's latest settings are applied to all the existing scenarios that use this template.
-
You can create scenarios using this template for portfolios of the types specified in the template.
Modify a published layout template
You can modify a published layout template to update its settings. You can also disable a published layout template to prevent its usage.
To update a published layout template:
-
From the What-if layout templates page, open the target layout template.
Note: Make sure the status of the layout template is Published. For details about the layout template status, see What-if layout template status.
-
Review and modify the template as necessary. For instructions, see Configure what-if layout templates.
-
To update the layout template immediately, in the top-right corner of the page, click Publish.
Changes made to the template are applied to the existing scenarios and newly-created scenarios that use this template.
-
To save the changes for future modification, in the top-right corner of the page, click Save Draft.
Existing scenarios and newly-created scenarios of this template continue to use the previous settings.
To disable a published template:
-
From the What-if layout templates page, open the target layout template.
Note: Make sure the status of the layout template is Published or Published and Modifying.
-
In the top-right corner of the page, click ... > Disable.
The status of the layout template is set to Disabled. Scenarios cannot be created using this template.
What-if layout template status
A what-if layout template can go through various statuses after its creation. The following table describes the different statuses and the actions available in each status:
| Status | Description and available Actions |
|---|---|
| Draft |
Templates being created or edited. You can:
|
| Published |
Templates available for use. You can:
|
| Published and Modifying |
Published templates undergoing modifications. You can:
|
| Disabled |
Templates that are disabled. You can re-enable a disabled template. When a disabled template is re-enabled, its status is set to Published and Modifying. To make the template available for use, you need to publish it. |
 Next steps: