Share this page


Run a Manual Test in Sprinter
The following steps describe how to run a
When you run a manual test in Sprinter, you need to decide whether or not to run the test in Power Mode . For details, see Run Tests in Power Mode.
Sections marked with the Power Mode icon
are only relevant when Power Mode is active.
This task includes the following steps:
-
Open a test for ALM users:
You can open a test in one of the following ways:
-
Open an Application Lifecycle Management test from within Sprinter.
-
Open an Application Lifecycle Management test from within Application Lifecycle Management.
-
In Application Lifecycle Management, select the Test Lab module, and make sure that the Test Sets tab is selected.
-
Select the Execution Grid tab.
-
Select the test, tests, or test set you want to run.
-
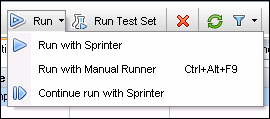
For a test set, click Run Test Set, and select Sprinter from the dialog box that is displayed.
-
For an individual or multiple tests, click the down-arrow next to the Run button and select Run with Sprinter. If you are continuing a previous run that was run with Sprinter, click Continue run with Sprinter.
-
Start your run and perform the user actions in your test
-
Stop your run and view and analyze the run results
Click Open in the Run Setup area.
If you are already connected to Application Lifecycle Management, the Open dialog box opens, enabling you to select which Application Lifecycle Management tests you want to open.
If you are not connected to Application Lifecycle Management, the Application Lifecycle Management Connection dialog box opens first, enabling you to connect to Application Lifecycle Management, and then the Open dialog box opens.
Once you open a test you can immediately skip to the following steps. All other steps are optional based on your testing needs:
-
-
Open a test for Octane users.
You can open a test in one of the following ways:
-
Open a test from within Sprinter: Click Open in the Run Setup area.
-
Open a test from within Octane:
-
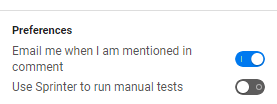
In Octane's workspace window, enable the Use Sprinter to run manual tests option.
-
Run the test.
-
Confirm to open Sprinter when prompted to do so. Sprinter opens and loads the test in Run mode.
-
-
Open a test for non-ALM users:
In Run mode, click Open in the main window.
Once you open a test you can immediately skip to the following steps. All other steps are optional based on your testing needs:
-
Start your run and perform the user actions in your test
-
Stop your run and view and analyze the run results
-
-
Configure your test definitions.
When you configure your test definitions, you can view and edit your test details, run details, parameters, and steps.
For details, see Run Area.
-
Configure Power Mode.
Before running your test with Power Mode, you need to configure Power Mode for the application you are testing. Decide if you need
-
Scanners. Use scanners to check that various aspects of your application behave correctly during the run session, such as W3C compliance, broken links, spelling and localization. You can also configure the Scanner settings during the run session. However, to display the Scanners sidebar, you need to configure settings for one or more scanners before the run session begins.
For details, see Scan an Application For Potential Defects.
Note: This feature is only available if you log in using ALM or a UFT license.
-
-
Start your run and perform the user actions in your test.
Click Run. For details, see the Main Sprinter Window.
-
Start your application.
If you are running your test in Power Mode and did not configure Sprinter to start your application when the run begins, you need to manually start your application.Note: To enable Power Mode to work with your application, it is recommended that you configure Sprinter to start your application when the run begins.
-
If you are running a test with steps you can run those steps directly.
-
You can perform the steps you imported to your local test from an external file as described in the Steps Tab (Plan mode).
-
If your test does not have steps, you can begin your test run and perform exploratory user actions. For details, see Run an Exploratory Test in Sprinter.
For details about managing the test steps, see Manage Test Steps.
-
-
Detect and submit defects.
Sprinter enables you to submit defects to ALM or a defect tracking system. You can also keep a record of a defect, create a reminder to submit your defect later, or include a screen capture of a defect in an email.
For details, see Detect and Submit a Defect.
-
Inject data into your test.
Note: This feature is only available if you log in using ALM, Octane, or a UFT license.
If you are running your test with Power Mode, you can automatically enter data into forms in your application using data injection.
For details, see Inject Data into your Application.
-
Use scanners in your test.
Note: This feature is only available if you log in using ALM, Octane, or a UFT license.
When you perform scans during a run session, you can monitor the progress of each scanner in the Scan Progress window. After each scan ends, you can view and address the results.
For details, see:
-
Use macros in your test.
If you are running your test with Power Mode, you can automate user actions with macros.
For details, see Record and Run Macros.
-
Stop your run and view and analyze the run results.
Click the End Run button
 . For details, see the
Run Control Sidebar.
. For details, see the
Run Control Sidebar. You can now view the results of your run in the main window. For details, see Review the Run Results.