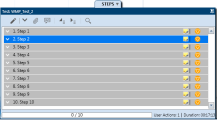
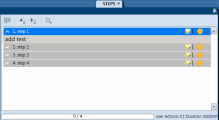
This area displays the steps in the current run.
For ALM users: For Business Process Tests, it displays the steps in the current component. In Parameters Mode (Business Process Tests only) it displays the parameters for the component selected in the left pane.
| Navigating
|
-
When you start a run, the Steps display area displays the first step expanded. If you switch to another run that you have not yet completed, the last step you marked is expanded.
-
When you set the status of a step, the Steps display area automatically advances to the next step in the test.
|
User interface elements are described below (unlabeled elements are shown in angle brackets):
|
UI Elements
|
Description
|

|
Expand/Collapse. Expands or collapses the selected step. When the step is expanded, the name, description, and expected results are displayed.
|

|
Status. Displays a drop-down list that enables you to set the status of the step.
Default status values:
-
 Passed. The step passed. Passed. The step passed.
-
 Failed. The step failed. Failed. The step failed.
-
 Blocked. The step is blocked. Blocked. The step is blocked.
-
 Not Completed. The step was paused in the middle of the run. Not Completed. The step was paused in the middle of the run.
-
 No Run (Default) The step has not yet been run. No Run (Default) The step has not yet been run.
-
 N/A. Current status is not applicable. N/A. Current status is not applicable.
Note: For ALM users, in addition to the default status items above, the list includes any user-defined statuses defined for your Application Lifecycle Management project. For details on user-defined statuses, see the Application Lifecycle Management Administrator Guide.
Tip: You can Ctrl-click to select multiple steps and then use the one of the selections in the drop-down list to set the status of all the selected steps.
|
| <Step content>
|
When a step is expanded, the following fields are displayed:
-
Name. If the step name is too long to display in the step heading it is truncated, and the full step name is displayed in the step description.
-
Description
-
Expected Result
-
Actual Result (if added). If you added a screen capture to the Actual Result, an icon is added to this area. If you move the cursor over the icon, the screen capture is displayed.
-
Step Attachments. If you added an attachment to a step, an icon indicates that there is an attachment.
Double-clicking the icon opens the attachment in your default program for that file type. For images, moving the pointer over the icon displays a preview of the attachment.
|


 icon. To reposition the sidebar, click and drag on the sidebar header.


 Passed. The step passed.
 Failed. The step failed.
 Blocked. The step is blocked.
 Not Completed. The step was paused in the middle of the run.
 N/A. Current status is not applicable.


