Share this page


Quick load test
The Quick start section on the LoadRunner Cloud Home page lets you create tests with or without existing scripts.
Create a test using an existing script
This section describes how to create a test using an existing script, created with an external test generation tool, such as VuGen (Virtual User Generator). Tests that were uploaded to the LoadRunner Cloud Assets section are available for use. For details, see Scripts.
To use an existing script for your test:
- In the Home tab, click Create a test and select Create a new test. The Load tests tab opens.
- Add scripts and set the relevant options as described in Define a load test.
- Click Run Test in the upper right. Watch the results in the Dashboard that opens after the test initialization.

Create a test using a HAR file
This section describes how to create a test using an HAR (HTTP Archive) file. This is the common format for recording HTTP tracing information.
Use a HAR file to create a TruAPI test to generate test results.
-
Generate a HAR file through your browser or another external tool.
- In the Home tab, click Create a test and select Create using a HAR file. The Test Configuration dialog box opens.
- Name your test.
-
Click Browse to add the HAR file.
Caution: Carefully review your HAR file before you upload it, as it may contain private information, such as usernames and passwords.
-
Set the runtime details:
- In the WEB Vusers box, select the number of Vusers from the drop-down list.
- In the Duration box, select a test duration from the drop-down list.
- Click Run Test. Watch the results in the Dashboard that opens after the test initialization.
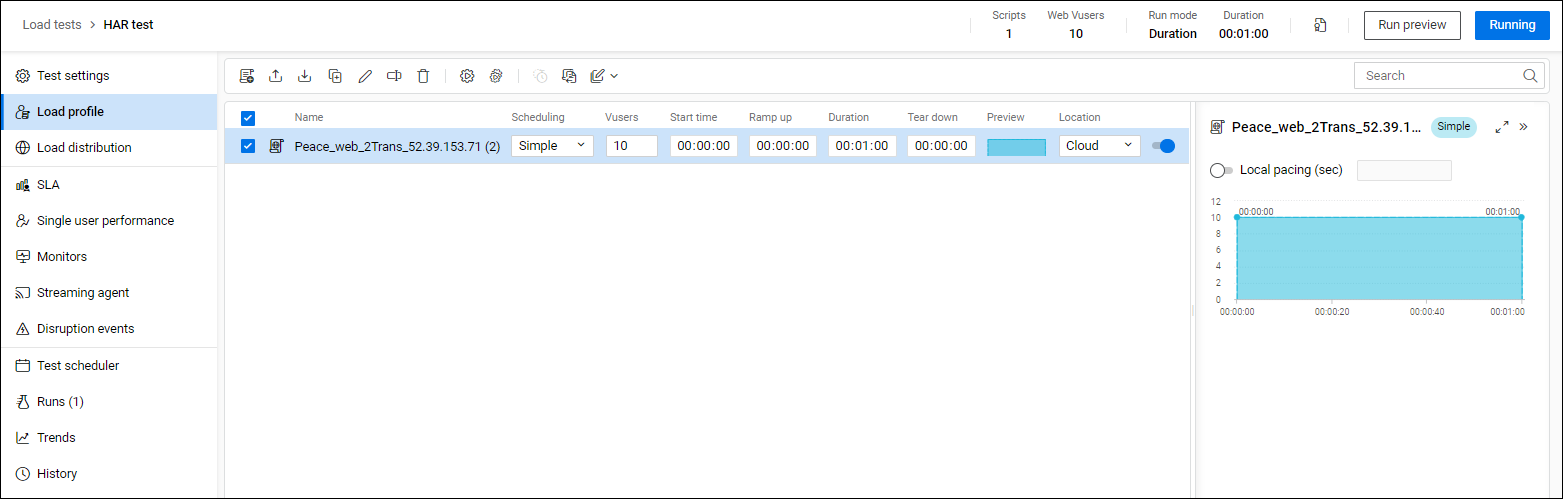
Tip: After the test runs, you can add the script that was created from the HAR file to a new or existing test.
View Load tests > Load profile to see the name of the script.
Create a test using a REST call
Use a REST call to create a TruAPI test to generate test results.
- In the Home page, click Create a test and select Create a REST test. The Create REST Test dialog box opens.
- Enter the test name.
-
Configure the test as follows:
Action How to Enter the request URL Enter the request URL of your application. Select the call method Select one of the following methods:
POST. Create
GET. Read
PUT. Update
DELETE. Delete
Enter the URL parameters Key. The parameter name
Value. The parameter value
Example:http://www.example.com/products/women?category=dressesreenKey= Category
Value = dresses
Enter the Header parameters Header. Header field name
Value. Header value
Example:
Accept: text/plainIf you select POST, PUT, or DELETE, you must also specify the payload, which is the actual data transmitted. Enter the payload in either Form or Raw format:
Form
Key. The column name.
Value. The key value.
Form example:
Key = id Value = "123'
Key = type Value = "dress"
Key= color Value ="green"
Raw. A string of all the values.
Raw example
id: "123", type: "dress", color: "green"
Add Vusers. Select the number of vusers from the drop down list. Specify test duration. Enter the test duration. - Click Run test. Watch the results in the Dashboard that opens after the test initialization.
Tip: After the test runs, you can add the script that was created from the REST call to a new or existing test.
View Load tests > Load profile to see the name of the script.
Create a test using a CSV file
Use a CSV file to create a TruAPI test to generate test results.
Create a .csv file with the following columns:
Note: Column names are mandatory.
| Column Name | Description |
|---|---|
| METHOD |
Select one of the following methods: POST. Create GET. Read PUT. Update DELETE. Delete The default value is GET. |
| URL |
Enter the request URL of your application. |
| HEADERS |
The header is a JSON string. If this column is blank the default http header value is used. |
|
PAYLOAD
|
Enter the payload raw format. Raw example:
id=123&type=address&color=green |
| TRANSACTION | The name of the transaction. |
| THINKTIME | Think time in milliseconds. Default think time is 0. |
Example: .csv file
Example:

Create a test from a .csv file
- In the Home tab's Quick start section, click the Create a CSV test button.
- Enter the test name.
-
Click Browse to select a .csv file.
Caution: Carefully review your CSV file before you upload it as it may contain private information such as usernames and passwords.
Assign labels
Use labels to help you organize scripts in your repository, or to organize your load tests in the Load tests and Results pages. The labels you create are common to both scripts and load tests.
Labels can be nested in sub-categories:
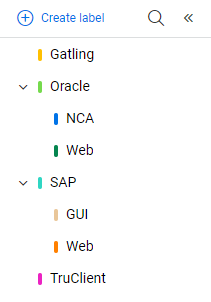
The expandable labels pane is located to the left of the grid. Click the left or right double arrows at the top to show or hide the pane.
You can perform the following actions for labels:
| Action | How to |
|---|---|
|
Create a label
|
|
| Edit a label |
From the Labels pane, highlight a label. Click the vertical ellipsis |
| Delete a label |
From the Labels pane, highlight a label. Click the vertical ellipsis Removing a label also removes any sub-labels. |
| Assign a color to the label |
From the Labels pane, highlight a label. Click the vertical ellipsis |
| Add a sub-label |
From the Labels pane, highlight a label. Click the vertical ellipsis |
| Manually assign a label |
You can assign a label to a script manually after the script has been uploaded.
Use the Search box |
| Automatically assign a label |
You can assign a label to a script automatically when uploading the script. To assign a label to a script automatically, select the required label before uploading the script's .zip file or before dragging and dropping the script into the Assets > Scripts page. Note: To assign a label to a script uploaded from a Git repository, you must use Git agent 2022.10 or later. |
| Filter by a label |
You can filter scripts, load tests, and results by a specific label. In the Labels pane, highlight a label or sub-label to filter the displayed items.
Use the Search box |
 to select a label color.
 and select Edit.
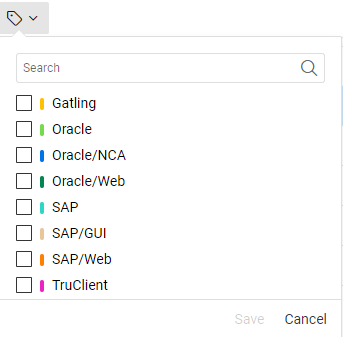
 to find a label name.
 to find a label name.
 See also: