Interactive REST authoring tutorial
This tutorial demonstrates how to interactively design data models for virtual services without recording real service communication. We will use only the client application and sample response messages.
Overview
Let’s assume you would like to test a service, which is dependent on another service. The other, 3rd party service is not available. You have your client application, which can send requests. You also have some sample responses according to what your application would expect. This is all you need to create a new virtual service. We will demonstrate it using the Claim Processing demo service.
Tip: Find more details about concepts and steps in this tutorial by searching the OpenText Service Virtualization Help.
Prerequisites
- Install OpenText Service Virtualization Designer.
-
Start the MemberAccounts REST Demo service:
-
In the sample projects folder, locate and run
ClaimProcessingRestDemo\run-xml.batto open the claim processing demo client.The sample project folders are located, by default, in <Your Documents folder>\Service Virtualization\Demos.
- In the Health Insurance demo client, click Enter Claim.
-
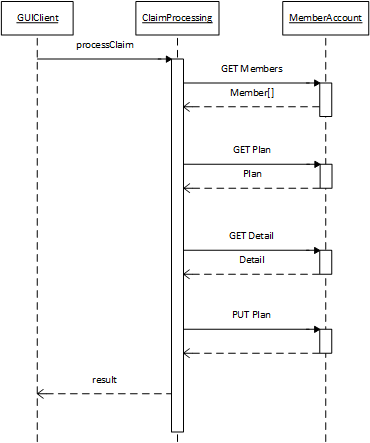
This image shows what happens in the demo client. You can see that the MemberAccount service was called four times.
Now let’s assume that the MemberAccounts Service is not available.
Close the console window of the MemberAccountsService that was started together with the demo client.

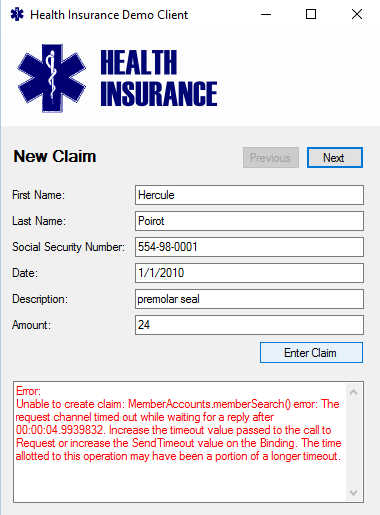
In the demo client, click Enter Claim again to trigger a new request. Because we closed the MemberAccountsService, it should fail.
Now everything is ready to virtualize the Member Accounts service interactively.
Virtualize a REST service interactively
To virtualize the MemberAccounts service interactively, you need to perform the following steps:
- Create a virtual service
- Reconfigure the client application
- Add data for "GET /accounts" call
- Add data for "GET accounts/{accountId}/plan" call
- Add data for "GET accounts/{accountId}/detail" call
- Add data for "PUT accounts/{accountId}/plan" call
In this step we’ll create an empty REST virtual service, properly configured to simulate default responses for whatever request it receives.
- Start OpenText Service Virtualization Designer.
- Create a new project. From the main menu, click File > New > Virtualization Project.
- Add a new REST virtual service. From the main menu, click File > New > Virtual Service.
-
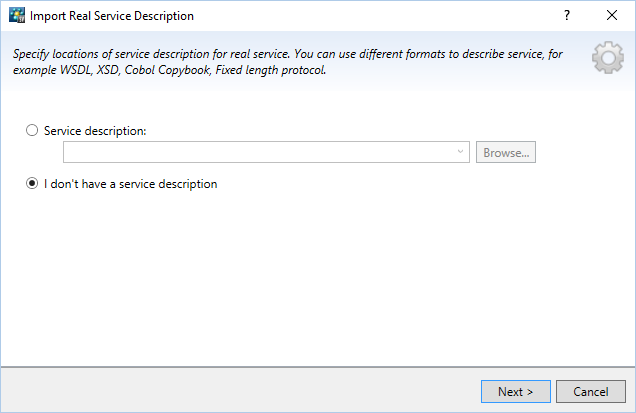
In the Import Real Service Description dialog box, select I don't have a service description.
-
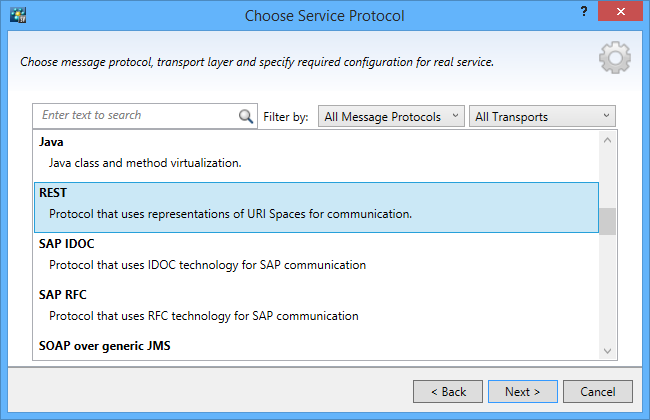
In the Choose Service Protocol dialog box, select the REST protocol.
-
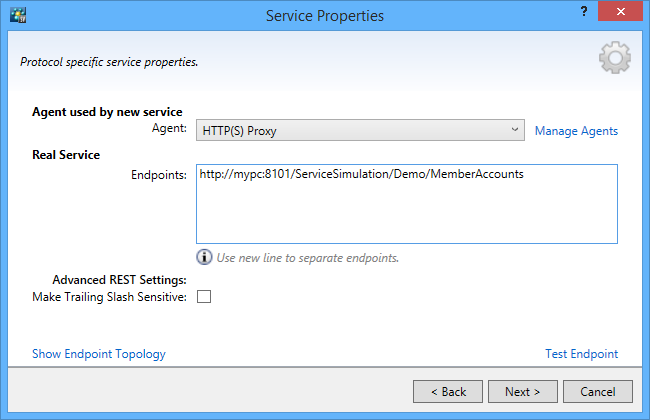
In the Service Properties dialog box, specify the endpoint of the "real" service, as follows:
http://<hostname>:8101/ServiceSimulation/Demo/MemberAccounts
-
Click Virtualize to complete the process.

-
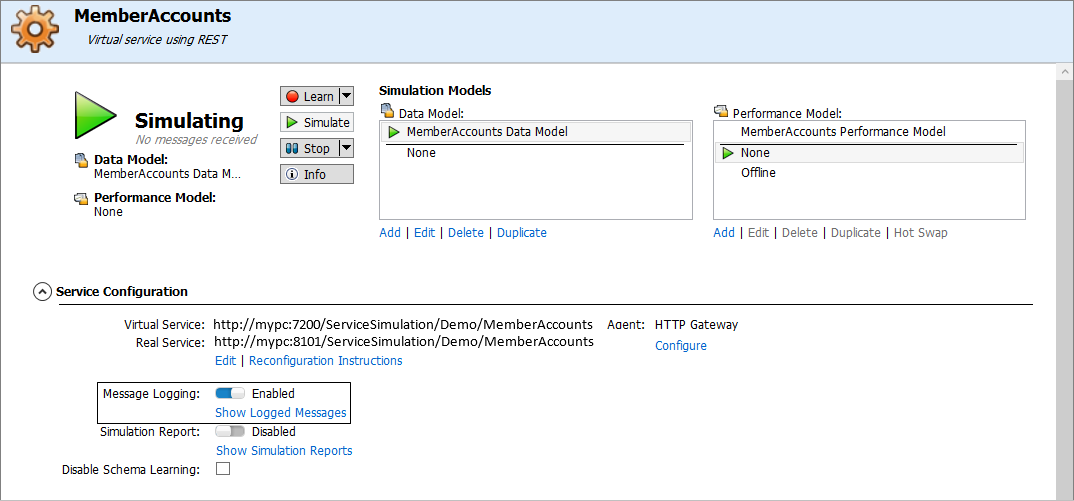
In the Virtual Service Editor, do the following:
-
Under Service Configuration, select the option to enable Message Logging.
- Click Simulate to switch the virtual service to Simulating mode.
-
Reconfigure the client application
Now we need to make a configuration change so that the client will send requests to the virtual service instead of to the real service.
We know that the client application is using the system proxy, so we need to change it.
-
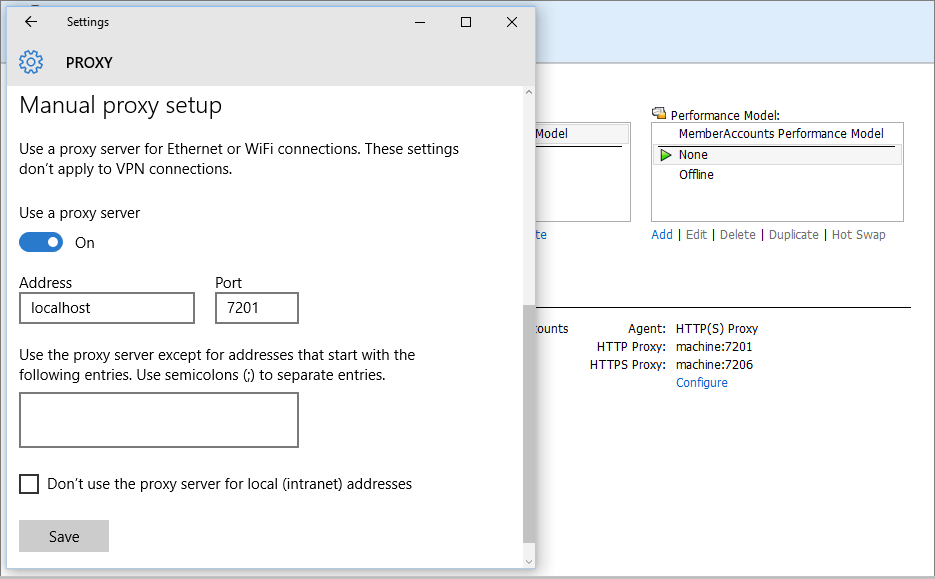
Set your machine's proxy server to the same proxy server that the virtual service is using.
Make sure proxy will be used for local addresses as well.
In Windows 10 you must clear the option Don’t use the proxy server for local (intranet) addresses as shown below.
-
In the demo client, click Enter Claim to send the request again. Now it should reach the virtual service.
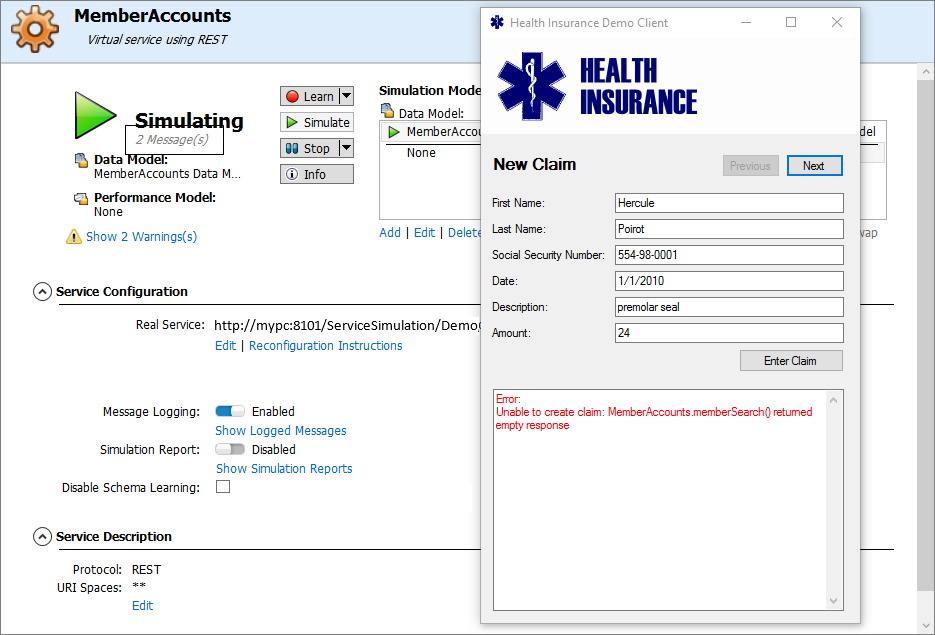
Notice that the error message is different now. The virtual service responded with the default response, which is currently empty.
Now let’s start designing the data model interactively.
Add data for "GET /accounts" call
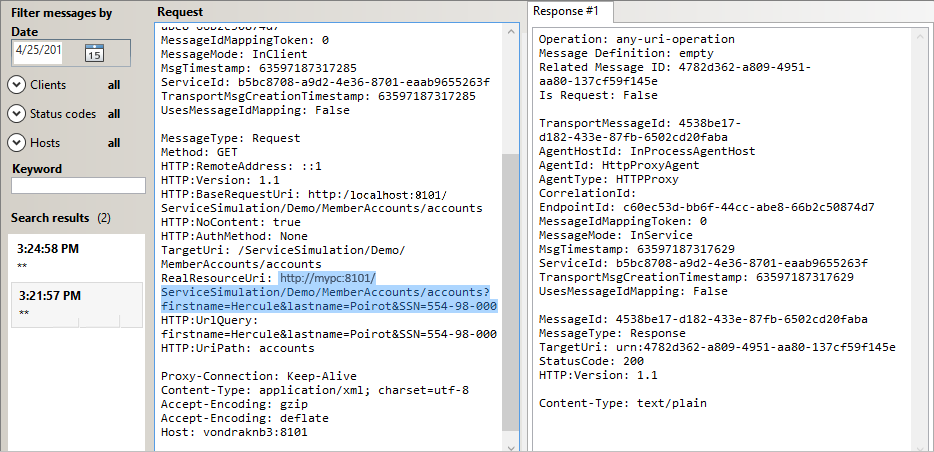
Because you enabled message logging, you now have the exact request message from the client logged inside OpenText Service Virtualization. You can use it in your data model, as we will explain in this step. The response part however you will need to provide. Let’s check the logged messages.
-
In the Virtual Service Editor, under Service Configuration, click Show Logged Messages to open the message viewer. Select the last request-response message pair so it will be available to import.
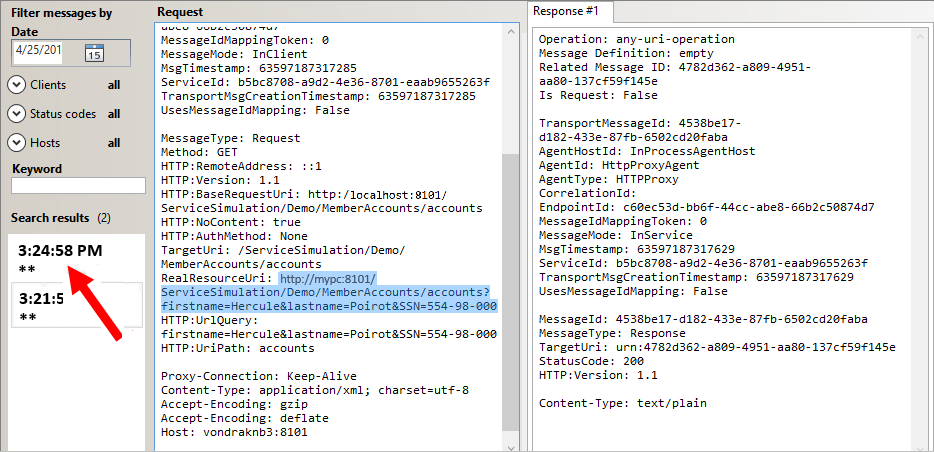
You can see that the request was a simple GET request on endpoint
http://hostname:8101/ServiceSimulation/Demo/MemberAccounts/accounts?firstname=Hercule&lastname=Poirot&SSN=554-98-0001, and the response was just HTTP Status code 200 with no payload. -
Open the Data Model editor for the default data model, by expanding the virtual service in the Virtualization Explorer, and double-clicking the Member Accounts Data Model node.

-
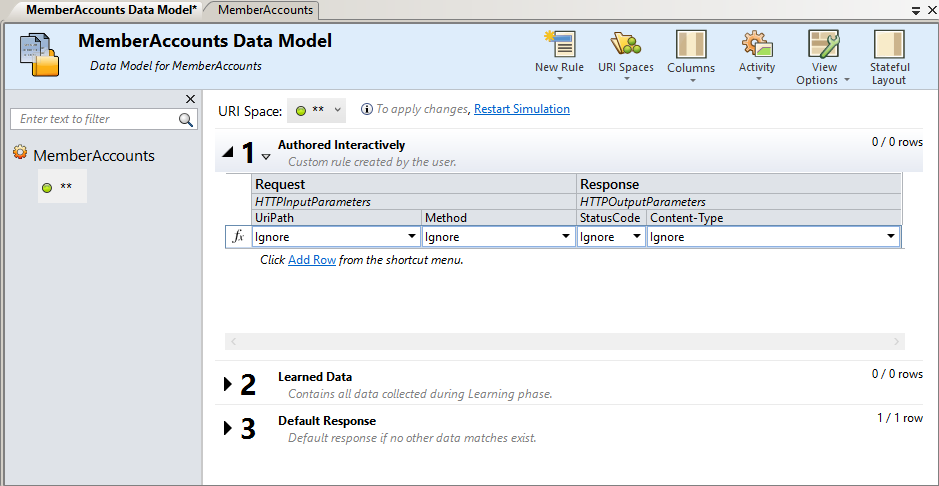
Click the New Rule button to create a new, blank rule. Rename the new rule to “Authored Interactively”. (It’s recommended to always leave the Learned Data rule for recorded data only.)
-
Import the message.
Note: You cannot import messages during Simulation. Before the import dialog box opens, you will be prompted to first stop simulation. Click Yes to continue. Click Yes again to confirm changes to the Data Model.
-
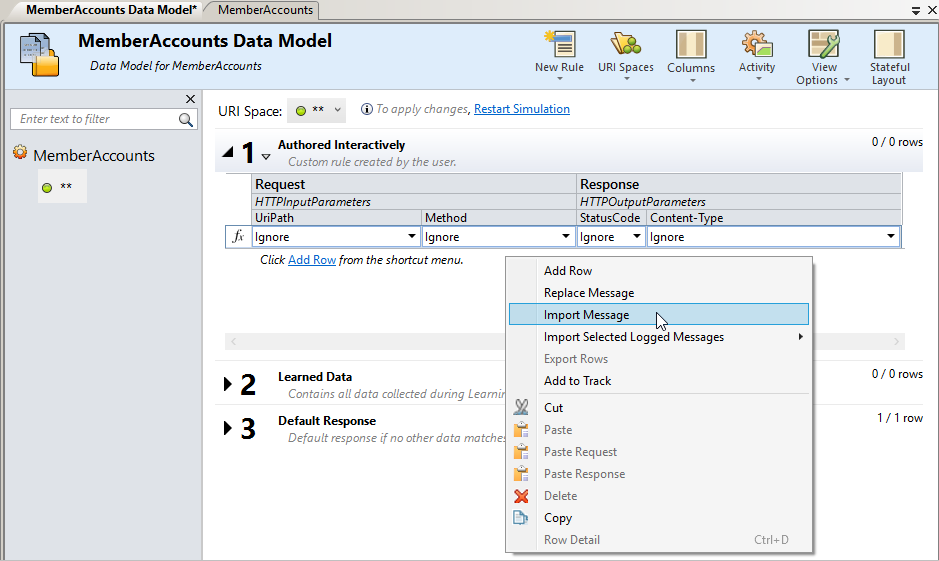
In the Data Model, click the arrow before the rule number to expand the rule. Right-click inside the rule and select Import Message.
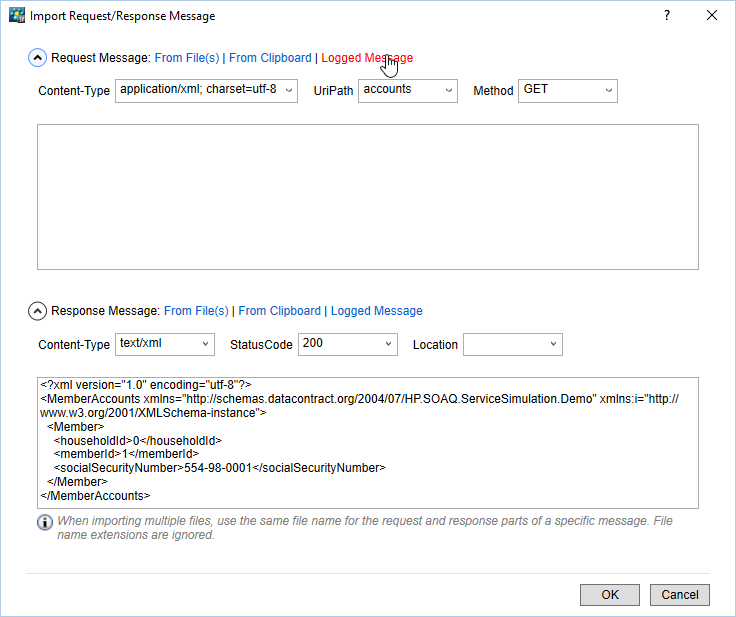
- Request Message - click Logged message to get the request message you selected earlier in the message viewer.
-
Response Message - copy the following:
Payload:
<?xml version="1.0" encoding="utf-8"?>
<MemberAccounts xmlns="http://schemas.datacontract.org/2004/07/HP.SOAQ.ServiceSimulation.Demo">
  <Member>
    <householdId>0</householdId>
    <memberId>1</memberId>
    <socialSecurityNumber>554-98-0001</socialSecurityNumber>
  </Member>
</MemberAccounts>
The Import Request/Response Message dialog box should now look like this:
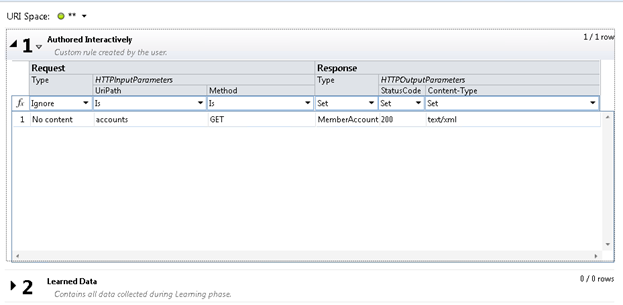
Click OK to create the new row in the data model.
-
-
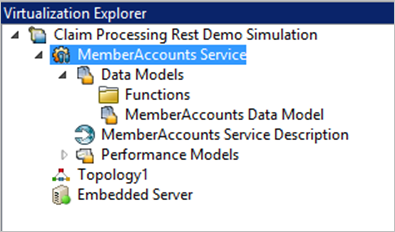
In the Virtualization Explorer, double-click the virtual service name to return to the Virtual Service Editor.
- Switch the virtual service back to Simulating mode.
-
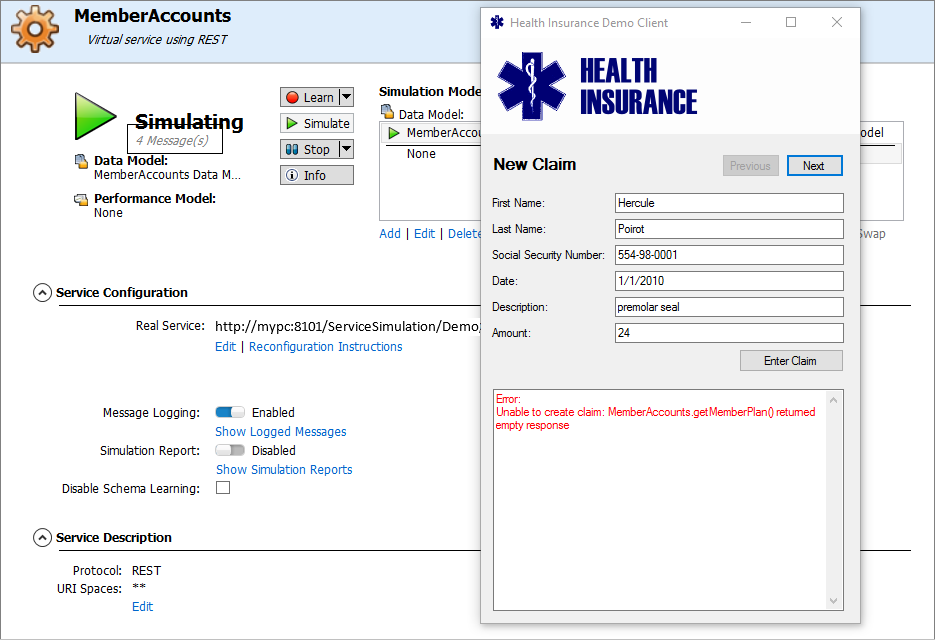
In the demo client, click Enter Claim to send the request again. You should now see 4 messages instead of 2 in the Designer. The error in the demo client is different as well.
Add data for "GET accounts/{accountId}/plan" call
Our claim processing application was able to get one step further, but the client application is still showing an error. This means we need to continue adding data to our data model. This time, we need to add data for the GET plan operation.
-
In the message viewer, select the relevant message pair - the one after the pair we imported in the last step.
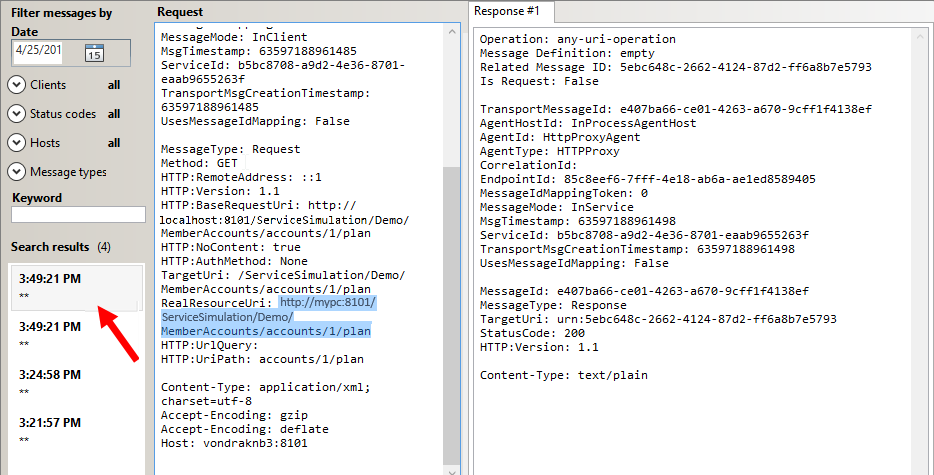
Notice that the GET on following endpoint was called:
http://hostname:8101/ServiceSimulation/Demo/MemberAccounts/accounts/1/plan -
Open the Import Request/Response Message dialog box in the data model again, and enter the following:
- Request Message - import from logged messages.
-
Response Message - copy the following:
Payload:
<?xml version="1.0" encoding="utf-8"?>
<Plan xmlns="http://schemas.datacontract.org/2004/07/HP.SOAQ.ServiceSimulation.Demo">
  <approvalLimit>1000</approvalLimit>
  <id>1</id>
  <name>Allpay Total 1000</name>
  <totalClaimed>0</totalClaimed>
</Plan>
The Import Request/Response Message dialog box should now look like this:
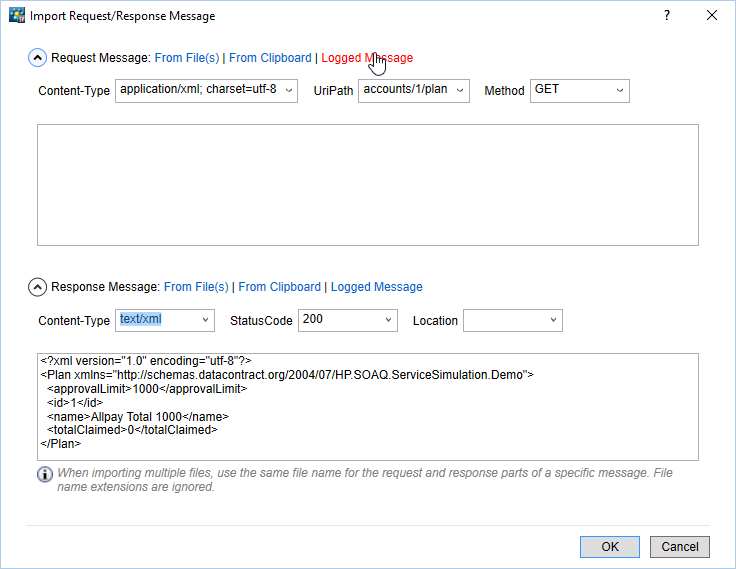
-
Switch the virtual service back to Simulating mode again, and send another request from the demo client. You can now see 6 messages in the Designer, and a different error in the demo client application.
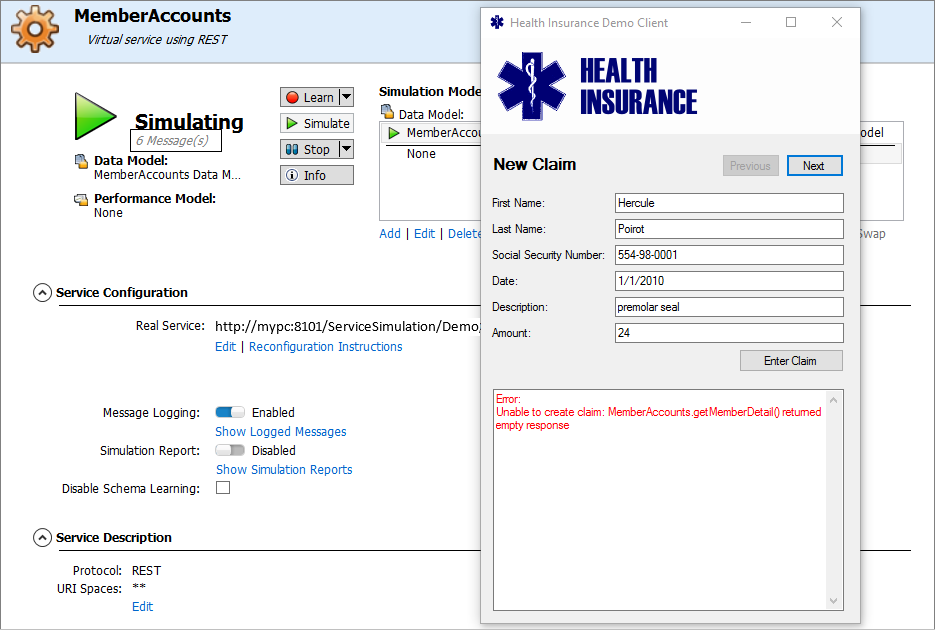
However, it is now complaining about another endpoint that we have not virtualized yet. Let’s fix it.
Add data for "GET accounts/{accountId}/detail" call
We moved one step ahead, but the claim processing application is sending a new request now, requiring us to further adapt our data model.
- Check the logged messages in the message viewer again, and select the last message pair in the list.
-
Open the Import Request/Response Message dialog box again, and do the following:
- Request Message - import the logged request.
-
Response Message - copy in the following:
Payload:
<?xml version="1.0" encoding="utf-8"?>
<Detail xmlns="http://schemas.datacontract.org/2004/07/HP.SOAQ.ServiceSimulation.Demo" xmlns:i="http://www.w3.org/2001/XMLSchema-instance">
  <address>
    <city>Smithfield London W1</city><country>Great Britain</country><line1>56B Whitehaven Mansions</line1><line2>Charterhouse Square</line2><state>England</state><zip i:nil="true" />
  </address>
  <householdId>0</householdId>
  <memberId>1</memberId>
  <person>
    <dateOfBirth>1876-04-01T00:00:00</dateOfBirth>
    <gender>Male</gender>
    <name><firstName>Hercule</firstName><lastName>Poirot</lastName><middleName i:nil="true" /><prefix i:nil="true" />      <suffix i:nil="true" /></name>
    <socialSecurityNumber>554-98-0001</socialSecurityNumber>
  </person>
  <phone i:nil="true" />
</Detail>
The Import Request/Response Message dialog box should now look like this:
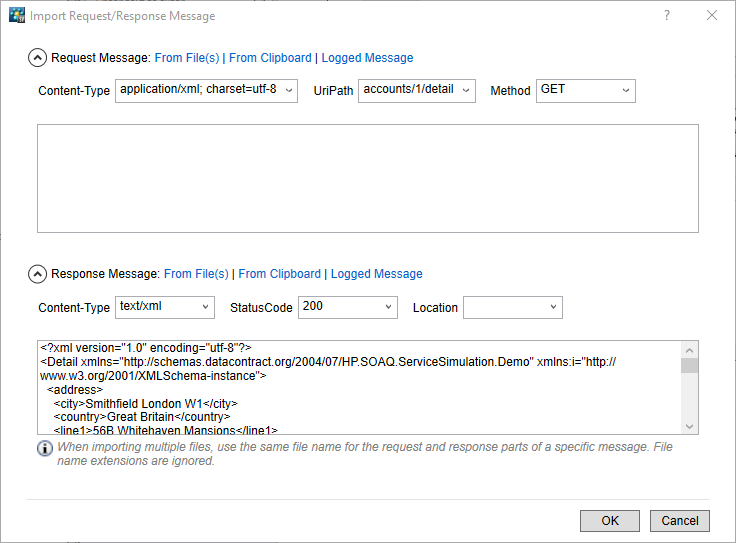
Let's test it.
-
Switch the virtual service back to Simulating mode again, and send another request from the demo client. Again we can see more messages were simulated, and a different error message is displayed in the client.
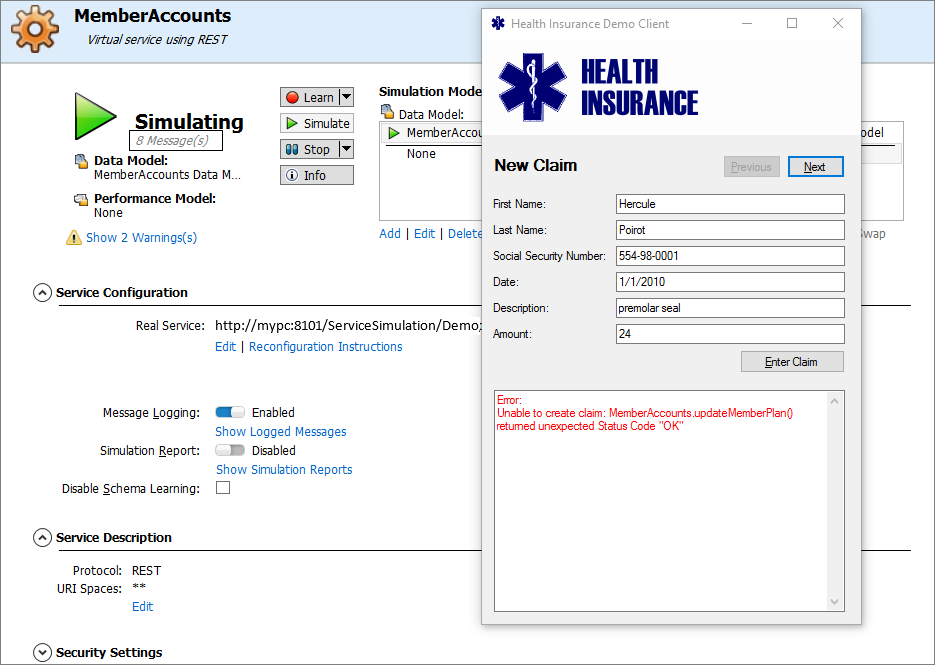
Add data for "PUT accounts/{accountId}/plan" call
-
Let's check the logged messages again and select the one we want to import.
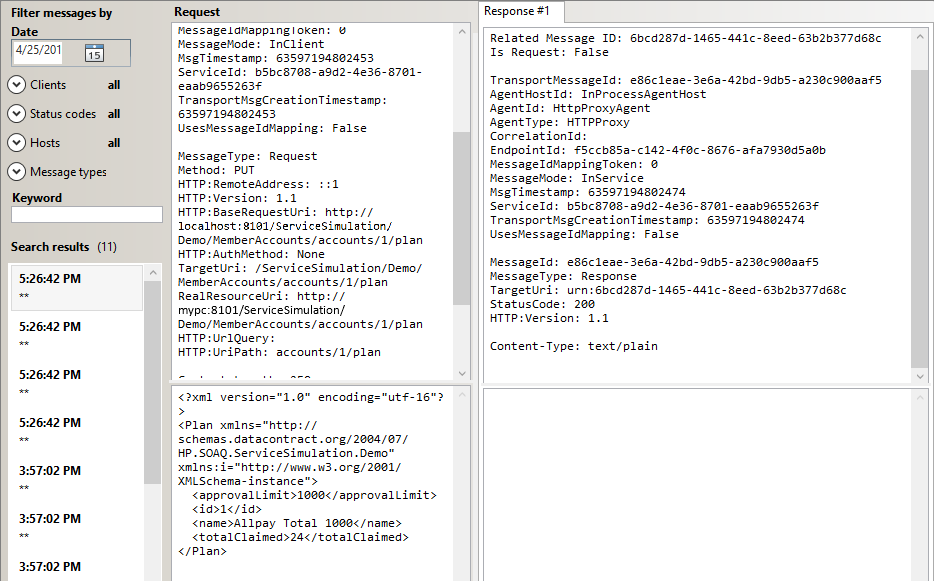
-
Open the Import Request/Response Message dialog box and fill in the data:
- Request Message - import the logged request.
-
Response Message - no payload this time.
Header: In Status Code field, enter 204.
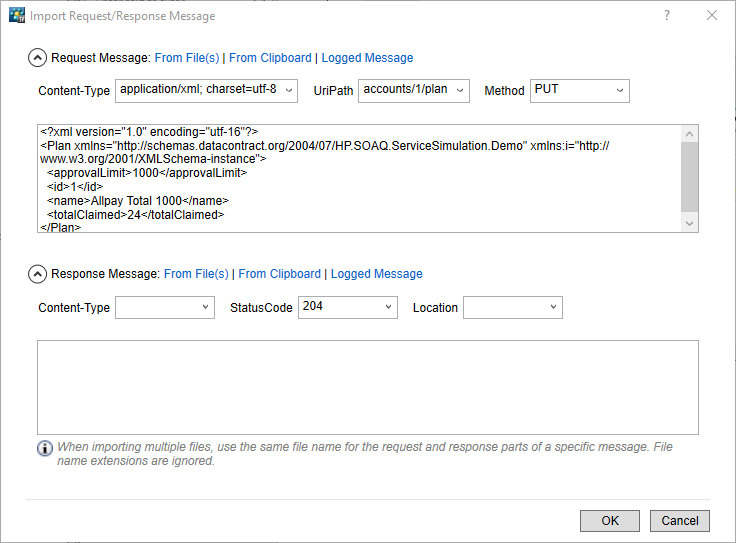
-
Test the simulation: Switch the virtual service to Simulating mode and send another request from the claim processing demo client.
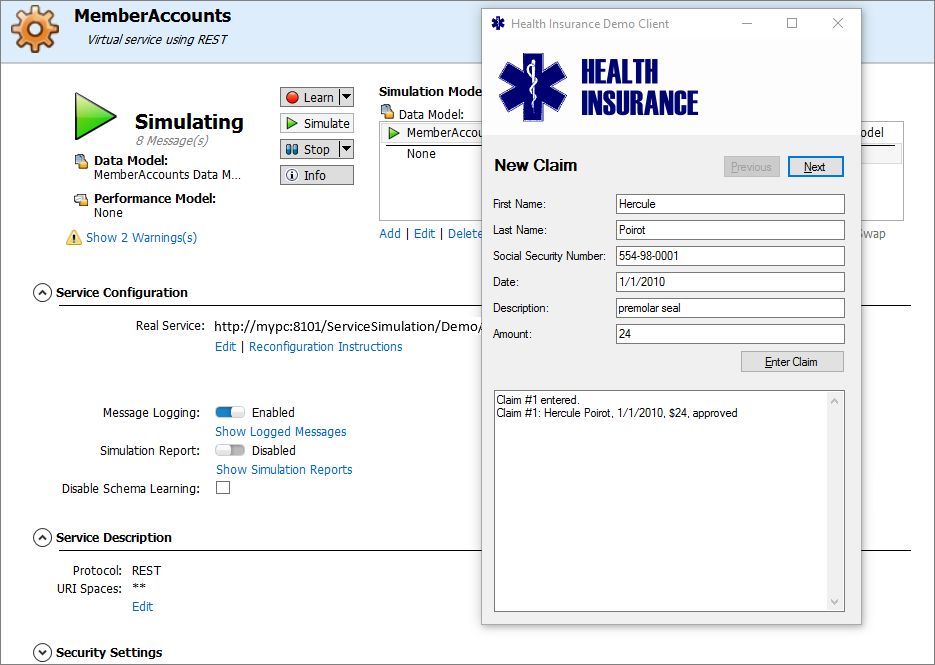
Eight messages and no errors. We are done.
Summary
In this tutorial, we populated the data model with four request-response pairs. All requests were taken directly from the log file, so they perfectly matched what the client is sending. All response messages were manually created, so they matched what we were expecting in our application.


