Digital Lab integration
Digital Lab's integration with Service Virtualization supports testing a mobile app with UFT Developer or Appium tests. This section is relevant only for on-premises deployments of Digital Lab.
Note: Service Virtualization supports integration with Digital Lab 2023 and earlier.
Set up your device
To run an app on a device with Service Virtualization, you need to enable Service Virtualization for each device as follows:
-
Enable Service Virtualization on the devices.
- Locate the connector.properties file, located by default in the Digital Lab Connector\server\conf folder.
-
Add the UDID of the devices that will use Service Virtualization to the SV feature flag. For example:
DEVICE_LIST_WITH_SV_FEATURE_ENABLED =8a6e6738ttt, 9887fc3159555
- Save the file and reconnect the devices, or restart the Digital Lab connector.
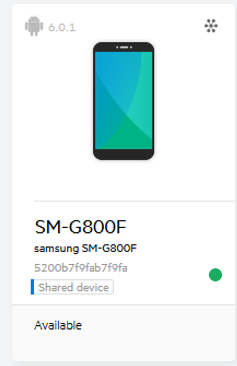
When the device is Service Virtualization enabled, the
 icon is displayed in the right-hand corner.
-
Set up the proxy for the device.
iOS devices
This configuration is handled automatically during plug and play if a device is enabled for Service Virtualization as per step 1, and is on the same WiFI network as the Digital Lab connector.
Note: The device must be connected over WiFi to the same network as the Digital Lab connector. Make sure that there are no security requirements that could prevent the connector from being reachable in the network.
Android devices -
Open Settings > WiFi.
-
Do a long press on the WiFi being used, and select Modify Network.
-
Select Advanced options.
-
In the IP settings, select DHCP. In the Proxy section, select Manual.
-
In the Proxy host name enter 127.0.0.1. In the Proxy port enter 6543.
-
Click Save.
-
-
Install the Service Virtualization certificate file.
iOS devices -
Download the sv-capture.pem certificate.
-
Upload the file via a USB cable and select it. This will start the process of installing the certificate as a new profile on the device.
-
Click Install.
Android devices -
Download the sv-capture.pem certificate.
-
Install the certificate in one of the following ways:
-
Upload the file via a USB cable and go to Settings > Security > Credential storage and perform Install from device storage.
-
Send the certificate by email to your phone and open the attachment in your email app.
-
-
When prompted, accept the use of the certificate for VPN and apps.
-
Enable the integration
Once you enable SV integration, all apps that you upload will be instrumented for both Digital Lab and Service Virtualization.
To enable the Service Virtualization integration with Digital Lab:
- With an admin role, click the Administration button
 in the right of the masthead, and choose the Settings tab. Scroll down and select the Service Virtualization (SVF) Integration
node.
 - Set Enable SV integration to Yes.
- Click Verify and Save.
When you connect a device, Digital Lab installs both the UFTM Agent and the SV Agent apps onto the device, provided that the device was added to the list of SV enabled devices.
Upload apps
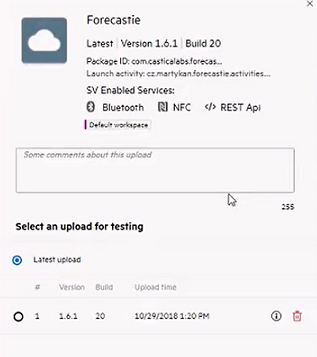
After you have enabled Service Virtualization integration, apps that you upload will be packaged (instrumented) with the Service Virtualization code. When an app is Service Virtualization enabled, the ![]() icon is displayed in the right-hand corner.
icon is displayed in the right-hand corner.
The app card details will indicate which Service Virtualization capabilities are available, such as Bluetooth and NFC.

Make sure to install the packaged app on the device when using Service Virtualization.
Perform Service Virtualization simulation
You perform Service Virtualization testing using UFT Developer or Appium tests. For details, see the UFT Developer Help Center.


