Work with GIT
This task describes how to work with virtualization projects that are under GIT version control.
Prerequisites
Integration with GIT requires the following:
-
System prerequisites of TortoiseGit. For details, see the TortoiseGIT documentation.
-
TortoiseGIT version 2.13 or later is installed on the OpenText Service Virtualization Designer machine.
Clone a virtualization project
Your virtualization project must be committed to a GIT repository.
From the main menu, select Versioning > GIT > GIT Clone. This accesses the TortoiseGIT user interface, and you can proceed to clone a project to the file system.
Clone a version controlled project
You can open a project or solution, or add a project to an existing solution.
-
Select one of the following:
- Open an existing project or solution. From the main menu, select Open Project/Solution.
-
Add an existing project to a solution. In the Projects pane, right-click a solution and select Add > Existing Project.
- Navigate to and select a cloned project located in the file system.
Manage version control
When a virtualization project is under version control, standard GIT actions are available in the OpenText Service Virtualization Designer.
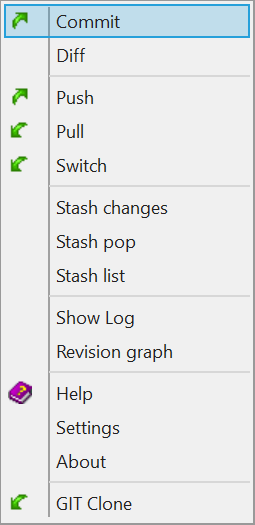
From the main menu, select Versioning > GIT and select a GIT action from the menu (see image below). The TortoiseGIT user interface opens, enabling you to manage version control for the project. The following options are available:

For more details on GIT actions, see the TortoiseGIT documentation.
View version status
From the main menu, select View > Projects to display the Projects pane. GIT icons indicate the version control status of your project's files.
Add a project to a GIT repository
In a non-versioned project, from the main menu, select Versioning > GIT > GIT Create repository. The TortoiseGIT user interface opens, enabling you to add your project to a repository.
For more details, see the TortoiseGIT documentation.
 See also:


