Share this page


Manage Virtualization Projects
This task describes how to create and manage virtualization projects.
Note: To learn more about OpenText Service Virtualization projects, see Virtualization Projects.
Create a new project
Select one of the following:
- Select a task from the Get Started page. These tasks first create a new virtualization project and then a new virtual service. For user interface details, see Start page.
- Create a new virtualization project. From the main menu, select File > New > Virtualization Project. For user interface details, see Summary of Virtualization Project Dialog Box.

Add projects to an existing solution
You can add new or existing projects to a solution.
- From the main menu, select View > Projects to display the Projects pane.
-
Right-click the solution name and select one of the following:
- Add > New Virtualization Project
- Add > Existing Project
Open a project
To open a project, select one of the following:
-
On the Start Page, under Recent Projects, select a project.
Tip: Hover over a project name to see the full path to the saved project.
-
From the main menu, select File > Open Project/Solution. By default, projects are stored in the following location in the file system: <Your Documents folder>\OpenText Service Virtualization\Projects.
Change the default project location
From the main menu, select Tools > Options > General tab. Then select Projects and Solutions.
Close a project
From the main menu, select File > Close Project/Solution.
View server information
In the Virtualization Explorer, expand a project. The server is displayed as the last item in the tree. Click the server to display its details in the lower pane.
Move virtual services to a different server
The virtual services in your project are deployed on the OpenText Service Virtualization server specified for the project.
To change the server:
- In the Virtualization Explorer, expand a project.
-
Right-click the server and select Change Server.
Alternatively, from the main menu, select Project > Change Server.
For user interface details, see Change Server Dialog Box.
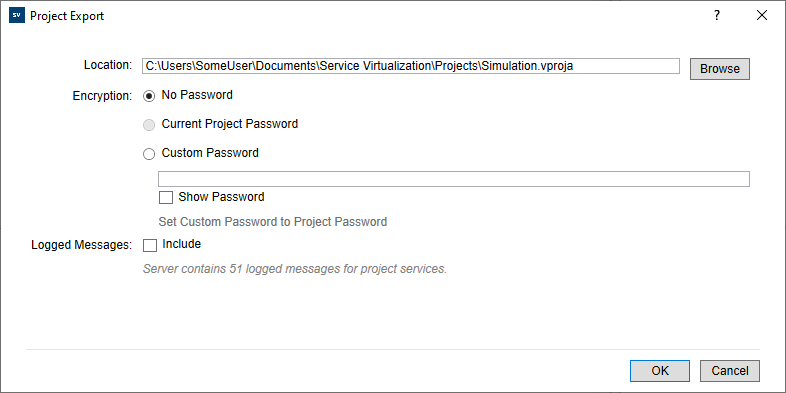
Export a project
Save your project as an archive file in the file system. From the main menu, select File > Export Project. The file is saved with the default file extension .vproja.
You can specify an encryption password for the archive.
You can also include logged messages. For details, see Message Logging.
Encrypt projects
By default, your project is encrypted by a project password. To see this setting:
- Open the Options dialog box. Select Tools > Options from the main menu.
-
On the General tab, click Projects and Solutions .
You can change the project password directly from the Virtualization explorer. In the Virtualization explorer, select the project, and choose Change Encryption Password from the right-click menu.
For details about the encryption, see Password encryption.