Share this page


Create modular object repositories
This step describes how to create modular object repositories for each of the actions in your test.
While each action is created by default with a local object repository, objects stored there are only accessibly by that action. We recommend creating modular object repositories, which enable you to access and reuse the test objects in actions across your test.
Create a Login object repository
By default, when you performed the steps in Record your first action, UFT One saved the test objects used for the recorded steps in the local object repository.
This procedure describes how to save those test objects in a separate, modular object repository.
Do the following:
-
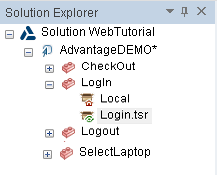
In the Solution Explorer, expand the Solution WebTutorial > AdvantageDEMO > Login action.
-
Double-click the Local object repository to open it.
-
Select File > Export and Replace Local Objects. In the Export Object Repository dialog that opens, do the following:
-
Browse to the C:\Users\<user>\Documents\Unified Functional Testing\WebTutorial directory.
-
In the File name field, enter Login.
-
Click Create.
The test objects used in this action are moved from the Local object repository to a new object repository, named Login.tsr.
-
- Save your test.
View your test object details
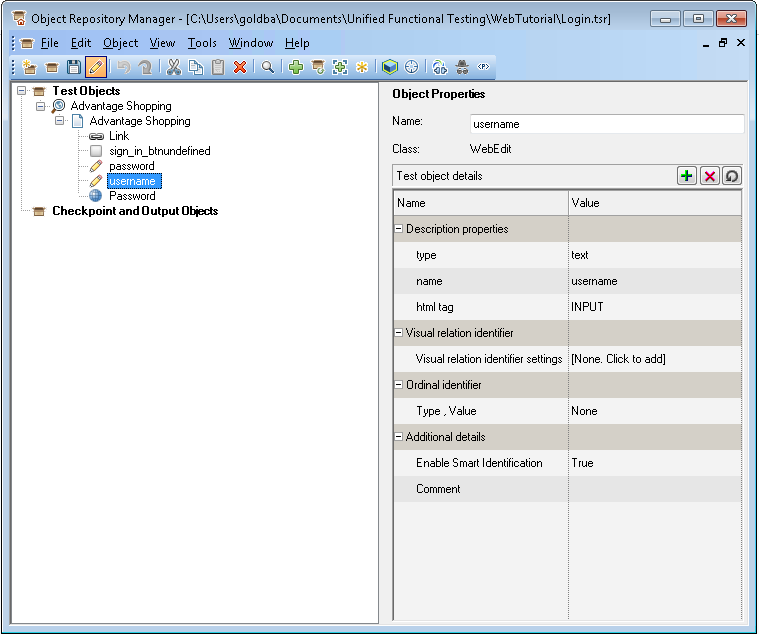
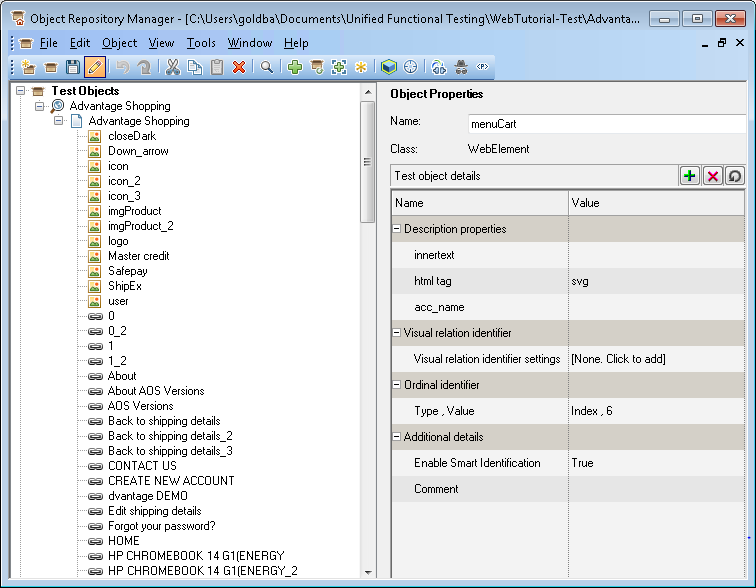
Double-click the Login.tsr node to open the new object repository. In the Object Repository Manager, select File > Enable Editing to view the details clearly.
Each of the test objects used in your recorded action are listed in a hierarchy under the Advantage Shopping page test object. Click each test object to view details on the right, including object properties and identifiers.
Create additional object repositories
The rest of the exercises in this tutorial teach you how to create test steps manually.
To do so, you must have test objects already existing in object repositories. We recommend creating a modular object repository for each action in your test.
Continue with:
- Create a SelectLaptop object repository
- Create a Checkout object repository
- Create a Logout object repository

Create a SelectLaptop object repository
Create an object repository with the test objects required to select a laptop and add it to your cart.
This time, use UFT One's Object Spy, which enables you to spy, highlight, and add individual test objects to an object repository.
Do the following:
-
In the UFT One Object Repository Manager, select File > New, and then File > Save As.
Save your object repository as SelectLaptop.tsr, in the WebTutorial directory.
-
In the Object Repository manager toolbar, click
 to open the Object Spy. In Chrome, ensure that the AdvantageDEMO site is open.
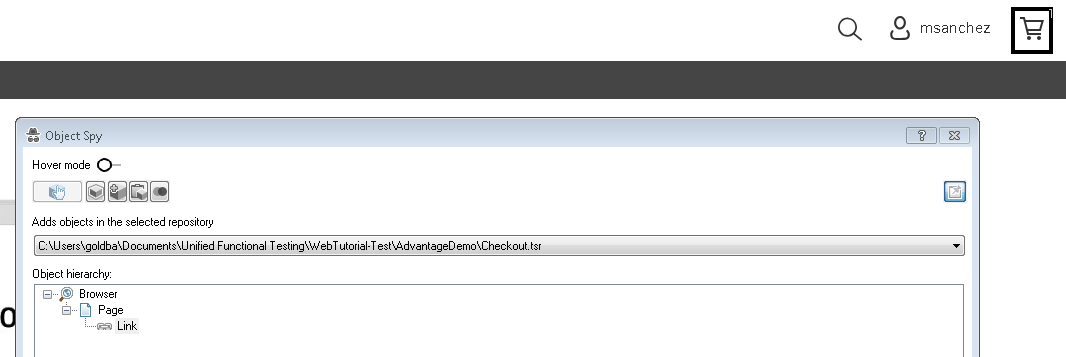
In the Object Spy, click the
 pointing hand button. UFT One is minimized to display Chrome.
 -
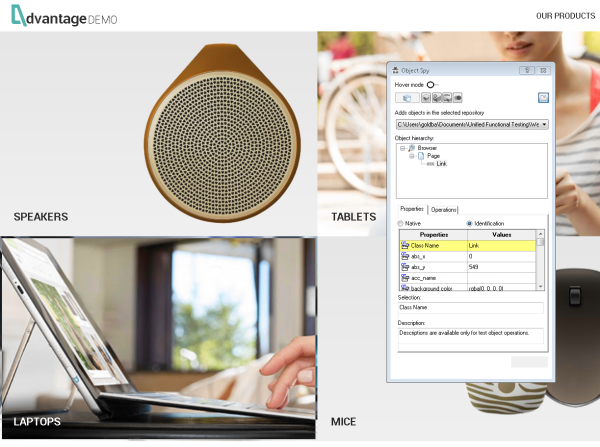
In Chrome, use your cursor to locate the Link object that highlights the LAPTOPS link on the bottom left. Ensure that the entire image is highlighted.
The Object Spy shows the properties for the LAPTOPS link object.
For example:
-
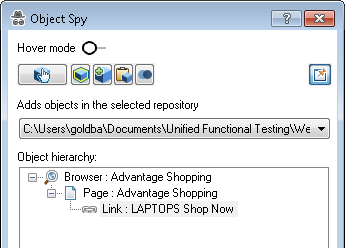
Click the highlighted LAPTOPS image to have the Object Spy capture the Link : LAPTOPS Shop Now test object properties.
- In the dropdown list under the Object Spy toolbar, ensure that your new SelectLaptop.tsr object repository is selected.
- Enlarge the Object Spy dialog to see the full path. Then, click the Add Object to Repository
 button to add the new object to the repository.
 -
Repeat the steps above to add the following objects to the SelectLaptop object repository using the Object Spy.
Click the links to expand for details:
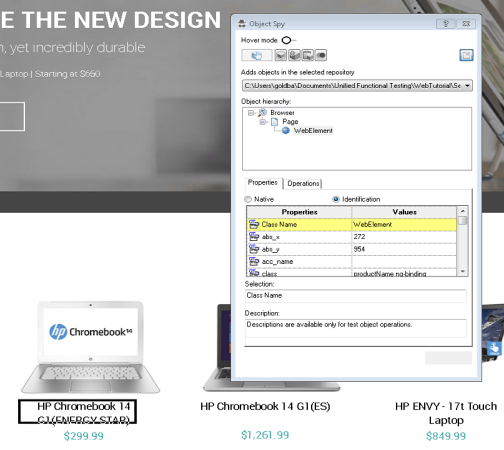
 The HP CHROMEBOOK 14 G1(ENERGY STAR) link object
In your browser, click on the text, LAPTOPS, to open the LAPTOPS page.
Spy on the HP CHROMEBOOK 14 G1(ENERGY STAR) WebElement object, click on its text in order to capture the properties, and then add it to the SelectLaptop object repository.
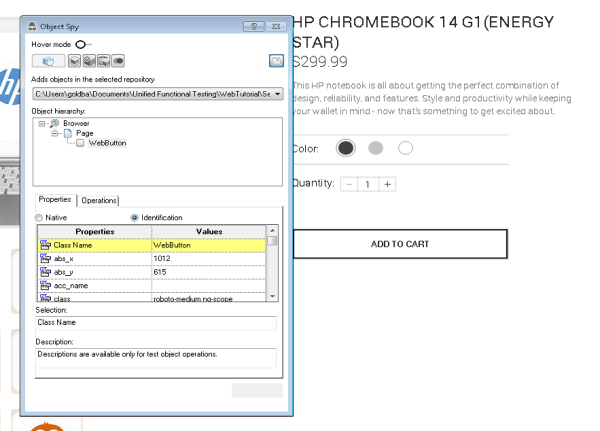
 The ADD TO CART button
In the browser, click on the text HP CHROMEBOOK 14 G1(ENERGY STAR) to show its details page.
Spy on the ADD TO CART button object, click it to capture the properties, and then add it to the SelectLaptop object repository.


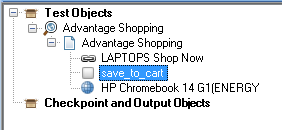
Your object repository should now look like this:
Tip: The Object Spy is available from both the Object Repository toolbar, and the main UFT One toolbar.
Associate your new object repository with the SelectLaptop action
Do the following:
- In UFT One's Solution Explorer, right-click the SelectLaptop action, and select Associate Repository with Action.
- Select the SelectLaptop.tsr file, and click Open.
- In the message box that appears, click Yes.
- Save your test.
Create a Checkout object repository
Create an object repository with the test objects required to check out your cart and complete your purchase.
Create a new object repository and add your first object
-
In the UFT One Object Repository Manager, select File > New, and then File > Save As.
Save your object repository as Checkout.tsr, in the WebTutorial directory.
-
In your browser, click the ADD TO CART button to add the HP CHROMEBOOK 14 G1(ENERGY STAR) to your cart.
Then, use the Object Spy to spy and add a test object for the
 cart icon Link object at the top right.
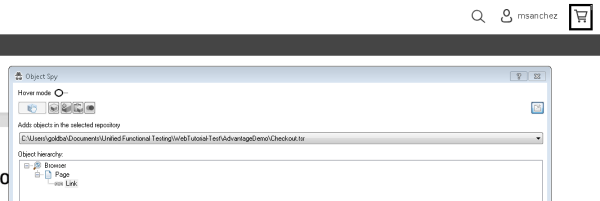
-
Make sure that the new Checkout.tsr object repository is selected, and then click Add Object
to add the new object to the repository.The cart link test object is simply named ShoppingCart.
Navigate and Learn to add more test objects
Use the Object Repository's Navigate and Learn toolbar to learn the additional objects required for this action.
Do the following:
-
In your browser, click CHECKOUT to display the SHIPPING DETAILS page.
If your browser jumps to a different pageIf the cart dropdown has disappeared, hover over the
cart icon, and then click CHECKOUT.If the REGISTRATION | LOGIN page is displayed instead of the SHIPPING DETAILS page, log in using the credentials you created earlier.
This tutorial creates a test that assumes that you are logged in to the site.
-
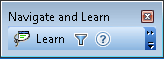
In the UFT One Object Repository Manager, select Object > Navigate and Learn to open the Navigate and Learn toolbar.
-
Define the learn filter to determine the objects you want to add to the repository.
On the Navigate and Learn toolbar, click the filter button
 , and then select Default object types.
This configures UFT One to learn the default objects on the selected page.
-
Select your browser window. Then, in the Navigate and Learn toolbar, click Learn to learn all the objects on the SHIPPING DETAILS tab.
The browser window flickers as UFT One adds test objects to the Checkout.tsr object repository.
-
Click NEXT to display the PAYMENT METHOD tab. (Make sure to first add the NEXT button to the repository).
Ensure that the SafePay option is selected, and click Learn again to learn all the objects on the PAYMENT METHOD tab.
-
Enter values in the SafePay username and Password fields, and then click PAY NOW to continue on to the ORDER PAYMENT order confirmation page.
-
In the Navigate and Learn toolbar, click Learn again to learn all the objects on the page.
-
Close the Navigate and Learn toolbar and save your object repository.
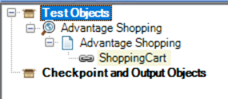
Your object repository should now look like this:

-
Associate your new object repository with the Checkout action, and save your test.
For details, see Associate your new object repository with the SelectLaptop action.
- Complete the purchase and view the Order Payment page.
-
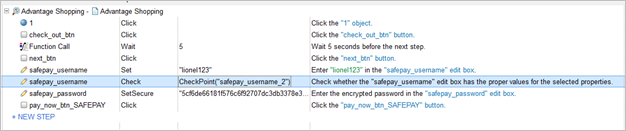
Add a checkpoint:
- For the Checkout action, open the Keyword view and select safepay_username.
- Select Design > Checkpoint > Standard Checkpoint.
-
Make sure that value is checked and selected.
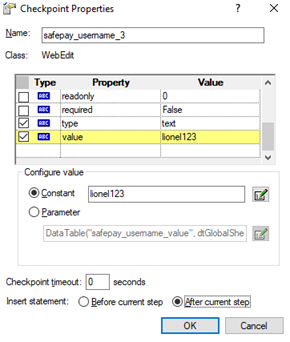
- In the Constant box, enter your safepay_username value.
-
Select to insert the statement After current step and click OK.
-
Create an output value:
- For the Login action, open the Keyword view. Right click the username and select insert output value.
-
Select the value property and indicate After current step.
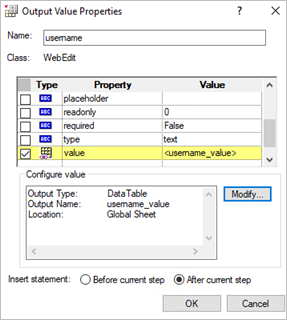
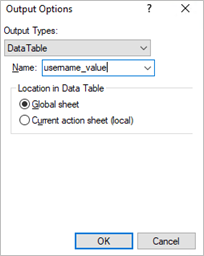
-
Click Modify. In the Output Options dialog box, enter username_value for the Name. Accept the default location Global sheet. Click OK.
-
Make sure there is a value in the Value property column and click OK.
-
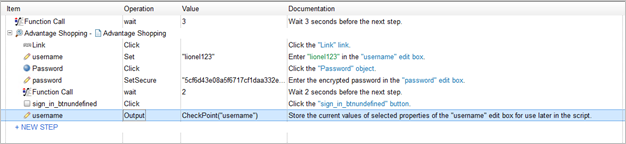
Test it with output values:
-
For the Checkout action, open the Keyword view. For the safepay_username row, select the Value column. Click the Configure value
 button.
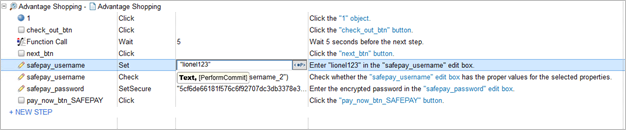
-
Select DataTable and then select the username_value row.

-
Run the test and view the results. Note that after the Login action has passed, there is a value in Global sheet row 1, and it will become the safepay_username value in the Checkout action.
-
Create a Logout object repository
Create a repository with the test objects used to log out of your AdvantageDEMO account.
Do the following:
-
In the UFT One Object Repository Manager, select File > New, and then File > Save As.
- Save the object repository as Logout.tsr, in the WebTutorial directory.
-
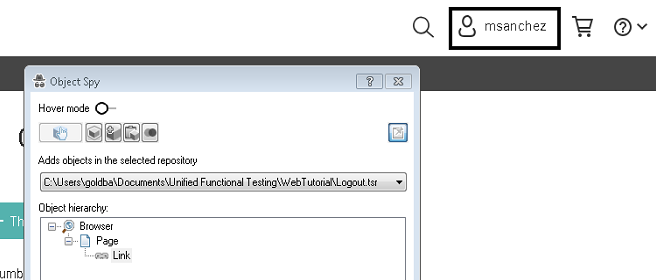
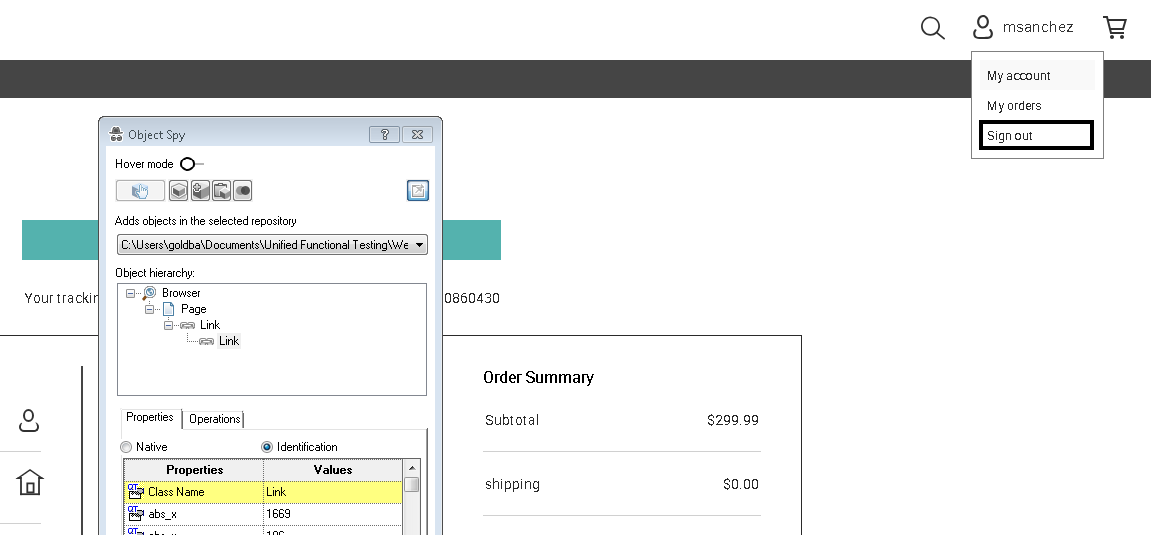
Open and use the Object Spy
to add a test object for the USER menu at the top right.In the Object Spy, make sure to select the Logout.tsr file from the dropdown list. Then, click the
Add to Object Repository button to add your new test object to the Logout repository.For example:

-
In the Object Spy, click the pointing hand again to add the Sign Out link in the menu.
Do the following:
-
Press the CTRL button on your keyboard to pause the spying, and then click the USER
 icon again.
 -
Release the CTRL button, and hover over Sign out in the USER menu.

-
-
Click the item to capture the object properties, and then on it, and then click the
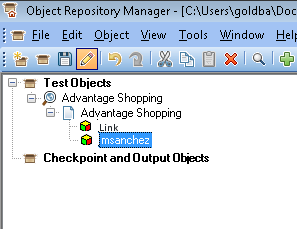
Add to Object Repository button to add the Sign out test object to the Logout.tsr repository.The Logout object repository now has the two test objects required to sign out of the AdvantageDEMO site. The object names may differ, depending on your unique test parameters, such as user name.
-
Save the object repository, and then switch back to UFT One.
-
Associate your new object repository with the Logout action, and save your test.
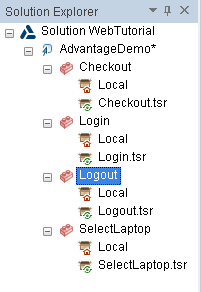
Each of your test actions now has its own shared object repository, viewable from the Solution Explorer.
Rename objects in the object repository
This exercise illustrates how to rename objects in the repository. This is ideal for creating meaningful object names that can make your scripts more readable and user-friendly.
Do the following:
-
Go to the Logout action.
-
Right-click the Link object and select Rename.
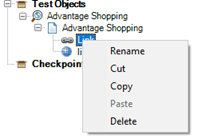
- Change the object name to Sign out.
-
Note the two objects.

 Next steps: