Share this page


Tutorial: Setting Test Step Input Properties Using Event Handler Code
In this tutorial, you will set the input properties using event handler code instead of the property value grid in an API test. This is useful if you have a property value generated dynamically during a test run, as you cannot use the Input/Checkpoint Properties tab in the Properties pane to set a property that does not exist before the test run.
In this tutorial, you will be setting the input properties of a Concatenate Strings step.
Note: We recommend printing this topic or putting the browser window on a second screen before performing this tutorial in a sample API test.
Prerequisite - create a Concatenate Strings step in your test
If necessary, from the String Manipulation section of the Toolbox pane, drag a Concatenate Strings step to the canvas.

Create an event handler for the Concatenate Strings step
For this test step, you want to set the value of the input and output properties before the step runs, so it is important to select the event handler that runs before the test step.
- In the Properties pane, select the Events tab
 .
. -
In the Events tab, in the BeforeExecuteStepEvent row, click the down arrow and select Create a default handler.
A separate tab, titled TestUserCode.cs, opens in the document pane, and a section of code is added to this file for the BeforeExecuteStepEvent section.
Add event handler code to set the input and output properties.
- In the TestUserCode.cs tab, find the TODO: Add your code here... section under the ConcatenateStringsActivity4_OnBeforeExecuteStepEvent portion of the code.
-
Delete the //TODO: Add your code here... string.
Note: Make sure not to delete the brackets on the line above and below the TODO line. These brackets are needed for proper code syntax.
-
In the same line, enter this. (with the period). (While you type, UFT One displays an autocomplete list. You can use this list if you want to find the this object.)
After you type the this. object, UFT One displays another autocomplete list.
-
From the autocomplete list, select the ConcatenateStringsActivity<#> variable:
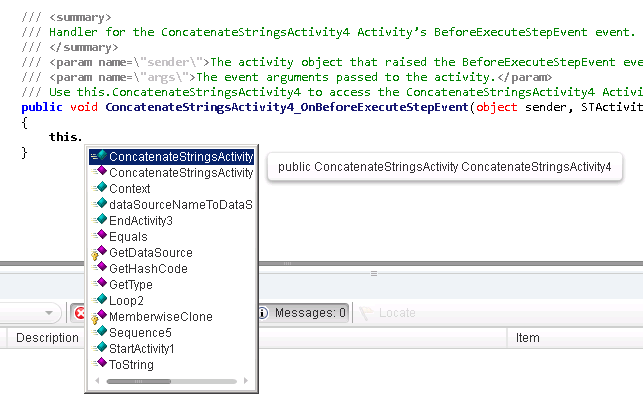
Note: The number of your activity differs between UFT One sessions, depending on what other activities you have previously added to the canvas.
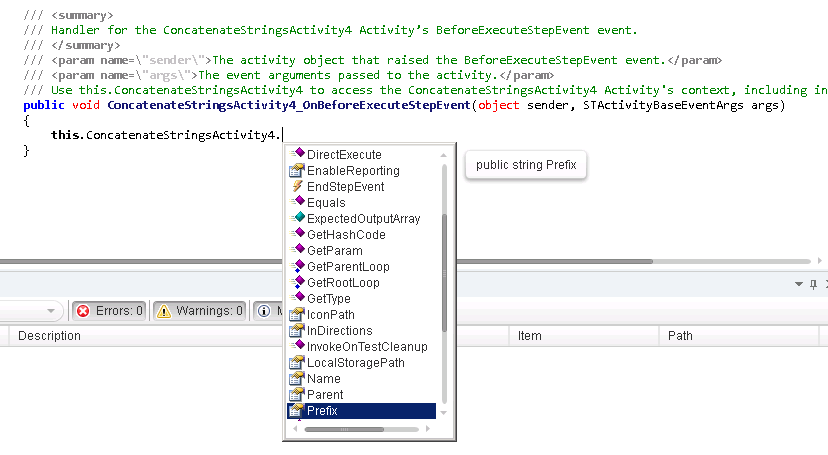
- After the ConcatenateStringsActivity<#>, type a period (.) character. Another autocomplete list is displayed.
-
From the autocomplete list, select the Prefix object and click ENTER:
- After the Prefix object, enter ="Hello " (with a space after Hello). Make sure to enclose the Hello string in quotes to ensure correct syntax.
-
After the "Hello" string, type a semicolon (;) character.
Your event handler code should now look like this:
this.ConcatenateStringsActivity4.Prefix="Hello"; - Click Save
 .
.
Repeat the process described in step 3 to set the Suffix property.
-
Use the same process described above to set the Suffix property to be "World." (with the period after World.)
After you enter the Suffix property in the event handler code, your event handler code should look like this:
this.ConcatenateStringsActivity4.Prefix="Hello "; this.ConcatenateStringsActivity4.Suffix="World."; - Click Save .
Run the test to check if the properties are set correctly.
- In the toolbar, click the Run button
 .
. -
In the Run dialog box, click Run. UFT One runs the test, using the property values provided in your event handler code as the input property values for the test step.
After the test run is complete, you can see the results to ensure that the event handler code provided the property values correctly:
Output pane In the User Logger log in the output pane, you can see the compilation log for the test run. In this compilation log, there is a step for the Prefix and Suffix properties of the Concatenate Strings step:
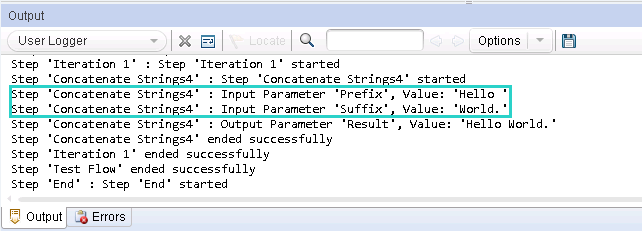
Note also the Output Parameter 'Result' line, which validates that your input properties were taken from the event handler code correctly.
Run results In the run results, if you look in the captured data for the step, you can see the input properties used by the test:
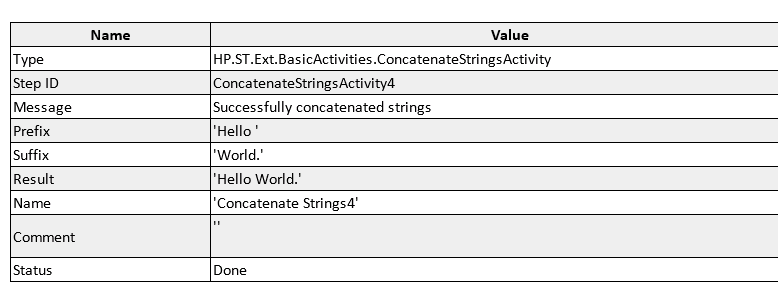
Note also the Result line, which validates that your input properties were taken from the event handler code correctly.