Share this page


Checkpoint and Output Value results
Relevant for: GUI tests only
For checkpoints and output values, the run results provide additional detail relevant for the checkpoint or output value type.
Standard checkpoints
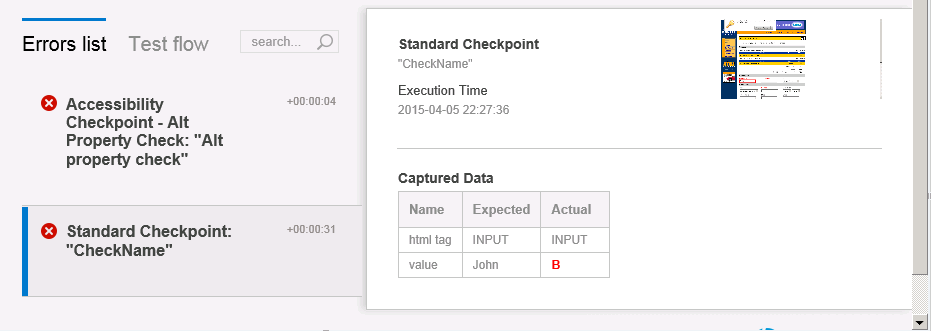
For each standard checkpoint step in your test, the run results display detailed results of the selected checkpoint, including an icon indicating the checkpoint status (Passed or Failed), and the time and date of the checkpoint step.
The summary area also displays a list of details relevant to the checkpoint and the object being checked:
-
The name of the checkpoint
-
The properties being checked
-
A screen capture of the object used in the checkpoint (if available depending on the selected options in the Screen Capture pane of the Options dialog box)
In the following example, the checkpoint to check the name in an input field fails because the expected name is not the entered name:

Accessibility checkpoints
When you include an accessibility checkpoint in your test, the run results display the results of each of the accessibility options you selected (in the Web > Advanced pane of the Options dialog box).
The test flow section of the run results displays a separate step for each accessibility option selected. For example, if you selected all the available options for your accessibility checkpoint, the run results displays them like this:
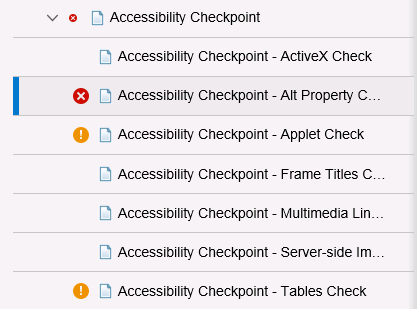
For those options that return warnings or errors, the summary area displays further details. The following example shows the information reported when the ALT property check of your application fails:

Using the information in the run results, you can pinpoint parts of your Web site or Web application that do not conform to the W3C Web Content Accessibility Guidelines. The run results are based on these W3C requirements.
Bitmap checkpoints
The step details display the checkpoint step results, including its status (Passed or Failed), the date and time the checkpoint was run and the portion of the checkpoint timeout interval that was used (if any).
The manner in which you decide to run the bitmap checkpoint is reported differently in the run results:
-
When Comparing Expected Bitmaps with Actual Bitmaps: The step details show the expected and actual bitmaps that were compared during the run session, and a Difference view. When you click any of the images, UFT One opens the captured bitmap in a separate tab, When you click the Difference image, UFT One displays an image that represents the difference between the expected and actual bitmaps. This image is a black-and-white bitmap that contains a black pixel for every pixel that is different in the two images.
-
When Locating Specified Bitmaps in Actual Bitmaps: The step details show the actual bitmap of the runtime object in the application and the source bitmap that UFT One attempted to locate within the object. It may also show the coordinates of a possible candidate that was found, and the image similarity percentage used to find the candidate.
By default, screen captures are available for bitmap checkpoints only if the bitmap checkpoint fails. You can change the conditions for when bitmaps are saved in the run results, using the Save still image captures to results option in the Screen Capture pane (Tools > Options > GUI Testing tab > Screen Capture node) of the Options dialog box.

Note:
-
When comparing bitmaps, if the checkpoint is defined to compare only specific areas of the bitmap, the run results display the actual and expected bitmaps with the selected area highlighted.
-
When comparing bitmaps, if the dimensions of the actual and expected bitmaps are different, UFT One fails the checkpoint without comparing the bitmaps. In this case the View Difference functionality is not available in the results.
-
The View Difference functionality is not available when viewing results generated in a version of QuickTest earlier than 10.00.
-
If the bitmap checkpoint is performed by a custom comparer:
-
UFT One passes the bitmaps to the custom comparer for comparison even if their dimensions are different.
-
The Result Details pane also displays the name of the custom comparer (as it appears in the Comparer box in the Bitmap Checkpoint Properties dialog box), and any additional information provided by the custom comparer.
-
The difference bitmap is provided by the custom comparer.
-
File content checkpoints
The step details display detailed results of the selected checkpoint, including its status (Passed or Failed), and the date and time the checkpoint was run. It also displays the number of lines that were checked, the number of changes found in the checked lines, and the total number of changed lines found in the file (including both the lines that were selected in the checkpoint and the lines that were not).
The details area also specifies whether the checkpoint includes the following options: Match case, Ignore spaces, Verify page count, and Fail checkpoint for added or removed lines.
The Captured Data displays a link enabling you to see the content comparison between the files.
The following example shows the results of checkpoint.

Table and database checkpoints
The run results displayed for a table or a database checkpoint are very similar. The run results display the checkpoint result, including an icon with the checkpoint status (Passed or Failed), the date and time the checkpoint was run.
The summary section also displays the object-relevant details for the checkpoint, including:
-
Verification settings you specified for the checkpoint (in the Checkpoint Properties dialog box)
-
The number of individual tables cells or database records that passed and failed the checkpoint.
-
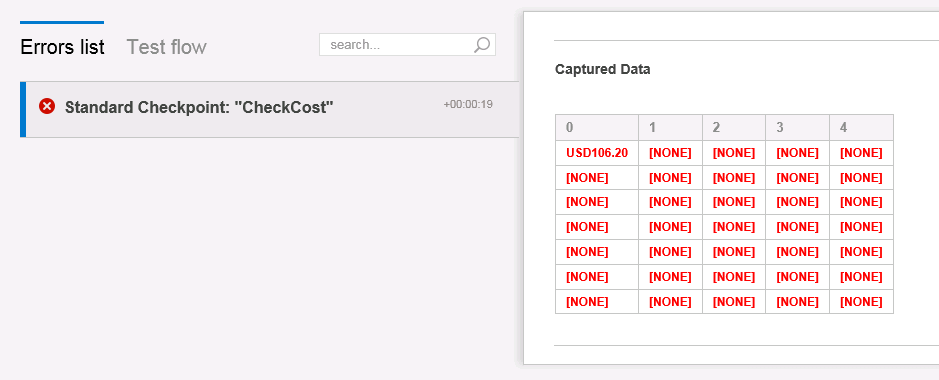
The summary section shows the table cells or database records checked by the checkpoint. If you click the Captured Data grid, a popup window shows another grid which displays the expected values and the actual values.
The following is an example of the results for a table checkpoint:
Text and text area checkpoints
When you add a text or a text area checkpoint, the run results display relevant information for the checkpoint, including an icon indicating its status (Passed or Failed), and date and time of the checkpoint step. In addition, the summary also shows the relevant object details for the checkpoint, including:
-
Expected text and the actual text in the application
-
Verification settings you selected for the checkpoint
-
A screen capture of the object for which you set the text or text area checkpoint
The following is an example of a text area checkpoint for a popup message that is displayed when you click the ORDER button in an application:

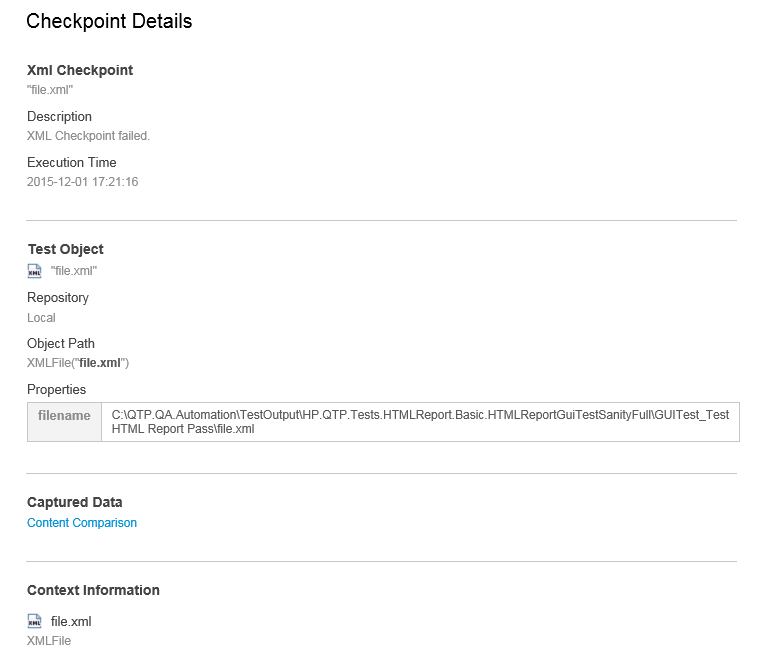
XML checkpoints
The step details display the checkpoint step results. If the checkpoint or schema validation failed, the reasons for the failure are also shown.
You can view details of each check performed in the checkpoint by clicking Content Comparison link. A separate tab opens, displaying details of the checkpoint's comparison.
The following is an example of the results for an XML checkpoint:
 See also: