
Share this page


Manage licenses with the wizard
The Functional Testing License Wizard enables you manage licenses for UFT One or UFT Developer.
Installing licenses requires administrator permissions.
Set seat license mode
Set seat license mode when you have a machine-specific license, based on a specific locking code per computer. For more details, see Seat vs. concurrent licenses.
-
Access the wizard from the Start menu or your <UFT One / UFT Developer installation folder>\bin\HP.UFT.LicenseInstallationWizard.exe.
-
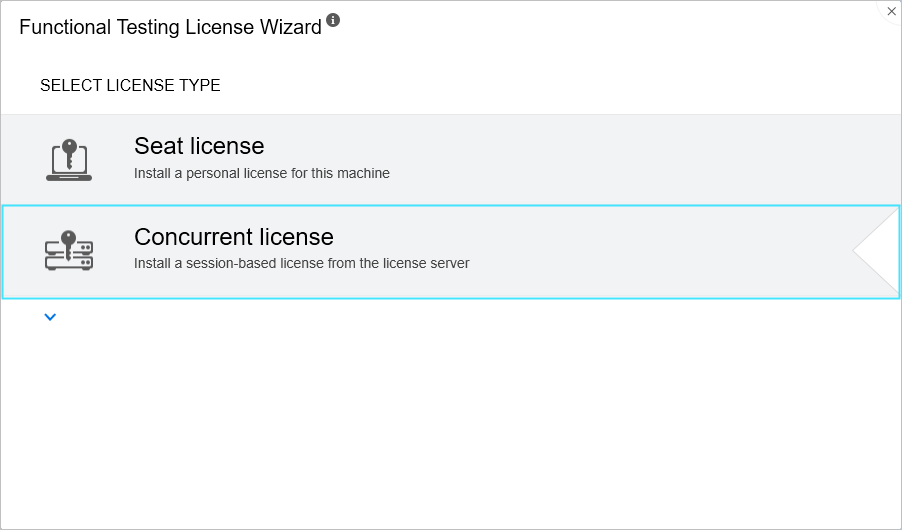
In the License Wizard start screen, select Seat license.
-
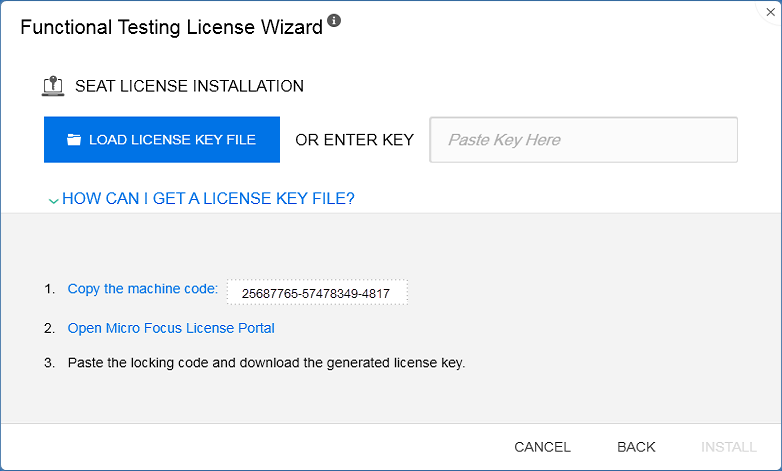
In the Seat License installation screen, do one of the following:
-
Click Load License Key File and select your license key .dat file that you received from your sales representative.
Paste the license key in the edit field.
-
If you don't yet have a license key, follow the instructions in the expanded How can I get a license key file section.

-
-
Verify that the license key is valid, and click Install.
-
When complete, restart UFT One or UFT Developer to apply the new license.

Set concurrent license mode (wizard)
Set the concurrent license mode to have UFT One consume a concurrent license from the AutoPass License Server.
For more details, see Seat vs. concurrent licenses.
Prerequisites
-
You must have a UFT One license installed on the AutoPass License Server.
For details, see the AutoPass License Server online documentation.
-
Make sure you are connected to the network and can access the AutoPass License Server.
Set the concurrent license mode
-
Access the wizard from the Start menu or your <UFT One / UFT Developer installation folder>\bin\HP.UFT.LicenseInstallationWizard.exe.
-
In the License Wizard start screen, select Concurrent license.
-
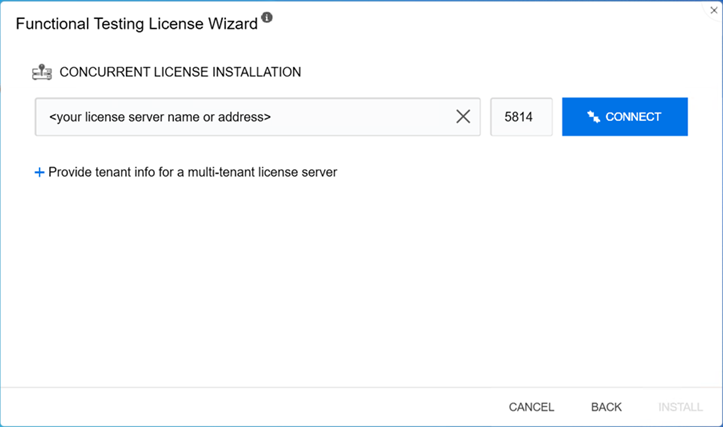
In the Concurrent License Installation screen:
Enter the License Server address and the port number.
Default port = 5814
Note:
-
The address format must be identical to the one used in the Main tab of the License Server Configuration pane. For details, see the AutoPass License Server online documentation.
-
The Concurrent License Installation screen varies between UFT One versions. UFT One version 2021 R1 and earlier: Skip the Add Redundant Server settings. AutoPass no longer supports server redundancy.
-
-
UFT One versions 2022 and later: Provide tenant information if you enter an address of a multi-tenant license server.
Click Provide tenant info for a multi-tenant license server, and enter the tenant ID and authentication token.
For information on how to assign an authentication token to a tenant in AutoPass License Server, see AutoPass License Server online documentation.
-
Click Connect to connect to the License Server.
-
From the product license drop-down list, select the appropriate license and click Install.
- If UFT One or UFT Developer was running while you defined the license consumption, restart it to apply the new license.
Check out and consume a Commuter license
Check out and consume a commuter license
Commuter licenses can be checked out only if your License Server has available concurrent licenses.
-
Prerequisite: Make sure you are connected to the network and can access the AutoPass License Server.
Alternatively, if you cannot access the License Server, see Check out and consume a Remote Commuter license.
-
Access the wizard from the Start menu or your <UFT One / UFT Developer installation folder>\bin\HP.UFT.LicenseInstallationWizard.exe.
-
In the License Wizard start screen, select Additional Options > Commuter License.
-
In the Commuter License Installation screen, enter the License Server address in the following format:
<license server address>:<port>
Default port = 5814
Note: The address format must be identical to the one used in the Main tab of the License Server Configuration pane.
For details, see the AutoPass License Server online documentation.
-
Click Connect to connect to the License Server.
-
After the list of available licenses is displayed, ensure that Available is selected below the License Server address field.
-
From the list of available licenses, select the licenses you need.
-
In the Check out licenses for (days) field, enter the number of days for which you need the commuter license.
Maximum = 365 days
-
Click Check Out, and then Next to define the license consumption.
-
If UFT One or UFT Developer was running while you defined the license consumption, restart it to apply the new license.
When you are done with a license, return it back in to the license server.
This process checks in all of the licenses that are checked out. If you still need some of these licenses, check them out again.
-
Prerequisite: Make sure you are connected to the network and can access the License Server.
Alternatively, if you cannot access the License Server, see Check out and consume a Remote Commuter license.
-
Access the wizard from the Start menu or your <UFT One / UFT Developer installation folder>\bin\HP.UFT.LicenseInstallationWizard.exe.
-
In the License Wizard start screen, select Additional Options > Commuter License.
-
In the Commuter License Installation screen, the License Server address should already be displayed and connected.
If needed, enter the License Server address in the following format:
<license server address>:<port>
Default port = 5814
Note: The address format must be identical to the one used in the Main tab of the License Server Configuration pane.
For details, see the AutoPass License Server online documentation.
-
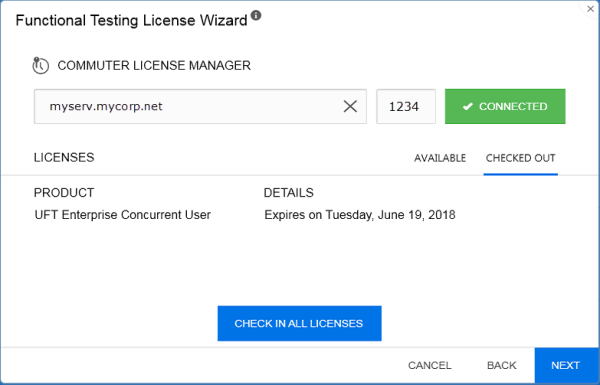
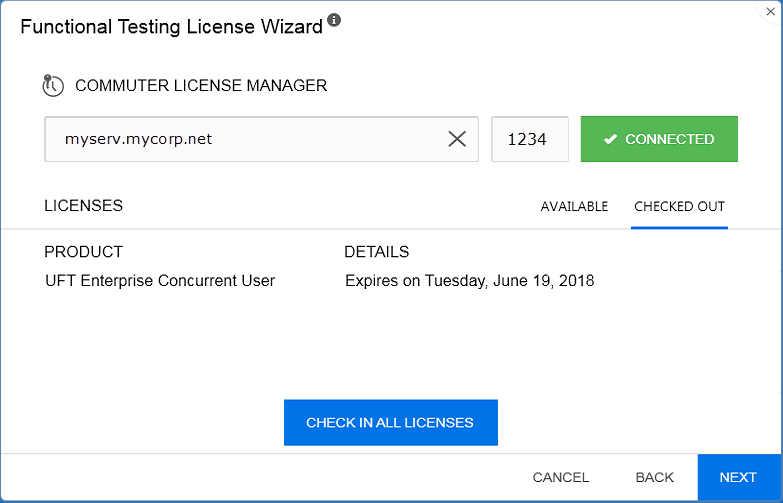
In the area that lists the licenses, ensure that Checked Out is selected.
For example:
-
Click Check In All Licenses, and then Next. The list of checked out licenses is cleared.
Check out and consume a Remote Commuter license
Check out and consume a remote commuter license
Remote commuter licenses can be checked out only if your License Server has available concurrent licenses.
-
Access the wizard from the Start menu or your <UFT One / UFT Developer installation folder>\bin\HP.UFT.LicenseInstallationWizard.exe.
-
In the License Wizard start screen, select Additional Options > Remote Commuter license.
-
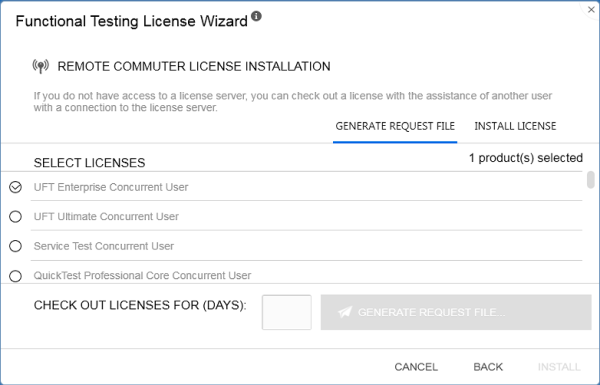
In the Remote Commuter License Installation screen, ensure that Generate Request File is selected.
-
From the list of available licenses, select the license you need.
-
In the Check out licenses for (days) field, enter the number of days for which you need the commuter license.
Maximum = 365 days
-
Click Generate Request File.
-
Click the link that appears below this button to open the folder containing the request file.
Send the generated .lcor request file to a License Server administrator or to a user with access permissions to the License Server.
The other user must access the Licensing Server to check out and send you a license key file.
-
When you receive the license key file, save it locally.
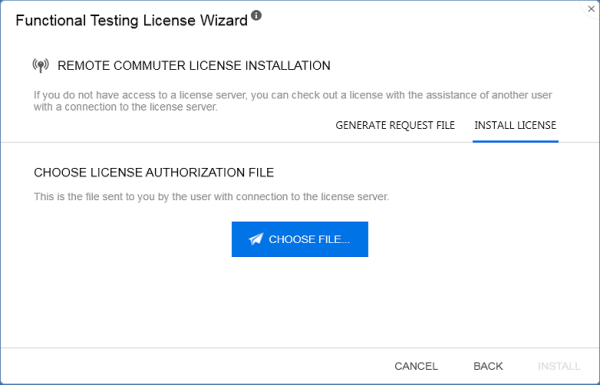
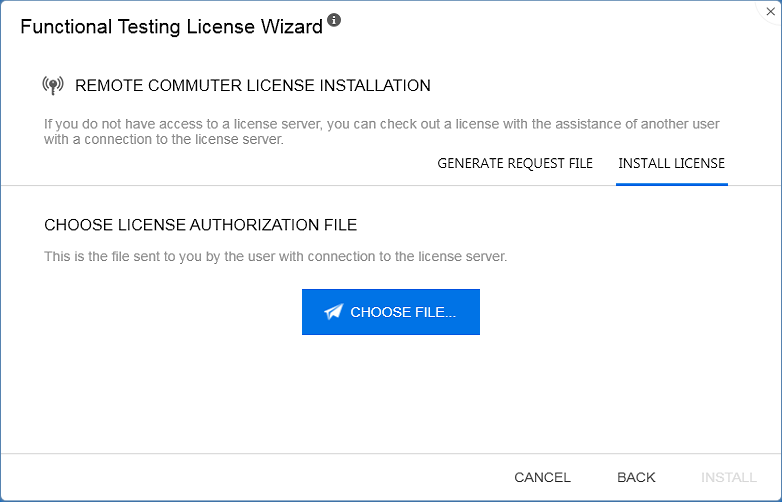
Click Install License, and click Choose File to browse to the text file you received.
-
Click Install to install the license.
-
If UFT One or UFT Developer was running while you defined the license consumption, restart it to apply the new license.

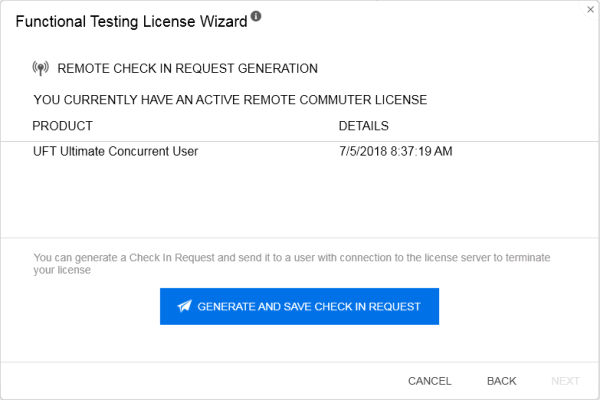
Return a Remote Commuter license
Perform this procedure after a License Server administrator has checked out your license.
-
Access the wizard from the Start menu or your <UFT One / UFT Developer installation folder>\bin\HP.UFT.LicenseInstallationWizard.exe.
-
In the License Wizard start screen, select Additional Options > Remote Commuter license.
-
In the Remote Commuter License Installation screen, ensure that Generate Request File is selected.
-
In the Generation screen, click Generate and Save Check In Request, and save the .lcir check in request file.
-
Click Next to uninstall the license.

The license wizard reports that the remote commuter license is uninstalled. UFT One or UFT Developer reverts to the previous license type as the active license.
 See also:


