Share this page


Object Identification Center
The Object Identification Center (OIC) is a tool that enables you to create unique and robust identifications for application objects.
Note: The OIC is available with trial and design-type licenses.
Overview
The OIC lets you spy objects in your application, determine how to identify those objects, and generate code to use in your scripts.
When opened from an application model, you can also use it to add test objects to the application model. For details, see Add objects to your application model.
The OIC is set up for single object spy mode. In this mode, you spy objects one at a time. However, you can also work in multi-object spy mode, meaning that you spy multiple objects in your application before returning to the OIC for editing and code generation. You can easily switch between modes in the settings. For details, see OIC settings.
By default, the OIC automatically selects a set of recommended test object properties and values to uniquely identify objects. You can change the default in the OIC settings, or use the Apply recommended identifications / Clear selections buttons for a particular object, when necessary.
You can customize object identification and change the properties and values with which to identify objects. When you do, use the Validate button to make sure that your identification is unique.

Prerequisites for spying a Web-based application
Before you begin using the OIC, review the following steps:
- Make sure your browsers are set up to work with UFT Developer. For details, see Set up web browsers and controls.
- Open the browser only after the UFT Developer engine is running.
- If you are working with Microsoft Edge Legacy, you must open Edge using Edge Agent for Functional Testing, accessible from the Start screen.
- (Optional) Configure how UFT Developer identifies objects. For details, see Customize how to identify objects.
Open the OIC
The OIC is included in the UFT Developer IDE plugin and can be opened from the UFT Developer menu, the IDE toolbar, or in standalone mode.
From the UFT Developer menu
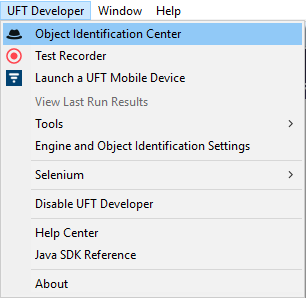
Click UFT Developer > Object Identification Center.
In standalone mode
| Windows |
Run OICLeanFT.exe from <UFT Developer installation>\Tools From the Start menu, click Micro Focus > UFT Developer > Object Identification Center. Note: The Start Menu path may be differ depending on the Windows version you are using. |
| Linux | Run ./oic-leanft from /opt/uftdeveloper/Tools |
| Mac | Run ./oic-leanft from Applications/UFTDeveloper/Tools |
Spy objects in your application
Spy objects in your application to obtain identification properties for the spied test object.
Select how you want to spy:
To spy in single object mode
-
Launch the OIC, as described in Open the OIC.
If you opened the OIC from your IDE, the IDE is minimized and the OIC window opens.
-
(Optional) Edit the default settings. For details, see OIC settings.
-
In the OIC window, click the Start spying
 button.
 The OIC window is minimized, and will be displayed after you have selected an object from a supported application.
Tip: In windows, all desktop objects are supported. In Linux and Mac, you must select an object from a supported technology. For a list of supported technologies, see Technologies.
-
Hover over objects in your application. Each object you point to in your application is highlighted, and a tooltip displays basic information about the object.
-
To temporarily pause the spying operation, press Ctrl (or command in Mac). This is useful, for example, if you want to use your mouse to bring another application into focus.
-
To stop or cancel the spying operation, press Esc. In Linux or Mac, the Esc functionality requires that a supported application or the spy window be in focus. To bring the spy window into focus, click its body and not its title bar.
-
-
Click the object in your application to capture it in the OIC.
The OIC window appears, displaying the object in edit mode. For details, see Edit object identification.

- Click an object display name in the object hierarchy to edit it, as required. The generated code will include the name you entered.
- To make sure that you have the object that you intended, hover on the object in the left pane, and click the Highlight
 button next to the object to highlight it in the AUT.
 - To customize the way objects are identified, see Edit object identification.
- To capture an object image, see Capture an image of an object.
- To generate code, see Generate test object identification code.
To spy in multi-object mode
-
Launch the OIC, as described in Open the OIC.
If you opened the OIC from your IDE, the IDE is minimized and the OIC window opens.
-
In the OIC, click the Settings
 button, and then select Allow multi-object spying.
 -
Click the Start spying
button. The OIC window is replaced by the OIC widget
 . Once you have completed selecting your test objects, click the OIC widget to return to the OIC window.
 -
Hover over objects in your application. Each object you point to in your application is highlighted, and a tooltip displays basic information about the object.
-
To temporarily pause the spying operation, press Ctrl (or command in Mac). This is useful, for example, if you want to use your mouse to bring another application into focus.
-
To stop or cancel the spying operation, press Esc. In Linux or Mac, the Esc functionality requires that a supported application or the spy window be in focus. To bring the spy window into focus, click its body and not its title bar.
-
-
Click objects in your application to capture them in the OIC.
Note: Wait until the spinner in the OIC widget completes spinning before selecting another object.
The number of objects captured is displayed on the OIC widget. When you are done, click the OIC widget.
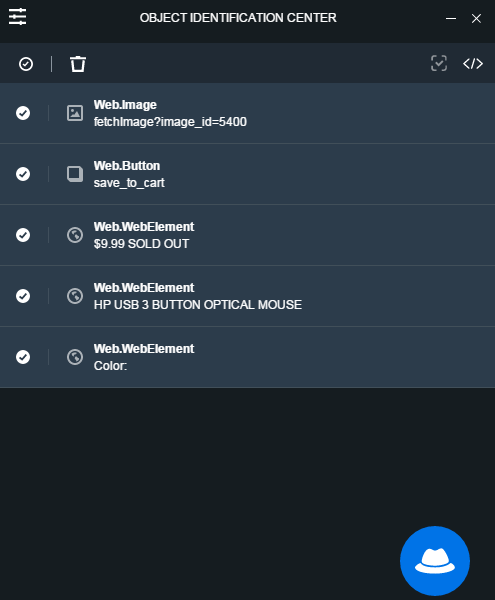
The OIC window appears, displaying the list of objects you selected.
-
In the list, click object display names to edit them, as required. The generated code will include the names you entered.
-
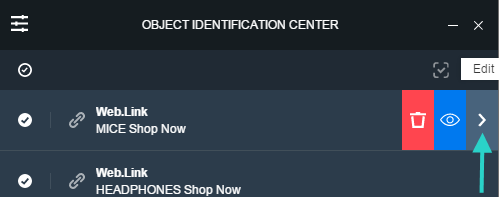
To make sure that you have the object that you intended, click the Highlight
button next to the object to highlight it in the AUT. -
To customize the way objects are identified, see Edit object identification.
Note: In edit mode, you can switch to a different object in the hierarchy (such as a parent object). If you choose to return to the list view (click the Back button), then you will be prompted to select which object you want to s[display in the list view: the original one or the new one that you selected.
-
To capture an object image, see Capture an image of an object.
-
UFT Developer 15.0.1 and later: To remove multiple objects from the list, select their rows and click Delete
 .
. -
To resume spying:
UFT Developer 15.0.1 or later
UFT Developer 15.0 To add objects to the spy, click the Spy additional objects button.

To add more objects, click the Spy additional objects button (hover on the Start spying button to display it).

To clear the objects in the current list and start a new spying session, click the Start spying button.
-
To generate code, see Generate test object identification code.
Edit object identification
By default, the OIC includes recommended identifications for objects which are unique. You can choose to disable this capability or override it at any time, if you wish to apply customized identification.
-
If you are in single object spy mode, the OIC automatically opens on the edit page.
In multi-object spy mode, hover over the object and click Edit.
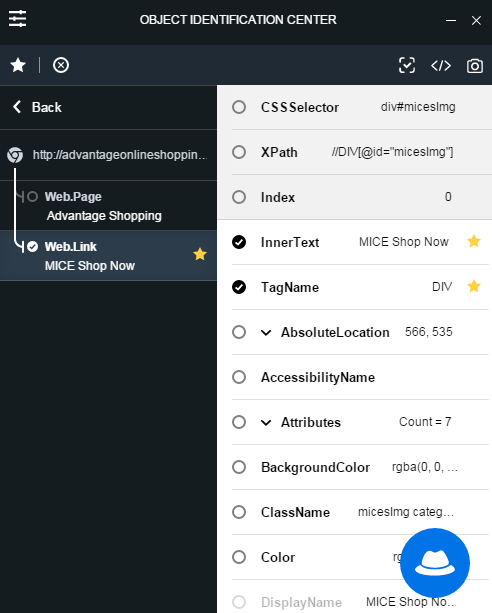
The left pane displays the object hierarchy. Stars in the left pane indicate the objects that UFT Developer recommends as the hierarchy to identify the object that is currently selected in the OIC.
The right pane displays the full list of supported identification properties for the selected object and the current values captured from your application. Stars in the right pane indicate the properties that UFT Developer recommends as the properties to identify your object.
-
Select the properties to identify the object and edit their values as required.
-
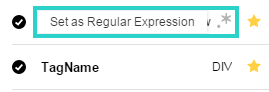
To enter regular expression values for string properties, click the Set as RegEx star to the right of the value box. For more guidelines on how to specify regular expressions, see Regular expression guidelines.
- Use CSSSelector or XPath instead of using the object properties, when required. For more details, see Describe objects using XPath or CSS expressions.
- Use the Clear selections
 button and the Apply recommended identifications
  button to easily apply or clear the UFT Developer recommended identifications, without changing your OIC settings.
-
-
Click the Validate
 button on the OIC toolbar to validate your new test object identification.
All of the objects that match your description are highlighted in your application. A message in the OIC tells you how many objects match the description.
If no objects were identified, or if multiple objects were identified, adjust the set of properties that you selected and their values, and validate again.
Generate test object identification code
In multi-object spy mode, you must select at least one object from your list in order to generate code.
In edit mode, the code will be generated for the object you are editing.
-
In multi-object spy mode, select the objects for which you want to generate code. Click Select all to select all the objects in the list.
-
In the OIC toolbar, click the Generate code to clipboard
 button.
The generated code is copied to the clipboard.
By default, the code is generated in the language primarily used by the IDE you are working in. However, by selecting an alternative Clipboard Code Language in the OIC Settings, you can generate the code in other languages. This is helpful if you want to share test object code with UFT Developer testers who are working in another IDE.
-
Paste the generated code into your test script.
- By default, object identifications are generated without the full SDK hierarchy. If you are using more than one SDK technology in your test, you may need to resolve ambiguous references.
- When pasting Web-based generated identifications, the browser parent object is called browser. If you assigned a different name to your browser test object, modify as needed in the pasted code. Similarly, you may want to replace the pasted parent identifications for Windows-based objects with previously defined variables for those objects.
Capture an image of an object
Capture an image of the object in your application that corresponds to the currently selected object in the OIC hierarchy tree, and save the image to the file system. This can be useful for image verification.
You can capture images for one object at a time.
Make sure no other application is covering any part of your application while performing the image capture.
-
In multi-object spy mode, select an object from the list, and then click Edit.
The object opens in edit mode.
- In the OIC toolbar, click the Capture object image
 button.
 - Save the file.
Add objects to your application model
Add object identifications to your application model using the OIC.
-
Open an existing application model. For details, see Application models.
-
In the application model Designer window, click the Object Identification Center
 button.
 -
Spy objects in your application, as described in Spy objects in your application.
-
When you are ready to add the objects to your application model, click the Add object to Application Model
 button.
 - To check if an object already exists in the application model, click the Locate object in Application Model
 button.
OIC settings
This section includes information on customizing OIC behavior.
(As opposed to customizing test object identification where you can specify identification properties for each object type, as described in Customize how to identify objects.)
In the OIC, click the Settings button.
The following table describes the settings:
| Option | Description |
|---|---|
| Clipboard Code Language |
By default, Generate code to clipboard generates test object description code in C# or Java, depending on the IDE you are using. To generate the code in JavaScript, select JavaScript. If you opened the OIC in standalone mode, all languages are available. |
| Apply recommended identifications |
Automatically selects the set of recommended test object properties and values that uniquely identify an object. A star icon is displayed next to the recommended objects and properties. |
| Add page objects to application model |
When working with Web applications, select this option to include the Page object in the hierarchy when adding an object to the application model. The Page objects are not necessary for object identification, but they are helpful in that they help to structure your application model according to the pages in your Web application. |
| Allow multi-object spying |
Spy multiple objects in your application before returning to the OIC for editing and code generation. |
 See also: