
Share this page


Exercise 1: Create an account
This exercise guides you through automating the process of creating a new Advantage Online Shopping account using OpenText Functional Testing for Developers.
Step 1: Launch your IDE
Start by launching the supported IDE of your choice. After the IDE opens, notice:
-
The Functional Testing for Developers menu in your IDE. Use this menu to access windows such as the Object Identification Center (OIC), OpenText Functional Testing Lab, and run results.
This is an example of the menu displayed in Eclipse:
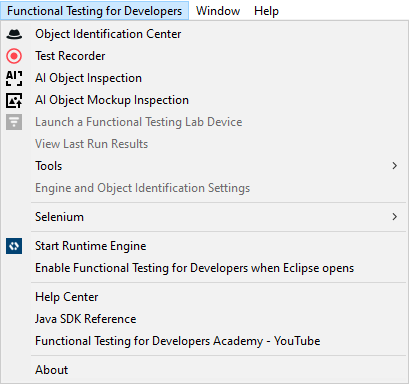
The View Last Run Results option is enabled only after you've run a test.
-
If you see the runtime engine icon
 in your system tray, this indicates that the runtime engine is running.
The runtime engine is launched when you select an identification, recorder, or inspection option from the menu.
Alternatively, you can manually start the runtime engine or select that in the future it be enabled when you open your IDE.

Step 2: Configure your settings
-
If the runtime engine is not running, select Start Runtime Engine to run it.
-
Open the Engine and Object Identification Settings from the Functional Testing for Developers menu in your IDE, or from the system tray menu (right-click the runtime engine icon
and select Settings). -
On the Engine tab, under Add-ins, configure settings to use the Web Add-in only.
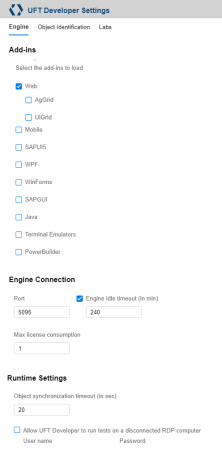

Save your changes to restart the runtime engine with the Web Add-in.
Step 3: Create a new testing project
Prerequisite for Visual Studio and NUnit:
Install the NUnit framework. For details about supported versions, see the Support Matrix.
-
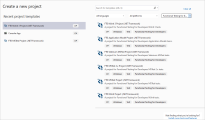
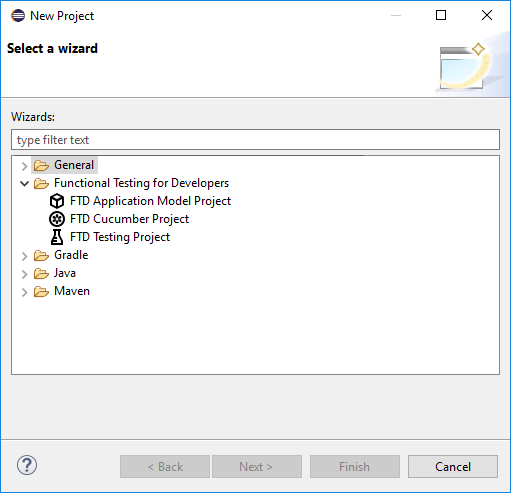
Create a new testing project or module using one of the FTD project templates for your IDE. Give your project a meaningful name.
-
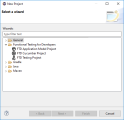
In Eclipse, use the Functional Testing For Developers > FTD Testing Project template.
-
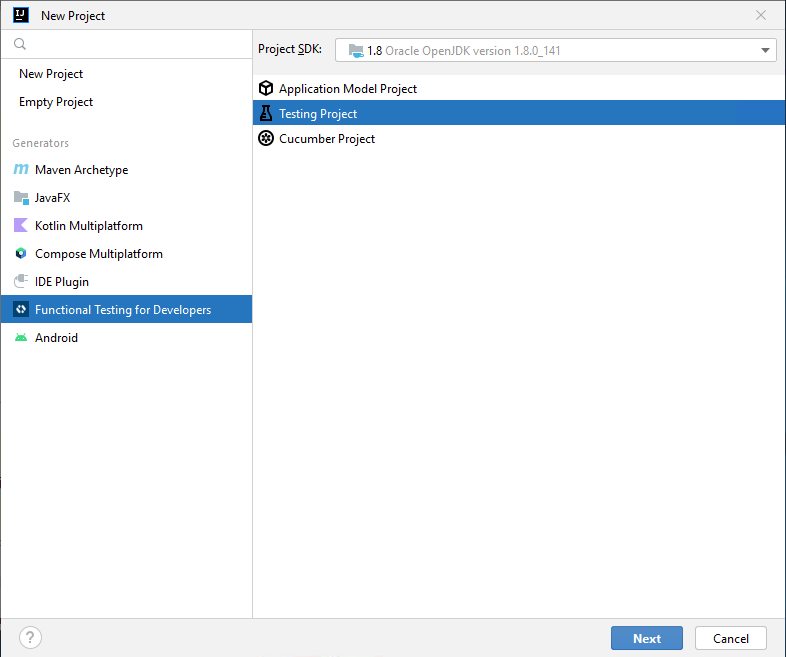
In IntelliJ IDEA, use the Functional Testing For Developers > Testing project template.

-
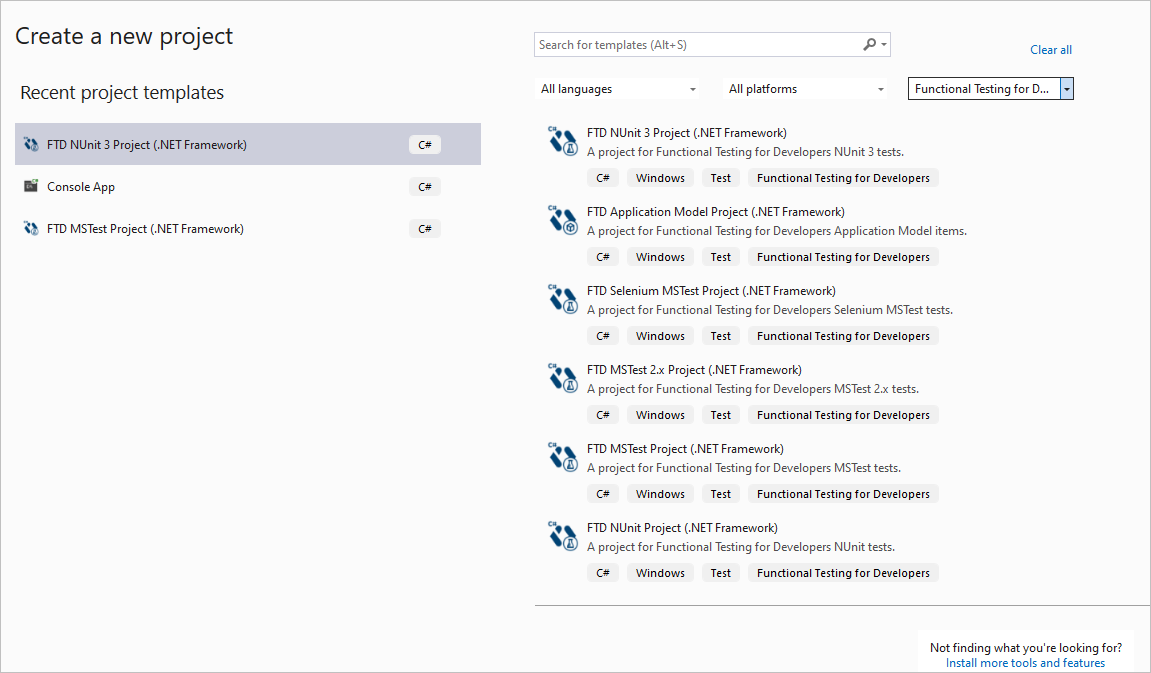
In Visual Studio, use one of the Functional Testing For Developers > FTD xx project templates.
When using Visual Studio and NUnit
-
If NUnit 2.6x is installed, use the FTD NUnit template.
-
If NUnit 3.x is installed, use the FTD NUnit 3.0 template.
-
-
Your project is created with a new class, using the standard format of the unit testing framework for the template you selected.
This class contains a test method with the Test annotation (highlighted in the examples below), which you use to include the test logic.
Rename this test method with a more meaningful name.
For example:
In C#
The following code is generated using the FTD NUnit template. Sample code may differ when using other templates.
using System;
using NUnit.Framework;
using HP.LFT.SDK;
using HP.LFT.Verifications;

namespace FTD_Tutorial
{
	[TestFixture]
	public class FTDTest : UnitTestClassBase
	{
		[TestFixtureSetUp]
		public void TestFixtureSetUp()
		{
			// Setup once per fixture
		}

		[SetUp]
		public void SetUp()
		{
			// Before each test
		}

		[Test]
		public   void   MyTest()
		{
		}

		[TearDown]
		public void TearDown()
		{
			// Clean up after each test
		}

		[TestFixtureTearDown]
		public void TestFixtureTearDown()
		{
			// Clean up once per fixture
		}
	}
}
In Java
package com.mycopmany.mypackage;

import org.junit.After;
import org.junit.AfterClass;
import org.junit.Before;
import org.junit.BeforeClass;
import org.junit.Test;
import com.hp.lft.sdk.*;
import com.hp.lft.verifications.*;
import unittesting.*;

public class FTDTest extends UnitTestClassBase {

	public FTDTest() {
		//Change this constructor to private if you supply your own public constructor
	}

	@BeforeClass
	public static void setUpBeforeClass() throws Exception {
		instance = new FTDTest();
		globalSetup(FTDTest.class);
	}

	@AfterClass
	public static void tearDownAfterClass() throws Exception {
		globalTearDown();
	}

	@Before
	public void setUp() throws Exception {
	}

	@After
	public void tearDown() throws Exception {
	}


	@Test
	public   void   myTest() throws GeneralLeanFtException {

	}

}
The following libraries are automatically referenced in the project:
- The OpenText Functional Testing for Developers library
- The unit testing framework library (such as NUnit or JUnit)
Step 4: Add code to open the Advantage Online Shopping site
In the blank test method, add code to launch the browser of your choice using OpenText Functional Testing for Developers's SDK for your IDE.
Then add code to navigate to the Advantage Online Shopping URL: http://www.advantageonlineshopping.com.
Tip: The examples below open Google Chrome. If you need to, update the code to launch a different browser.
In C#
//Include OpenText Functional Testing for Developers SDK's Web namespaceusing HP.LFT.SDK.Web; ... [Test] public void MyTest() { //Launch Chrome IBrowser browser = BrowserFactory.Launch(BrowserType.Chrome); //Navigate to "Advantage Online Shopping" browser.Navigate("http://www.advantageonlineshopping.com"); }
In Java
//Import OpenText Functional Testing for Developers SDK's Web package
import com.hp.lft.sdk.web.*;

…

@Test
public void myTest() throws GeneralLeanFtException {

	//Launch Chrome
	Browser browser = BrowserFactory.launch(BrowserType.CHROME);

	//Navigate to "Advantage Online Shopping"
	browser.navigate("http://www.advantageonlineshopping.com");
}
Step 5: Add code to click the User Account button
Add code to click the  USER icon at the top right of the Advantage Online Shopping site.
Use the OIC to obtain a unique identification for the USER object.
-
Launch your browser.
Note: If this is the first time you've launched your browser after installing OpenText Functional Testing for Developers, you are prompted to enable the OpenText Functional Testing Agent extension. Enable the agent to continue.
-
Navigate to the Advantage Online Shopping demo application site: http://www.advantageonlineshopping.com.
-
In your IDE, open theObject Identification Center (OIC) by selecting Object Identification Center from the Functional Testing for Developers menu, or by clicking the Object Identification Center
 button in the IDE toolbar.
Obtain a unique identification for the
USER object:-
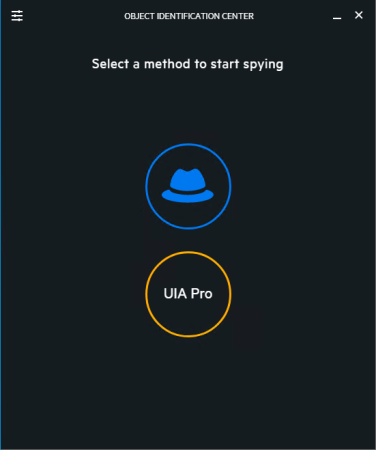
In the OIC, click Start spying:
Then, hover over the
USER object in the top-right corner of your browser window to highlight it. Click it to capture the object properties in the OIC.The following image shows a sample desktop with the browser window and OIC displayed, and the
USER object highlighted.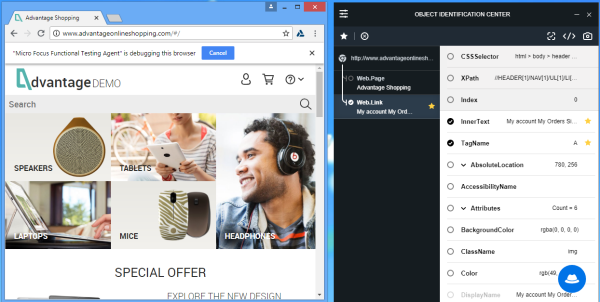
-
In the OIC, click the Recommended tab.
Note that some properties are starred. The stars indicate a recommended set of properties and values to use for uniquely identifying the spied object. There is only one object on the current page in the application that matches the starred properties and their current values.
-
Click the Highlight
 button to see the USER object identified in your browser window.
 -
Click Generate Code to Clipboard
 , and paste the code into your test script.
Your identification code should look like this:
In C#
browser.Describe<ILink>(new LinkDescription
{
	TagName = @"A",
	InnerText = @"My account My Orders Sign out "
});
In Java
browser.describe(Link.class, new LinkDescription.Builder()
			.tagName("A")
			.innerText("My account My Orders Sign out ").build());
Tip:
-
Your code may differ slightly as it is based on the properties recommended by the OIC for your environment.
-
In addition to using the recommendations in the OIC, you can customize the identification using the Edit mode. Click the Edit
 button to switch to Edit mode and select the properties you want to use to identify the object. Then, test the identification by clicking the Highlight button. For more details, see Object Identification Center.
-
-
-
In your test, add code to click the
USER object.Your test should now look something like this:
In C#
browser.Describe<ILink>(new LinkDescription
{
	TagName = @"A",
	InnerText = @"My account My Orders Sign out "
}).Click();
In Java
browser.describe(Link.class, new LinkDescription.Builder()
			.tagName("A")
			.innerText("My account My Orders Sign out ").build()).click();


Step 6: Add code to start creating a new account
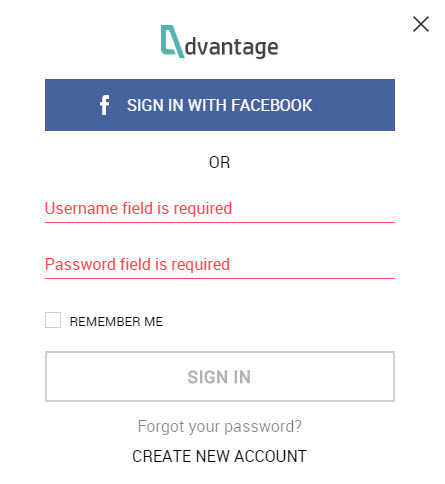
When the USER object is clicked, the login dialog box opens. Add code to click CREATE NEW ACCOUNT in this dialog box.
Use the same steps you performed earlier in Step 5: Add code to click the User Account button.
Your code should look like this:
In C#
browser.Describe<ILink>(new LinkDescription
{
	TagName = @"A",
	InnerText = @"CREATE NEW ACCOUNT"
}).Click();
In Java
browser.describe(Link.class, new LinkDescription.Builder()
			.tagName("A")
			.innerText("CREATE NEW ACCOUNT").build()).click();
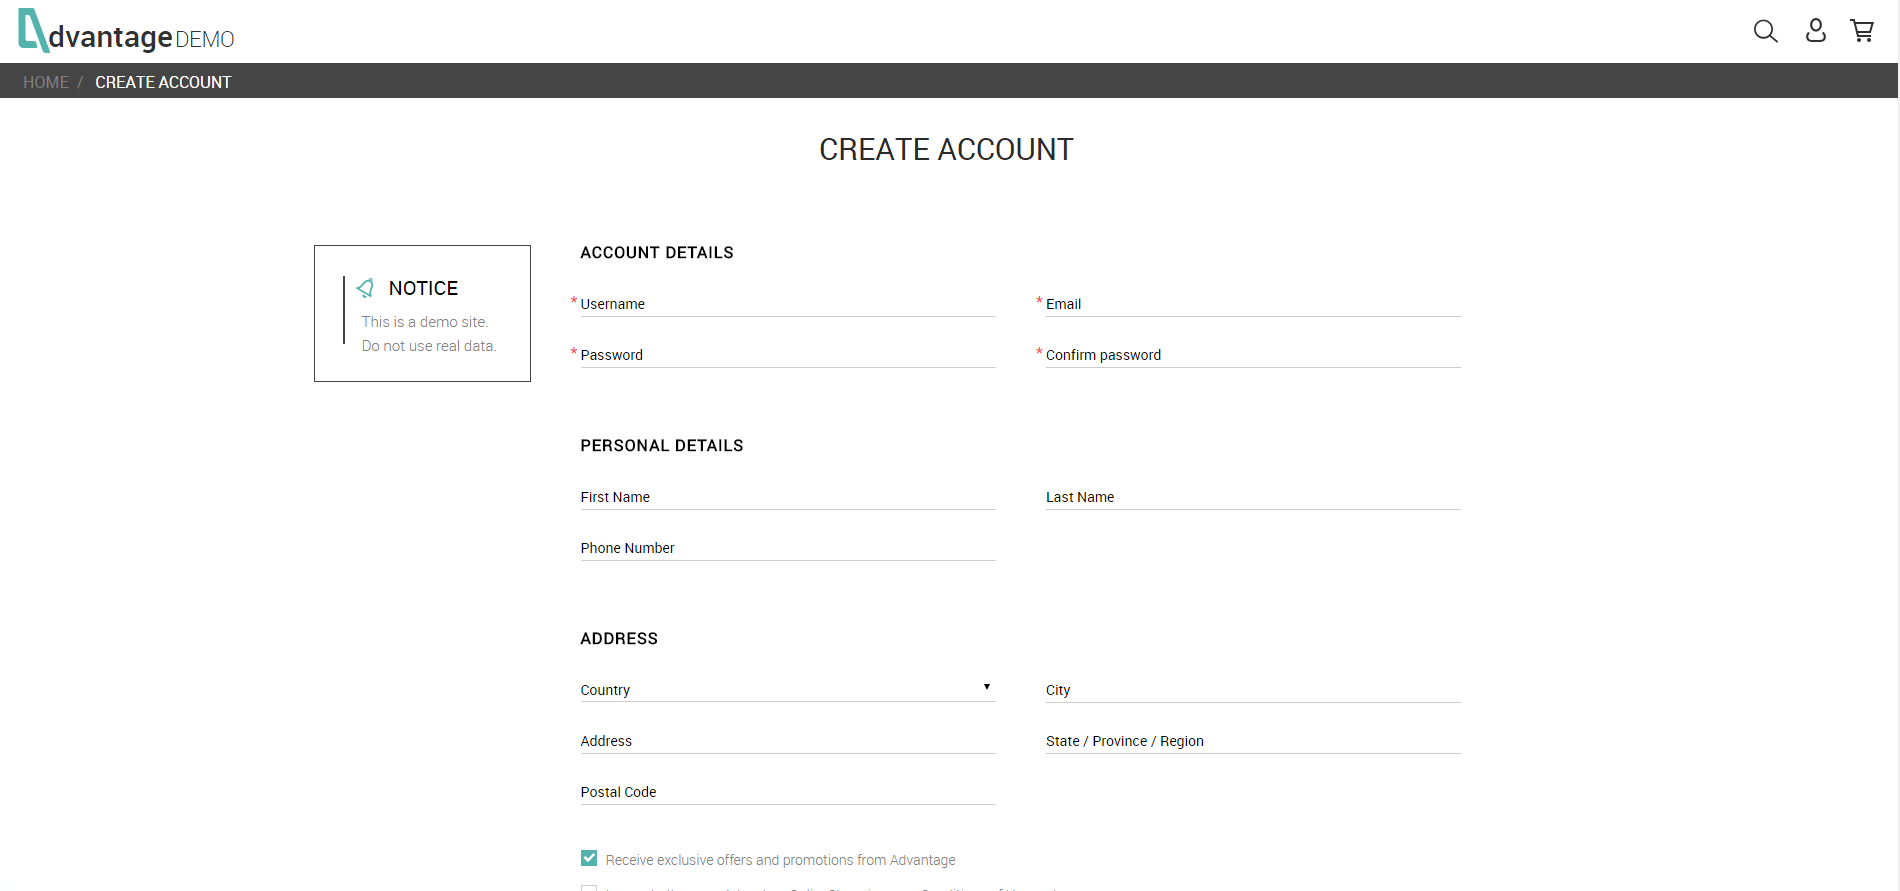
Step 7: Add code to fill in the CREATE ACCOUNT form
Extend your test method code to fill in the user details in the CREATE ACCOUNT page that opens when the CREATE NEW ACCOUNT button is clicked in the previous step.
This time, use application models instead of including the object's identification code directly in the script.
Application Models enable you to model your application objects and then reference them from your scripts. The modeled objects can be reused in different scripts and by different users, which can be helpful when maintaining tests.
Add objects to an application model and use them in test steps:
-
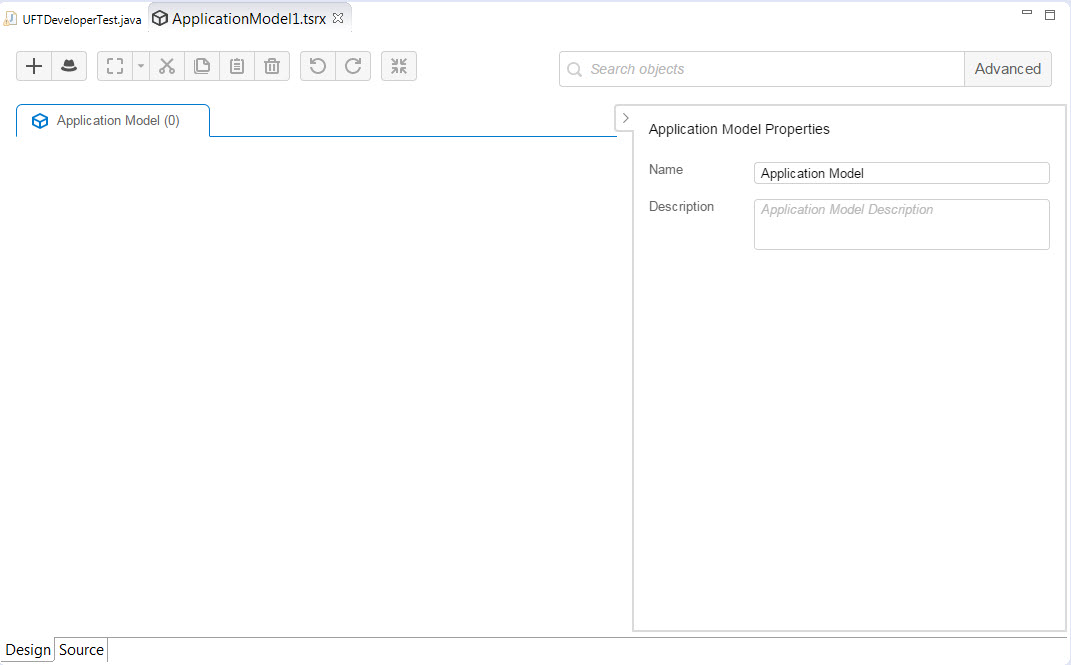
Create a new application model.
IDE Instructions Visual Studio In the Solution Explorer, right-click your test project and select Add Functional Testing For Developers > Application Model.
Use the application model name suggested by Visual Studio (ApplicationModel1).
Eclipse - Right-click the package you created when you created the project, and select File > New > Other > Functional Testing For Developers > FTD Application Model Item.
- Name the application model ApplicationModel1.
The item (.tsrx) is added under the package folder and a corresponding .java file is generated under the appmodels folder.
IntelliJ IDEA In the project:
-
Right-click the package that includes your test class.
- Select New > FTD Application Model item.
- Name the item ApplicationModel1.
The ApplicationModel1.tsrx item is added under the package folder and a corresponding .java file is generated under the appmodels folder.
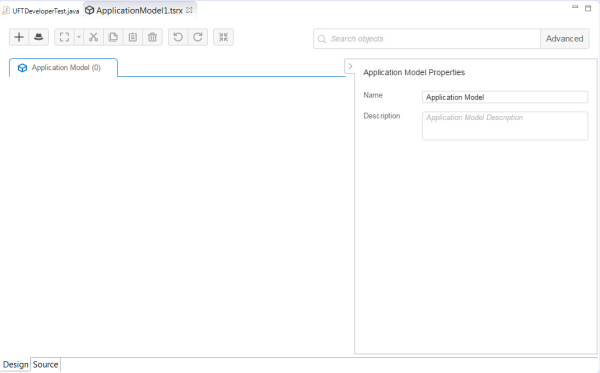
The Application Model Editor opens in your IDE, and you can use it to model the required objects, as described in the next step.
For example, in Eclipse:
-
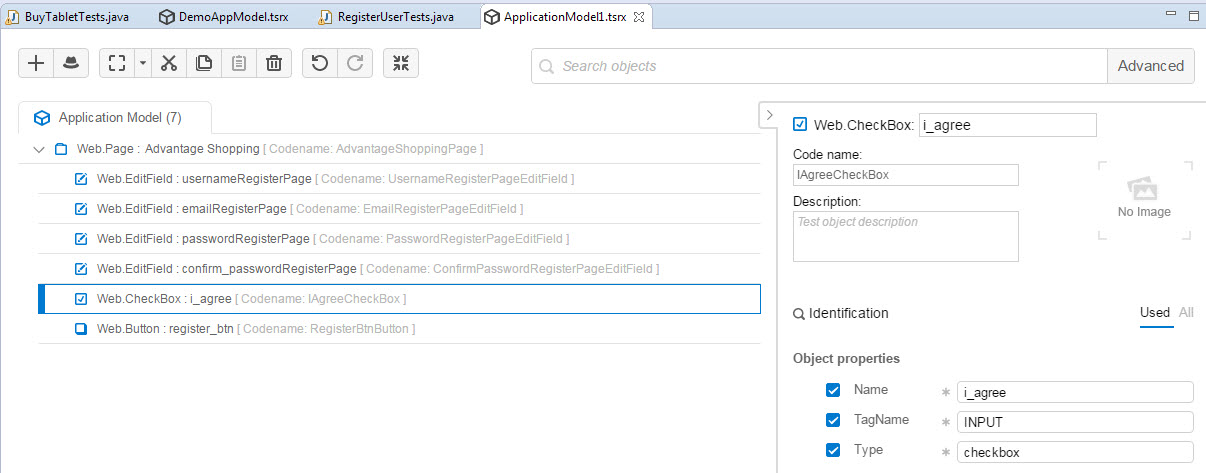
Use the OIC to add the following objects to the application model:
- User name, Email, Password, and Confirm password fields
- I agree to the Advantage.com Conditions of Use and Privacy Notice option
- REGISTER button
From the Application Model editor, click the
 button to open the OIC in the Application Model editor.
Tip: When opened from the Application Model editor, the OIC has an additional button (
 ) to add objects to your application model. You can close the other OIC instance.
For each of the objects mentioned above:
-
Spy the object in the application.
-
At the bottom of the OIC, click the Add object
button.
If you are using Eclipse, save your application model.
Click to view a sample application model:

Tip: Alternatively, see Object Identification Center.
-
Close the OIC. Then use the test objects from the application model in your script to perform the following steps:
- Set the values in the edit fields.
- Select the I agree ... option.
- Click the REGISTER button.
Your script should look similar to the samples below:
In C#
ApplicationModel1 appModel = new ApplicationModel1(browser);
appModel.AdvantageShoppingPage.UsernameRegisterPageEditField.SetValue("demoUser");
appModel.AdvantageShoppingPage.PasswordRegisterPageEditField.SetSecure("596f1409b156a60dc50592de897863e8d552");
appModel.AdvantageShoppingPage.ConfirmPasswordRegisterPageEditField.SetSecure("596f1409b156a60dc50592de897863e8d552");
appModel.AdvantageShoppingPage.EmailRegisterPageEditField.SetValue("demoUser@default.com");
appModel.AdvantageShoppingPage.IAgreeCheckBox.Set(true);
appModel.AdvantageShoppingPage.RegisterBtnButton.Click();
In Java
ApplicationModel1 appModel = new ApplicationModel1(browser);
appModel.AdvantageShoppingPage().UsernameRegisterPageEditField().setValue("demoUser");
appModel.AdvantageShoppingPage().PasswordRegisterPageEditField().setSecure("596f1409b156a60dc50592de897863e8d552");
appModel.AdvantageShoppingPage().ConfirmPasswordRegisterPageEditField().setSecure("596f1409b156a60dc50592de897863e8d552");
appModel.AdvantageShoppingPage().EmailRegisterPageEditField().setValue("demoUser@default.com");
appModel.AdvantageShoppingPage().IAgreeCheckBox().set(true);
appModel.AdvantageShoppingPage().RegisterBtnButton().click();
Note:
-
ApplicationModel1 is the name you gave the application model when you created it (Eclipse/IntelliJ).
It is also the class name defined for the application model in the right pane of the Application Model editor when the Application Model tab is selected (Visual Studio).
Your application model is dynamically compiled into a class of the same name, which, in turn, is used in your code.
-
The browser argument passed to ApplicationModel1 in the first line of code is the one you created at the beginning of the script. This argument enables you to reuse the same application model with different browsers.
Below is sample code of the entire test.
In C#
public void MyTest()
{
	//Launch Chrome
	IBrowser browser = BrowserFactory.Launch(BrowserType.Chrome);

	//Navigate to "Advantage Online Shopping"
	browser.Navigate("http://www.advantageonlineshopping.com");

	//Click the User Account button
	browser.Describe<ILink>(new LinkDescription
	{
		TagName = @"A",
		InnerText = @"My account My Orders Sign out "
	});

	//Click the Create New Account link
	browser.Describe<ILink>(new LinkDescription
	{
		TagName = @"A",
		InnerText = @"CREATE NEW ACCOUNT"
	}).Click();

	//Fill in the user details and create the account
	ApplicationModel1 appModel = new ApplicationModel1(browser);
	appModel.AdvantageShoppingPage.UsernameRegisterPageEditField.SetValue("demoUser");
	appModel.AdvantageShoppingPage.PasswordRegisterPageEditField.SetSecure("596f1409b156a60dc50592de897863e8d552");
	appModel.AdvantageShoppingPage.ConfirmPasswordRegisterPageEditField.SetSecure("596f1409b156a60dc50592de897863e8d552");
	appModel.AdvantageShoppingPage.EmailRegisterPageEditField.SetValue("demoUser@default.com");
	appModel.AdvantageShoppingPage.IAgreeCheckBox.Set(true);
	appModel.AdvantageShoppingPage.RegisterBtnButton.Click();
}
In Java
 @Test
	public void myTest() throws GeneralLeanFtException {

	//Launch Chrome
	Browser browser = BrowserFactory.launch(BrowserType.CHROME);

	//Navigate to "Advantage Online Shopping"
	browser.navigate("http://www.advantageonlineshopping.com");

	//Click the User Account button
	browser.describe(Link.class, new LinkDescription.Builder()
	.tagName("A")
	.innerText("My account My Orders Sign out ").build()).click();

	//Click the Create New Account link
	browser.describe(Link.class, new LinkDescription.Builder()
	.tagName("A")
	.innerText("CREATE NEW ACCOUNT").build()).click();

	//Fill in the user details and create the account
	ApplicationModel1 appModel = new ApplicationModel1(browser);
	appModel.AdvantageShoppingPage().UsernameRegisterPageEditField().setValue("demoUser");
	appModel.AdvantageShoppingPage().PasswordRegisterPageEditField().setSecure("596f1409b156a60dc50592de897863e8d552");
	appModel.AdvantageShoppingPage().ConfirmPasswordRegisterPageEditField().setSecure("596f1409b156a60dc50592de897863e8d552");
	appModel.AdvantageShoppingPage().EmailRegisterPageEditField().setValue("demoUser@default.com");
	appModel.AdvantageShoppingPage().IAgreeCheckBox().set(true);
	appModel.AdvantageShoppingPage().RegisterBtnButton().click();
}
Step 8: Run your test from the IDE
-
(Optional) Customize your snapshots level test setting to save snapshots during the test run for each step performed and include them in the run results.
Test settings are defined in the test settings file referenced by your testing project:
- Eclipse / IntelliJ / Android Studio: leanft.properties
- Visual Studio: App.config
For details, see Customize test settings.
-
Build your project and run your test directly from your IDE.
IDE How to run your test Visual Studio -
Ensure that you have the NUnit Test Adapter for Visual Studio that is compatible with the NUnit template you are using. For example, if you are working with NUnit 3.0, you must use the NUnit 3.0 Test Adapter.
In the Visual Studio Extensions and Updates dialog, select Online, and then search for NUnit Test Adapter.
-
Build your project. For example, right-click your project in the Solution Explorer and select Build.
-
In the Solution Explorer's Test Explorer tab, right-click your test and select Run Selected Tests.
Eclipse From the Run menu, select Run.
IntelliJ IDEA Click the Run Test button to the left of your test code.
-
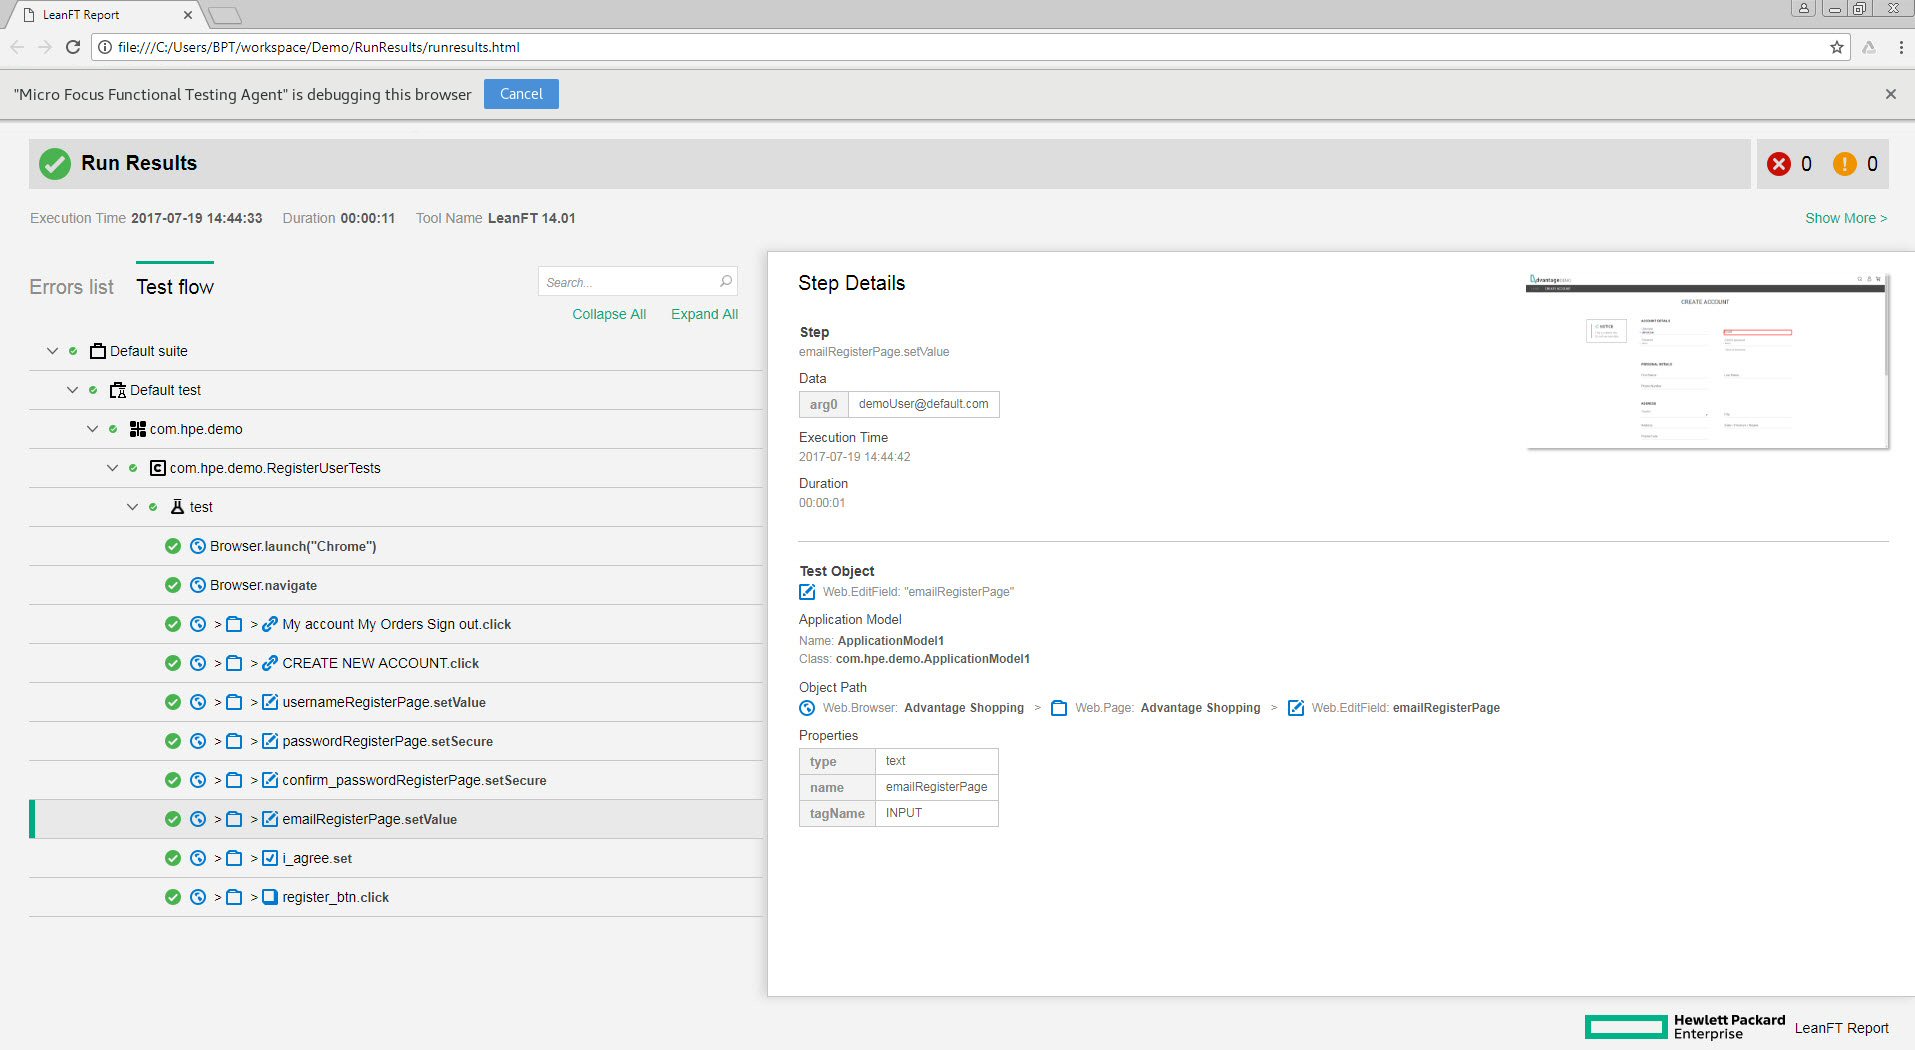
Step 9: View and analyze your run results
In your IDE, from the Functional Testing for Developers menu, select View Last Run Results.
If you customized your report settings as described in Step 8.1, notice the screen captures added to your report.
Your run report should look similar to the following:
 Next steps:


