Share this page


Continuous integration with TeamCity
Using the OpenText plugin, you can set up JetBrains TeamCity projects to run LoadRunner Professional performance tests.
TeamCity integration overview
As more software companies utilize continuous integration practices, you may also need to integrate load tests into your build process. This integration helps developers insure that new builds do not introduce regressions.
The LoadRunner plugin for the TeamCity provides a mechanism for executing Controller scenarios as part of a build configuration. This plugin allows you to trigger a performance test as a build step and view the results in TeamCity reports.

Prerequisites
The following are the prerequisites for installing the LoadRunner TeamCity plugin:
Operating system
- Non-server machines: Windows 8.1 or Windows 10
- Server machines: Windows 2012 R2 SP1 or higher
PowerShell
PowerShell 5.0 or higher. For download and setup information, see the Windows PowerShell documentation.
Agent machine
- The machine must be configured as a TeamCity agent. For more information, see the TeamCity documentation.
- LoadRunner Professional installed on the agent machine.
Once you have verified that your environment is properly configured, install the LoadRunner Professional plugin for TeamCity.
Permissions and accessibility
To complete the integration, you need to grant Read/Write permissions and check accessibility.
-
Ensure that the user running the TeamCity Build Agent service has Read/Write permissions.
-
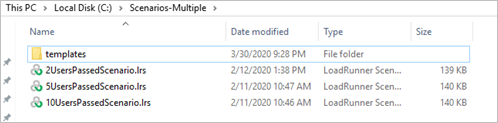
Create test scenarios to ensure that their location is accessible to your agent.
Build steps
This section provides an example for using the TeamCity integration to run your tests.
-
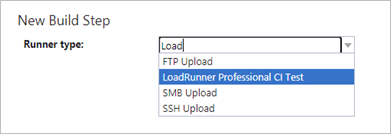
Add a new build step and search for LoadRunner Professional CI Test:
-
Enter the parameter and setting values. For details, see Build steps .
Parameter/ Setting
Description Test Path The path of the test or folder that contains the tests. Results Path The directory to which the test results should be saved. Timeout The timeout value for the build step execution, in seconds. To specify no timeout, use a value of -1. Controller polling interval:
The maximum time allotted for scenario execution, in minutes. Scenario execution timeout The maximum time allotted for scenario execution, in minutes. Analysis template The path to a template file (.tem extension) to apply to the build. To use the default template, do not specify a value. -
Run the build. The tests are executed sequentially, each of them being passed or failed based on the scenario SLA. If there is one failed scenario during the build step, the rest of the scenarios will run, but the build is marked as failed at the end of the execution. To view the build step summary, click the Build Log tab.
Review the results in Jenkins
You can access the results in the following ways:
-
The results are stored on the agent machine that was used for the job at <Results Path>\<BuildLabel>.
-
The results are also uploaded as artifacts of the build.
-
In addition, you can see the LoadRunner Analysis results on the build's LoadRunner Report tab. In this tab, you can select the scenario whose results you want to view.

 See also: