
Share this page


User management
The User Management tab in Site Administration enables you to manage ALM users.
UI element
The following table describes the UI elements of the User Management tab.
| UI Element | Description |
|---|---|
|
Opens the Add New User dialog box, enabling you to add new users. For details, see Add new users. |

|
Opens the Assigns Project to Users dialog box, enabling you to add the selected users to the selected projects. For details, see Assign projects to users. |

|
Activates the selected users. For details, see Deactivate and activate users. |

|
Deactivates the selected users. For details, see Deactivate and activate users. |

|
Opens the Set Deactivation Date dialog box, enabling you to select a date when the selected users will automatically be deactivated. For details, see Deactivate and activate users. |

|
Unlocks the selected locked user. For details, see Lock out users. |

|
Refreshes the users list. |

|
Click it to open the following options:
|

|
Opens the Set Roles dialog box, enabling you to assign roles to the selected users. |

|
Opens the Set Policy dialog box, enabling you to assign a policy to the selected users. For details, see Assign policies to users. |

|
It includes the following options:
|

|
Filters users by user attributes. |

|
Searches users by username. |

Add new users
You can add users to the system. After a user is added, you can view and edit its details.
To add a new user:
-
Open Site Administration > User Management tab.
-
Click Add User.
-
In the Add New User dialog box, enter the following information for the user.
User Name Type a username (maximum length: 60 characters). A username cannot include the following characters:
& ( ) @ \ / [ ] ' : | < > + = ; " , ? * ` %.Identity Provider Name
Identity Key
For single sign-on (SSO) authentication only.
If SSO is enabled, provide your Identity Provider Name and Identity Key.
For details, see Set up SSO authentication.
Email We recommend you add an email for the user. It enables the user to receive projects information after the user is added to projects. -
Click Save. The user is added with blank password.
For SaaS only: After the user is created, an email message that contains the username will be sent to the user.
Define user authentication settings
You can define user authentication settings to allow users to log in to ALM using their LDAP passwords or external authentication, instead of ALM passwords.
To define user authentication settings:
-
Open Site Administration > User Management tab.
-
Select User Settings > Authentication Settings.
-
In the Authentication Settings window, select one of the following authentication types.
Application Lifecycle Management Users log in to ALM using their ALM credentials. LDAP Enables LDAP authentication. Users log in to ALM using their LDAP passwords.
Note:
-
After LDAP authentication is enabled, authentication will be performed against the LDAP server. Make sure that the site administrator is set up as an LDAP user before switching to LDAP authentication, otherwise the site administrator will not be able to log in after the authentication type is switched.
-
After you enable LDAP authentication, disable the password reset option by defining the PASSWORD_RESET_DISABLE parameter. For details, see Set configuration parameters.
-
Working with LDAP over SSL requires that you perform additional steps. For details, see Enabling LDAP over SSL (LDAPS).
External authentication Enables external authentication.
Click Advanced Settings to set the following external authentication parameters.
-
Authentication type
-
Email. ALM extracts the user email from the header value and finds the ALM user with the same email address defined in ALM.
-
Name. ALM extracts the username from the header value and finds the ALM user with the same name in the Description field.
-
Email + Name. ALM extracts the user email and username from the header value. ALM first tries to match the email to an ALM user, and if this is unsuccessful, ALM tries to match the username to an ALM user.
-
-
Pattern. Enter the format for extraction information from the header. Below are the default patterns that ALM users to search for the email and name. You can write your own pattern.
To match by email: *[eE][^=]*=([^,]*@[^,]*).*
To match by the Description field: *?[cC][nN] *= *([^/,]*).*
-
-
Click OK.
Define multi LDAP settings
If you want to import users from an LDAP directory, you add the LDAP directory and define the LDAP import settings first.
To define LDAP settings for importing LDAP users:
-
Open Site Administration > User Management tab.
-
Select User Settings > Multi LDAP Settings.
-
Click the add button
 . In the Server Title field, enter the LDAP server name. In the Directory Provider URL field, enter the LDAP server URL. Click OK.
 -
In the LDAP Authentication Type field, select Anonymous or Simple.
Anonymous Enables you to import users from the LDAP server using an anonymous account. Simple Enables you to import users from the LDAP server using an authorized (search-entitled) user account and password.
If you select Simple, the following options are enabled:
-
Authentication Principal. Enter the username of the authorized user.
-
Authentication Credentials. Enter the password of the authorized user.
Important: The user specified here is used not only for importing users from the LDAP server, but also for connecting LDAP and ALM. If you change the user credentials, make sure you also update the authentication information in this option.
-
-
If you are using lightweight single sign-on, select the Use LWSSO checkbox and enter the LDAP attribute name to be used as the lightweight single sign-on login name.
-
Click Test Connection to test the LDAP server URL.
-
In the Data Retrieving Settings section, define the following.
-
In the Field Mapping Settings section, define the corresponding LDAP field names.
-
To set the default values for the Active Directory, select the Use default values for checkbox and select Active Directory.
To set the default values for LDAP, select the Use default values for checkbox and select LDAP.
-
Click Save.
As each LDAP directory is created, it is added to the LDAP server panel. You can hover a LDAP directory and click the delete button to delete it.
When a user logs in, ALM searches the LDAP directories in the order they are listed in the LDAP server panel until a match is found.
Import users from CSV files
You can import users from a CSV file.
Note:
-
ALM does not support importing LDAP users from a CSV file. For details about importing LDAP users, see Import users from LDAP.
-
For on-premises: It is not allowed to update users imported from CSV files.
-
For SaaS: You can update imported users only when the User Update Allowed option is enabled during importing users. See User Update Allowed.
To import users:
-
Open Site Administration > User Management tab.
-
(Optional) Download the user import template.
Click More > Import > Download User Import Template.
You can also use your custom CSV file to save the information of the users you want to import.
-
Click More > Import > Import Users from CSV File to open the Add User from CSV window.
-
In the Choose CSV File section, click Browse, select the CSV file you want to upload, click Open, and click Upload.
-
In the Map to Users Fields section, map the user attributes in Site Administration to the user attributes in the CSV file you uploaded.
Only the mapped user fields are imported.
-
Click Add Users.
The Operation Complete window opens, listing which users are imported, which are not, and why. You can click Export to CSV to export the result.
Import users from LDAP
You can import users from an LDAP directory.
Before you import users from LDAP
Understand the following before you import users from an LDAP directory.
| Add the LDAP directory and define the import settings | See Define multi LDAP settings. |
| LDAP over SSL |
If you want to work with LDAP over SSL, perform additional steps. For details, see Enabling LDAP over SSL (LDAPS). |
| LDAP_TIMEOUT |
The LDAP_TIMEOUT parameter enables you to define a connection timeout between ALM and an LDAP server. The default value is 10 minutes. For details, see Set configuration parameters. |
To import users from LDAP:
-
Open Site Administration > User Management tab.
-
Click More > Import > Import LDAP Users.
-
In the Import LDAP Users window, specify the following, and click Apply.
Server Select the LDAP server where you want to import users. Filter Mode Select Basic Filter or Advanced Filter.
Directory Base The LDAP directory base is filtered according to the filter set in Directory Base. Filter By Keyword Enabled when you select Basic Filter.
Enter a keyword to search users by. ALM searches for the keyword in the following fields: User Name, Full Name, Group, Description, Email, and Phone.
Tip: To broaden your search, enter partial values. For example, enter Mi to search for Michael and Mikhael.
Filter Enabled when you select Advanced Filter.
Enter a string to filter users by ObjectClass or user group.
For example, to filter users by the user ObjectClass, enter
objectClass=user; to filter users by user group, entermemberof=CN=group,CN+Users,DC=ldap,DC=com. -
Select the users to import and click Import.
To view the LDAP details of a user, click the user link.
If the users are imported successfully, a summary dialog box opens. If the same usernames exist in the users list, the Handle Conflict dialog box opens. For details, see Handle import conflict.
When importing users from an LDAP directory, you may encounter the following conflicts. To resume the importing process, you can choose to skip the user, rename the user, or update the user information, and click Continue.
| Conflict: Same User |
A user with the same LDAP distinguished name already exists in ALM. Select on of the following options to continue.
|
| Conflict: Same User Name |
A user with the same username already exists in ALM. Select one of the following options to continue.
|
Update user details
After you add a user, you can update user details. For example, you may need to update a user's full name or contact details. You can also define ALM users as site administrators.
To update the details of a user:
-
Open Site Administration > User Management tab.
-
Click the user from the users list.
-
In the User Details tab, you can update the following information.
General information Update User Name, Full Name, Email, Phone, and Description. Status - Active. Select this to activate the user.
-
Not Active. Select this to deactivate the user.
You can also deactivate or activate a user by using the Deactivate or Activate button. See Deactivate and activate users.
Deactivation Date Sets a future deactivation date for the user. You can also use the Set Deactivation Date button. See Deactivate and activate users.
Password Policy Select a password policy for the user. You can also use the Set Policy button. See Assign policies to users.
Role Select a role for the user. You can also use the Set Role button. See Assign roles to users.
For SaaS: Only site admins and users with the system-defined role Customer Admin can set roles to users.
Identity Provider Name
Identity Key
Available when SSO authentication is enabled. For details, seeSet up SSO authentication.
If you want to map the user with an IdP user, update the Identity Provider Name and Identity Key fields with the corresponding information of the IdP user.
LDAP Authentication Server
Domain Authentication
Available when the user was imported from an LDAP directory.
LDAP Authentication Server displays the LDAP server and Domain Authentication displays the LDAP authentication properties of the imported user.
-
In the User Projects tab, assign projects to or remove projects from the user.
For details, see Assign multiple projects to a single user.
-
Click Save to save your changes.
Export users
You can export the username and full name of all site users to a text file.
To export users:
-
Open Site Administration > User Management tab.
-
Click More > Export.
The users are exported to a .txt file and saved in your download default path.
Assign projects to users
As an ALM site administrator, you can control user access to ALM projects by assigning users to and removing users from projects.
When you add a user to a project, the user is automatically assigned to the project with the Viewer group privileges.
Note: You can also assign a project to a user from the Projects tab. For details, see Add users to a project.
Assign a single project to multiple users
You can assign a single project to multiple users.
-
Open Site Administration > User Management tab.
-
Select the users you want to assign the same project to, and click Assign Project to Users.
-
In the Assign Project to Users window, in the Project field, select the project you want to assign to the users.
-
In the Grant and Remove Roles table, define the roles for each user.
-
Click the Group drop-down field.
-
Select the roles you want to assign to the project user.
-
-
Click Next to go to the Summary step.
The Summary step lists the users that are assigned to the selected project with specified roles.
-
Click Finish.
Assign multiple projects to a single user
You can assign multiple projects to a user and remove projects from a user in the user details page.
To assign projects to a user:
-
From the users list, click the user to whom you want to assign projects to.
-
Click the User Projects tab. It lists the projects that are already assigned to the user.
-
To assign more projects to the user, click Add Projects.
-
In the Add Projects window, from the All Projects list, select the projects you want to assign to the user, and click the right arrow
 .
. -
Click Add.
The assigned projects are listed in the User Projects tab.
To remove projects from the user:
-
Click Delete Project for each project.
-
Click Delete in the Delete Project dialog box.
Deactivate and activate users
You can deactivate or activate an ALM user. A deactivated user cannot log in to any project. The user is not deleted from the Users list, and all user permissions and settings are saved. This can be useful, for example, for contract workers that work intermittently for a set period of time.
To deactivate users:
-
Open Site Administration > User Management tab.
-
Choose one of the following.
Deactivate users as of the next attempted login To deactivate users as of the next attempted login:
-
Select one or more users from the users list.
-
Click Deactivate button.
-
Click OK in the confirmation dialog box.
Deactivate users on a set date in the future To deactivate users on a set date in the future:
-
Select one or more users from the users list.
-
Click Set Deactivation Date.
-
In the Select Date field, select a date, and click OK.
-
To activate users:
-
Open Site Administration > User Management tab.
-
Select one or more users from the users list.
-
Click Activate.
-
Click OK in the confirmation dialog box.
Note: You can also deactivate or activate a user by updating the user details. See Update user details.
In any user drop-down list field of the ALM client, an icon is available in the front of each user to indicate whether the user is active or not. Inactive users have a gray indicator.
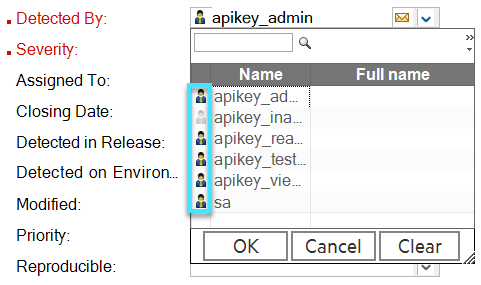
Note: If you set the HIDE_USER_ACTIVE_INACTIVE_INDICATOR_ICON parameter to Y, the icon is hidden.
Assign policies to users
By default, all users are assigned the default policy. You can assign a different policy to users.
To assign an authentication policy to users:
-
Open Site Administration > User Management tab.
-
Select the users to whom you want to assign an authentication policy, and click Set Policy.
-
In the Set Policy window, select a policy, and click Next.
-
Click OK in the confirmation dialog box.
Alternatively, you can assign a policy to a user by updating the user details. See Update user details.
Assign roles to users
A user's role decides its permissions.
For SaaS: Only site admins and users with the system-defined role Customer Admin can set roles to users.
To assign a role to a user:
-
Open Site Administration > User Management tab.
-
Select the user to whom you want to assign a role, and click Set Role.
-
In the Set Role window, select a role, and click OK.
-
Click OK in the confirmation dialog box.
Alternatively, you can assign a role to a user by updating the user details. See Update user details.
Send email to users
You can send a message to selected users or all users of selected projects or domains. This enables you to periodically inform the users of important maintenance activities.
For SaaS: Only site admins and users with the system-defined role Customer Admin can send email to user.
To send a message to selected users:
-
Open Site Administration > User Management tab.
-
Select one or more users to whom you want to send a message, and click More > Send Email.
-
In the Send to Users tab, enter the subject and message you want to send.
-
Click Send.
To send a message to all users of selected projects or domains:
-
Open Site Administration > User Management tab.
-
Click More > Send Email.
-
In the Send to Projects/Domains tab, in the To field, select the projects or domains you want to send messages to.
-
Enter the subject and message.
-
Click Send.
Move users between customers (for SaaS only)
You can move users from one customer to another.
To move users:
-
Open Site Administration > User Management tab.
-
Select the users you want to move to another customer.
-
Click More > Move Users.
-
In the Move Users Between Customers window, select the target customer you want to move the users to, and click OK.
A warning message opens telling you that all projects where the users have membership will be disassociated.
-
Click OK to confirm.
Lock out users
As the site administrator, you can determine the number of login attempts a user can make before being deactivated. By default, no limit is set. In addition, you can set a parameter that resets the count of failed logins if a specified amount of time passes after an attempted login.
You can set a time interval after which a deactivated user is reactivated automatically, or you can reactivate locked out users.
To lock out users:
-
Set the MAX_INVALID_LOGINS_ATTEMPT_TO_LOCKOUT parameter.
If the user unsuccessfully tries to log in more times than the number you assign, the user is locked out.
-
You can also set the INTERVAL_BETWEEN_INVALID_LOGINS_TO_LOCKOUT parameter.
The default value for this Site Configuration parameter is 60 seconds. If the user waits longer than this amount of time between login attempts, the count of invalid login attempts resets to zero.
To unlock a user:
From the users list, select the user and click Unlock , and the user can attempt to log in again.
To automatically allow users to attempt to log in again, set the INTERVAL_TO_AUTO_RELEASE_LOCKOUT parameter. Once the user waits the amount of time specified in this parameter, the user is activated and can attempt to log in again.
For details about setting parameters, see Set configuration parameters.
Manage orphan users (for SaaS only)
Users that are created in Site Administration rather than in Site Administration (for SaaS), and do not have customers associated with them, are called orphan users. You can make an orphan user a non-orphan by assigning the user to a customer.
To assign a customer to an orphan user:
-
Open Site Administration > User Management tab.
-
Select the user you want to assign to a customer.
-
Click More > Orphan Users.
User interface elements are described below.
UI Element
Description
<customer drop down list> Opens a drop down list of all owner customers and end customers. Select a customer.
Assign Orphans to customer
Assigns the selected orphan user to the customer.
If the orphan user has already been associated with a project that belongs to another customer, an error message is displayed asking you to disassociate the orphan user with the customer. If you select this option, the User projects for user (<orphan user name>) dialog box opens, enabling you to remove the orphan from the project.
You can also assign orphan users that have been assigned to projects to a customer without removing them from the projects. To enable this, contact your SaaS delivery team for help.
Remove Assignment
Removes the customer from the user. User Projects Opens the User Projects dialog box. For details, see Assign multiple projects to a single user. Login Name The login name of the orphan user. Full Name The full name of the orphan user. Email The email of the orphan user. Phone Number The phone number of the orphan user. Domains The domains of projects with which the orphan user is currently associated. Possible Customers The names of the customers who own the projects with which the orphan user is currently associated. Assign to Customer The name of the customer you are assigning the orphan user to. - Click OK.
 See also:


