Cross project customization
As an ALM template administrator, you use cross project customization to apply customization from a template project to one or more linked projects. Cross project customization enables you to use a template project to define and maintain a common set of project customizations for multiple projects. This helps standardize policies and procedures across projects in your organization.
ALM Editions: Cross project customization is not available for Quality Center Enterprise Edition, Quality Center Community Edition, or Quality Center Express Edition. For more information about ALM editions and their functionality, see
In this topic:
- Cross project customization overview
- Cross project customization examples
- Verify cross project customization
- Apply template project customization to linked projects
- Apply template project and reports customization to linked projects
- Check template customization information from template project
- Check template customization information from linked projects
- Cross project customization reports
Cross project customization overview
Implementing cross project customization involves the following steps.
| 1. Create a template project | The site administrator creates a template project and assigns template administrators. For details, see Create template projects. |
| 2. Link the template to projects | The site administrator selects projects to link to the template. For details, see Link a template to projects. |
| 3. Customize the template project |
As a template administrator, you customize a template project to meet the policy needs of your organization. The template customizations that are applied to linked projects include: user groups and permissions, module access, project entities, project requirement types, project lists, PPT, report templates, and workflow. For details, see Project customization. |
| 4. Verify cross project customization |
Before applying template customization to linked projects, you must verify that ALM can successfully apply customization from the template to the projects. For details, see Verify cross project customization. |
| 5. Apply template customization to linked projects |
After defining or updating customization in the template, you apply the customization to the linked projects. For details, see Apply template project customization to linked projects. |
| 6. Share dashboards and reports as templates across projects |
You can share dashboards and reports as templates across projects. This applies to Analysis and Dashboard entities in the Public folder of the Dashboard module. For details, see Apply template project and reports customization to linked projects. |
| 7. Check cross project customization status |
From the template project or a linked project, you can check whether or not the linked project is updated with the current template customization. For details, see Check template customization information from template project and Check template customization information from linked projects. |
Note: Cross project customization cannot be implemented between a Unicode template project and ASCII projects. Also, when a template project is converted to Unicode, any linked ASCII projects cannot receive customization changes from the template.
Cross project customization examples
The following examples demonstrate how you can use cross project customization.
| Scenario | Details |
|---|---|
|
Set a standard for working with defects |
The QA manager wants to limit how testers can modify defects. For example, you want to allow testers to modify the status of defects to |
| Enable consistent reporting by managers |
Managers in all divisions of your organization are required to report on a standard set of measures, such as defect status or priority, or coverage status of requirements. As template administrator, you can customize project lists and fields, and set required fields in a template. Applying the template customization to the linked projects provides users with a common set of fields and values for consistent reporting. |
|
Create unique policies for separate sectors of an organization |
Your organization has acquired a new company. The new company has a standard policy for working with defects, which is different from how your organization currently operates. Both sectors want to maintain their current policies. You can customize a template for each sector of your organization, and link each to the relevant projects for its sector. |
Verify cross project customization
Before you can apply template customization to linked projects, you must verify the customization. The verification process checks that ALM can successfully apply template customization to the linked projects. Verification must complete successfully before ALM can apply template customization to a linked project.
Note: For verification to complete successfully, the appropriate extensions must be enabled in linked projects. If an extension is enabled for a template project, the extension must also be enabled for the template's linked projects. Linked projects can have additional extensions enabled. For details on enabling extensions, see Enable extensions for a project.
To verify cross project customization:
-
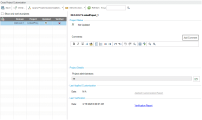
Open the template project. In the Project Customization window, in the left pane, click Cross Project Customization.
-
Select a linked project from the linked projects grid, or press the Ctrl key and select multiple projects.
To display only those projects that are activated, select Show only active projects.
- Click Verify. The Verification dialog box opens and displays progress.
-
To stop verification before it completes, click Stop. ALM completes the project that is currently being verified and then stops. The remaining projects are not verified.
-
Click Details to view additional information.
-
When verification completes, click Close to close the Template Verification dialog box. The verification status for the projects is updated in the linked projects grid.
-
Under Last Verification, click the Verification Report link to view details of the verification. For details, see Cross project customization reports.
Alternatively, you can verify customization from a linked project. For details, see Check template customization information from linked projects.
Apply template project customization to linked projects
You can apply template customization to projects linked to the template. This applies the following customization: groups and permissions, module access, project entities, project requirement types, project lists, PPT, report templates, and workflow. When you apply template customization, the applied customization is set to read-only in the linked projects and cannot be edited.
Before you apply template customization
Understand the following before you apply template customization.
-
Before applying template customization, you must verify the customization and the verification must complete successfully. For details, see Verify cross project customization.
-
When a new project is created based on a template and linked to the template, you must apply template customization in order to set the template customization as read-only in the linked project. For details on creating a project based on a template, see Create a project from a template.
- The option for setting a report template as default is not applied to linked projects and can be set by a project administrator in the linked project.
To apply template customization to linked projects:
-
Open the template project. In the Project Customization window, in the left pane, click Cross Project Customization.
-
Select a linked project from the grid, or press the CTRL key and select multiple projects.
To display only those projects that are activated, select Show only active projects.
-
Click Apply Project Customization.
If the project administrator of any selected projects has requested not to apply template customization changes, a warning is displayed. Click OK to apply template customization to all selected projects.
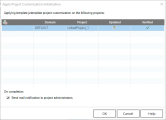
The Apply Project Customization Initialization dialog box opens.
-
Select Send mail notification to project administrators to instruct ALM to notify project administrators after the process completes.
-
Click OK. The Apply Project Customization dialog box opens and displays progress.
-
To cancel the process for projects that ALM did not yet update, click Stop. ALM completes the update to the current project and cancels the update to the remaining projects.
-
When the process completes, click Close to close the Apply Project Customization dialog box.
-
Under Last Applied Customization, click the Applied Customization Report link to view details of applied template customization. For details, see Cross project customization reports.
Apply template project and reports customization to linked projects
In addition to applying template project customization, you can also apply template project's dashboards and reports to linked projects. The property fields of the shared data cannot be edited. However, you can modify the graph filter, X- and Y-axes fields, Group by field, appearance, etc.
What template project and reports customization includes
In addition to template customization, template and reports customization shares the following entities across linked projects. The shared entities are placed under the Shared folder in the Dashboard module of linked projects.
- Dashboard and Analysis folders
- Entity graphs reports
- Pages and health reports in the Dashboard View
Note:
- Business view graphs are not supported.
- This feature is available for ALM Edition only.
To apply template customization and share dashboards and reports as templates across projects:
- Prerequisite: Verify cross project customization. For details, see Verify cross project customization.
-
Open the template project. In the Project Customization window, in the left pane, click Cross Project Customization.
-
Select a linked project from the grid, or press the Ctrl key and select multiple projects.
To display only those projects that are activated, select Show only active projects.
-
Click Apply Project and Reports Customization. If the project administrator of any of the selected projects has requested not to apply template customization changes, a warning is displayed. Click OK to apply template customization and data to all selected projects.
The Apply Project and Reports Customization Initialization dialog box opens.
-
Select Send mail notification to project administrators to instruct ALM to notify project administrators after the process completes.
-
Click OK. The Apply Project and Reports Customization dialog box opens and displays progress.
-
To cancel the process for projects that ALM did not yet update, click Stop. ALM completes the update to the current project and cancels the update to the remaining projects.
-
When the process completes, click Close to close the Apply Project and Reports Customization dialog box.
-
Under Last Applied Customization, click the Applied Customization Report link to view details of applied template customization. For details, see Cross project customization reports.
Check template customization information from template project
You can view details about template customization applied to the linked project, send email to the project administrator, or check customization and verification reports.
To check template customization information from the template project:
-
Open the template project.
-
In the Project Customization window, in the left pane, click Cross Project Customization.
-
In the linked projects grid, view the projects linked to the template project. The Linked Projects grid contains the following information for each project:
Column
Description
Indicates a request by the project administrator not to apply template customization changes to the project.
Domain
The domain of the linked project.
Project
The name of the linked project.
Updated
Indicates if the linked project is updated with current template customization. The current status can be one of the following:
-
 Not Updated (default)
 -
 Updated
Verified
Indicates if template customization has been verified and can be successfully applied to the linked project. By default, the status is Not Verified.
The current status can be one of the following:
-
 Not Verified (default)
 -
 Verified with Warnings
-
 Verified
-
-
To refresh the data in the Linked Projects grid, click the Refresh button
 .
. -
To view details of a linked project, select the project and check the following.
Project Status View the status of the project.
If the project administrator has selected the Request Suspension of Apply Customization option in the linked project, Requested suspension of Apply Customization is displayed. The template administrator can choose to exclude the project from template customization updates.
Comments View comments added by the project administrator. Click Add Comment to add a comment to the project. The project administrator can view and add comments when viewing the project details.
Project Details Displays the names of project administrators. Click the Send E-mail button
 to send mail to project administrators.
Last Applied Customization View the date that template customization was last applied to the linked project. Click the Applied Customization Report link to view details. For details, see Cross project customization reports. Last Verification View the date of the last verification. Click the Verification Report link to view details of the last verification. For details, see Cross project customization reports.
Check template customization information from linked projects
If you are working with a project that is linked to a template project, you can view details about template customization applied to the project, send email to the template administrator, check for conflicts between customization in the project and customization in the template project, or make a request to block template customization updates.
To check template customization information from a linked project:
-
Open a project that is linked to a template.
-
In the Project Customization window, in the left pane, click Cross Project Customization.
-
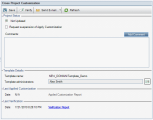
Check the following information.
Project Status View the following status information:
-
Updated. Customization in the template project is applied to the project.
-
Not Updated. Changes made to customization in the template project have not been applied to the project.
Request suspension of Apply Customization Select Request suspension of Apply Customization to make a request to block template customization updates. The request is displayed in the template project, and the template administrator can choose to exclude the project from template customization updates.
Comments Click Add Comment to add a comment to the project.
The Comments box also displays comments made by the template administrator. The template administrator can add and view comments when reviewing linked project details in the template project.
Template Details View the name of the template project linked to the project, and the names of the template administrators. To send email to the template administrators, click the Send E-mail button
 .
.Last Applied Customization View the date of the last time customization was verified for the project. Click the Verification Report link to view details. For details, see Cross project customization reports.
Last Verification View the date of the last time customization was verified for the project. Click the Verification Report link to view details. For details, see Cross project customization reports.
-
-
If you make changes to project customization, you can run template verification to check for conflicts between customization in the project and customization in the template project.
To verify cross project customization for the project:
-
Click Verify.
-
Click Details to view additional information during or after verification. When verification completes, you can click the Report link to view detailed results for the project.
-
When verification completes, click Close to close the Verification dialog box.
Alternatively, you can verify cross customization from the template project. For details, see Verify cross project customization.
-
Cross project customization reports
The cross project customization reports provide detailed results of the verification process, and of template customization applied to linked projects.
Types of cross project customization reports
| Verification Report | Provides results of verification for the linked project. |
| Applied Customization Report |
Provides results of template customization applied to the linked project. The Applied Customization Report includes the following sections:
|
Categories of report results
|
Result category |
Verification Report |
Applied Customization Report |
|---|---|---|
|
Successful |
The change can be successfully applied to the linked project. |
The change was successfully applied to the linked project. |
|
Warning |
The change can be applied to the linked project, but may result in data loss. For example:
|
The change was applied to the linked project but may have caused data loss. |
|
Failure |
The change cannot be applied to the linked project. For example:
|
An error occurred during the Apply Customization process. The change was not successfully applied to the linked project. |
Tips:
-
To easily locate warnings or errors in the Cross Project Customization Report, click the Find button to open the browser's search tool, and search for the word warning or error.
-
To preserve formatting when mailing a report to another user, save the file as an HTML archived web page by saving it with the .mht file extension.
-
If transition rules are set for user groups in the linked or template projects, each rule is listed in the Transition Rule column in the format <from state>,<to state>. For example, New,Open New,Rejected Open,Fixed Open,Rejected indicates that the user group can change the field value from New to Open or Rejected, and from Open to Fixed or Rejected.
 See also:


