
Share this page


User interface
In Deployment Automation, you can create and configure elements and initiate the deployment of your component versions. You can view and access only those elements for which you have permissions.
The following image explains some of the common user interface elements:
Refer to the image to navigate the Deployment Automation user interface:
-
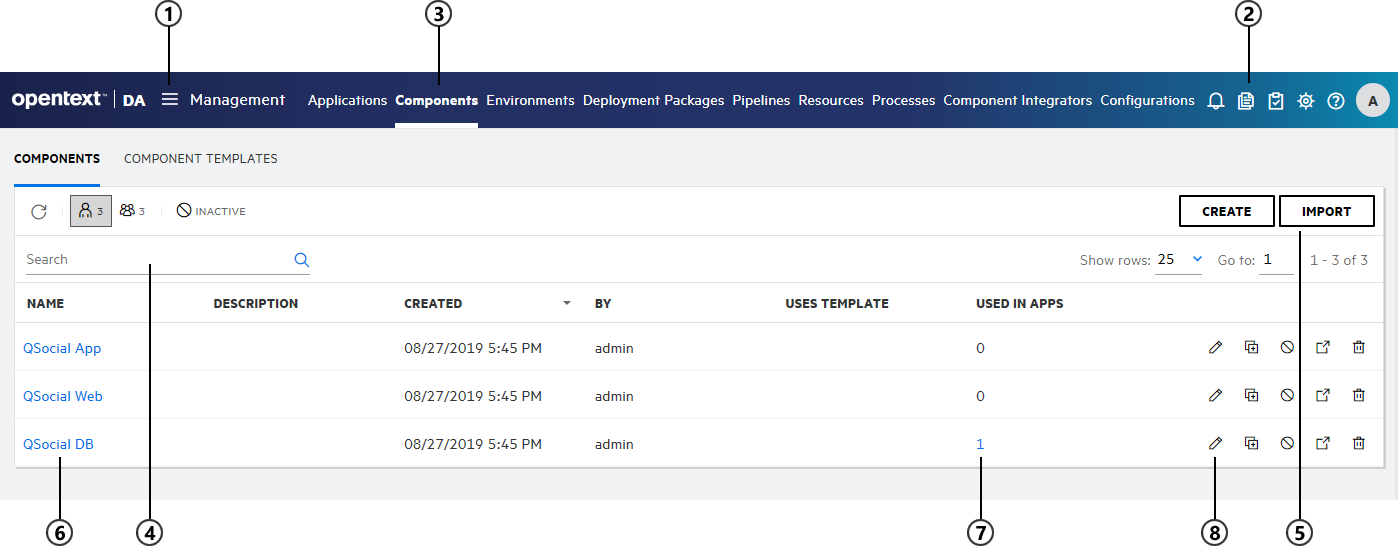
Click the navigation button
 and select the area to work in. Depending on your role and privileges, you can see some
or all of the following areas:
and select the area to work in. Depending on your role and privileges, you can see some
or all of the following areas: Management Create and configure the primary elements of Deployment Automation, design your processes, and run deployments. Deployment View information about deployments on a timeline, run deployments, and schedule deployments and blackouts. Administration -
Set the automation and system options available to users when they work with Deployment Automation.
-
Views security reports and the administration timeline.
-
Schedule version and deployment history cleanups.
-
-
Use the dashboard at the top right to access the following options:
Notifications 
View important messages such as upgrade suggestions for your server and agent versions. Component Version Import Queue 
View active version import requests. Pending Approval Requests 
View requests awaiting approval. Processes 
View processes that ran within a given time range. Help 
Get help, visit the user community, and view information about the product version. User Profile Set preferences such as locale and user profile image, impersonate another user, or log out. -
Select an option from the navigation menu to view and manage information.
For example, to manage components, select Management > Components.
-
If the page displays a list of elements, you can filter them by clicking the filter buttons above the list.
Use Search to search various columns and view only those elements that match the search string. For example, you can filter the components list to view only the components that belong to the current user and to hide inactive components.
- Create or import an instance of the selected element.
- In the content area, click the element name to open the element.
- Click any links in the content area to view more information. For example, for components, click the number under Used in Apps to view the applications the component is associated with.
- Use actions, such as delete or edit, available for listed elements. For example, in the component list, click the Edit button to modify a component.

 See also:


