Share this page


LRE integration with Analysis
Analysis integrates with LoadRunner Enterprise (LRE) allowing you to analyze runs results stored in the LRE repository.
In this topic:
- Integrating with LoadRunner Enterprise
- Connect to LRE from Analysis
- Work with results in LRE
- LRE Connection dialog box
Integrating with LoadRunner Enterprise
LoadRunner Analysis works together with LoadRunner Enterprise (LRE).
LRE is a cross-enterprise tool for planning and running multiple performance test projects. It enables you to remotely monitor concurrent tests across different geographic locations.
The integration with LRE lets you analyze runs results stored in the LRE repository. You connect to the LRE project and download the run results. Then you build graphs and reports as you would with any set of run results, using all of the capabilities of LoadRunner Analysis.
You can also upload your result files to LRE to give access to all LRE users.
In order for the Analysis to access an LRE project, you must first connect to the LRE tenant, as described below.

Connect to LRE from Analysis
To retrieve run results from LRE, you need to connect to an LRE project. You can connect or disconnect from an LRE project at any time during the testing process.
To connect to LRE:
-
Select Tools > LRE Integration. The LRE Connection dialog box opens.
-
Enter the required information as described in LRE Connection dialog box.
- Click OK to open the LRE Integration window through which you can view the repository.
- To disconnect from LRE, click Disconnect.
Work with results in LRE
The following steps describe the workflow for working with results saved in an LRE project.
Open a connection to the LRE server and project that contains the LoadRunner Professional result files as described above. Click OK in the LRE Connection dialog box to open the LRE integration window. Expand the repository tree.
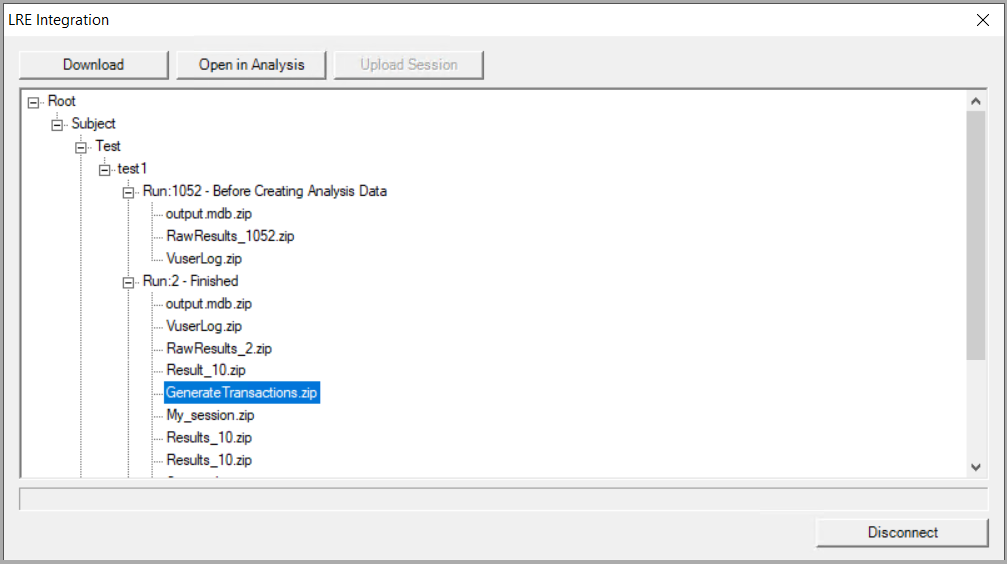
The following operations are available: Download, Open in Analysis, and Upload Session.
- Download. You can download any type of file from the LRE repository.
- Open in Analysis. Select a run result or Analysis session file and click Open in Analysis. Wait for Analysis to create a database. Generate graphs and reports as you would with any session.
-
Upload. After you save your LRE Analysis session (for which you clicked Open in Analysis), you can save it to the LRE repository. Make sure to wait until LoadRunner Analysis has completed generating the data. Note: The uploaded session will be considered a user file and will not overwrite the existing session.
To save the results to the LRE repository:
- Click Tools > LRE integration.
- Expand the tree, select a parent level of the run, and click Upload Session. The Analysis session file is added to the LRE project.
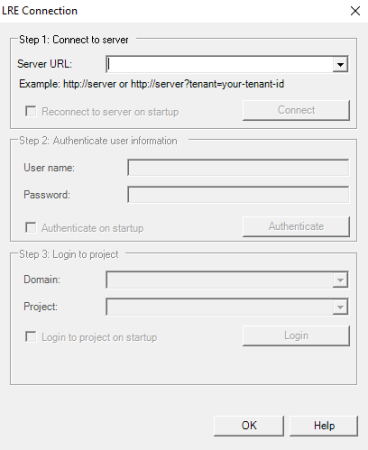
LRE Connection dialog box
This dialog box enables you to connect to an LRE project.

| To access | Tools > LRE Integration |
User interface elements are described below:
| UI Element | Description |
|---|---|
| Step 1: Connect to Server |
|
| Step 2: Authenticate User Information |
If you entered a URL with SSO arguments, this section is disabled.
After your user information has been authenticated, the fields in the Authenticate user information area are displayed in read-only format. The Authenticate button changes to
You can log in to the same LRE server using a different user name by clicking Change User, entering a new user name and password, and then clicking Authenticate again. |
| Step 3: Login to Project |
|
 /
/
 . Connects to the server specified in the Server URL box. Only one button is visible at a time, depending on your connection status.
 . Authenticates your user information against the LRE server.
 .
.  /
/
 . Logs into and out of the LRE project.
 See also: