This section describes how to use timeslots to reserve resources for running your performance tests.


Note: For details on reserving timeslots for maintenance (administrators only), see Manage timeslots.
Timeslot overview
When running tests, or performing maintenance on host machines (administrators only), the resources needed for these tasks must be available, and must fall within the project and license limits.
LoadRunner Enterprise's timeslots feature enables you to reserve resources in advance to ensure that the required resources are available when you are ready to perform these tasks. LoadRunner Enterprise itself also reserves resources needed for data processing tasks.
You can also link tests with Elastic (Cloud and Docker) load generators to a timeslot.

Types of timeslot reservation
Timeslots can be reserved for immediate use or they can be reserved in advance for future use. This section describes these two types of timeslot reservations.
Immediate timeslot reservations
Scheduling an immediate timeslot reserves resources for a task at hand.
-
Performance Testing: When you start running a performance test, before the test starts to run, you specify the time and resources you need for the test. LoadRunner Enterprise checks if the required hosts and Vusers are currently available for that amount of time, and that the license and project limits are not exceeded, in which case, you can reserve the hosts and Vusers for that timeslot. If the hosts and Vusers are not available, or license/project limits have been exceeded, you cannot run the test at that time and need to try again at a later time.
-
Data Processing: When working with LoadRunner Enterprise projects, tasks such as test result analysis, SLA status publication, and trending are performed on a data processor host. LoadRunner Enterprise estimates how long a data processor host is needed for the task at hand. As soon as a data processor becomes available for this task, an immediate timeslot reservation is automatically made.
If you know which testing resources you need for running a test, or you know the hosts on which you need to perform maintenance, you can reserve the resources for your test in advance for a specified amount of time.
When reserving a testing timeslot, you can request either specific hosts or automatch hosts. That is, you can specify the exact hosts which will run your test or test set, and if those hosts are available, LoadRunner Enterprise reserves them for you. Alternatively, you can request automatch hosts, which allows LoadRunner Enterprise to allocate any available host with properties that match your selected criteria.
When you add a test instance to a test set, LoadRunner Enterprise automatically allocates hosts linked to the test instance based on the test type.
For performance test timeslots, you must select at least one Controller. For details, see the Distribute load generators.
A timeslot can be reserved successfully only if all of the requested resources are available.
Tip: All users in your project can use the timeslot that you have reserved.
It is important to note that many conditions and changes in the system can affect host allocation, and can cause a shuffling around of the hosts. For more details about host allocation and examples of resource shuffling, see Allocate hosts.
Automatic timeslots
Some tests might require a lot of time and many resources. The Timeslot feature enables you to reserve these resources when resources are more readily available, and/or when you might not be available to run the test manually. This allows for maximum resource usage because your resources can then be used around the clock.
Example:
Suppose a project has a total of eight hosts for allocation and the employees assigned to the project work a standard 09:00-17:00 day. The hours between 09:00 and 17:00 are peak hours for host usage, during which time all the hosts are usually reserved for testing, data processing, and maintenance tasks. Because of this, there may be periods during the day that employees cannot perform tasks because there are no available hosts. In contrast, the non-standard work hours pass with very little host resource usage.
To extend host resource usage, employees might come in early or stay late to run tests, but this only extends the peak usage by one or two hours at the beginning and end of the day.
Reserving timeslots during non-standard work hours and setting the tests to run during these timeslots allows for maximum resource usage.
Best practices for reserving automatic timeslots
-
Where possible, run the test manually first to get an indication as to how long it takes for the test to run. This information can assist you when selecting the timeslot duration.
-
The following suggestions apply to running automatic Performance tests:
-
Always ensure that the Scheduler is set to stop as soon as all the Vusers have stopped running. This allows more time for post-run actions during the duration of the timeslot. For details, see Configure general test options.
-
If you want to analyze the test results straight after the run, take into account that the analysis process can take a long time, so be sure to reserve enough time for this operation.
-
If you want to perform auto-collate and analyze operations at the end of the run, you should take the time required for these operations into account when reserving the timeslot.
Note: To prevent loss of run data, it is recommended, whenever possible, to collate the results immediately after the run finishes. If your timeslot ends before result collation is completed, collation continues as it does not require reserved resources. For details, see Collate run data.
-
15 minutes before the end of a timeslot, LoadRunner Enterprise automatically stops the test run. Five minutes before the end of the timeslot, even if all the Vusers have not yet finished running, LoadRunner Enterprise aborts the run. To ensure that the test ends properly as designed, make sure that you reserve more time than defined in the test schedule.
-
Create a timeslot
To create a timeslot reservation:
-
Prerequisites
-
Ensure that there is a host pool defined and allocated to the project. For details, see Manage host pools.
-
If you want to run a particular test during the timeslot, ensure that an instance of that test is included in a test set.
-
Make sure that at least one of the hosts in the host pool can be designated as a Controller, and that Host, Vuser, and Concurrent Run limits are defined in the project settings.
-
-
Create a timeslot
-
From the LoadRunner Enterprise navigation toolbar, click
 and select Resources > Timeslots.
 -
In the Timeslots module:
-
From the grid view, click
 Create Timeslot.
 -
From the calendar view, right-click and select
New Timeslot.
-
-
Enter the details of the timeslot and select resources.
UI Elements Description Start Choose the method for executing linked tests or test sets:
-
Manually. The timeslot reservation reserves testing resources only. You manually execute the linked test or test sets.
-
Automatically. The linked tests or test sets automatically start running at the start of the timeslot, without any manual intervention. Setting the test to start automatically enables autostart for the timeslot.
-
 Recurrence. Opens the Timeslot Recurrence dialog box, enabling you to create recurring timeslot reservations. For details, see Create a recurring timeslot.
Name A descriptive name for the timeslot.
Test instance Link a performance test instance to the timeslot by selecting the test name and test set. By default, there is no linked test, and the selection is empty.
You do not have to link a test to the timeslot. However, linking a test gives you the option of running the test automatically without your manual intervention.
Note:
-
While you can save a timeslot without a linked test, it must have at least one non-elastic load generator (automatch or specific) assigned to it.
-
If you make changes to the linked test (in the Performance Test Designer), the timeslot is updated automatically, and you do not need to relink the test manually. Bear in mind that changing a linked test might affect the validity of the timeslot.
Vusers If you have a linked test, it displays the number of Vusers that are defined in the linked test, and any additional Vusers that you want to add during the test. You can add additional Vusers to the test by clicking the number field.

The total number of linked and additional Vusers is displayed in the timeslot Summary tab.
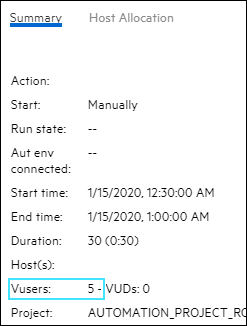
If you do not have a linked test, it displays the default number of Vusers in the test (10).
Note:
-
The sum of all Vusers reserved for the requested timeslot and other timeslots must not exceed the limits specified in the project settings, and must not exceed the number of Vusers specified in the license.
-
If you configure a timeslot for a Controller only, you cannot link it to a test.
VUDs Displays the number of VUDs that are defined in the linked test.
Note: The sum of all VUDs reserved for the requested timeslot and other timeslots must not exceed the limits specified in the project settings, and must not exceed the number of VUDs specified in the license.
For details about VUDs, see Manage licenses.
Duration The duration of the timeslot, in hours and minutes.
Note: A timeslot can be reserved for a minimum of 15 minutes and maximum of 480 hours (20 days).
Start/End Time The date and time (in hours and minutes) that the timeslot starts and ends.
Demands Lists the hosts assigned to the test.
Add Automatch LG Opens the Add Automatch Load Generators dialog box, enabling you to select automatch load generators with specific properties for the timeslot.
-
Reserve x Load Generators. The number of automatch load generators to reserve for the timeslot.
-
Location. Select a load generator location for the reserved load generators.
-
Host Attributes. Select attributes for the selected load generators. You can customize the list of attributes. For details, see Customize load generator attributes.
Example: You want a Vuser group to use a load generator that is located in London and has medium strength and memory. Under Location, select London, and in the Host Attributes list, select Host memory: Medium and Host strength: Medium. At runtime, the system tries to assign a specific load generator with these properties to the Vuser group.
Opens the Add Specific Load Generator dialog box, enabling you to select specific load generators for the timeslot.
-
ID. The load generator ID.
-
Name/IP. The name or IP address of the load generator.
-
Purpose. The purpose of the load generator, that is, Controller, Load Generator, Data Processor, or a combination of these.
-
Location. The location of the load generator.
-
Status. The current state of the load generator: Operational, Non- Operational, or Unavailable.
-
Installation. The installation type of the host. The following types are available:
-
Unix Load Generator. Indicates that this Unix host is used as a load generator for performance tests.
-
Windows Host. Indicates that this Windows host can be used for performance purposes (Controller, Load Generator, or Data Processor).
-
*OneLG / Windows Standalone LG. Indicates that this Windows host is used as a standalone load generator for performance tests.
*OneLG is a combined Windows load generator installation for all of the LoadRunner family products that was introduced in LoadRunner Enterprise SP3.
-
-
Attributes. The attributes for the load generator.
 Edit
Edit
Enables you to edit the selected request, except for hosts assigned to the linked test.
-
Selecting an automatch load generator opens the Add Automatch Load Generators dialog box. For details, see Add Automatch LG.
-
Selecting a specific load generator opens the Add Specific Load Generator dialog box. For details, see Add Specific LG.
-
Selecting a Controller opens the Select Controller dialog box.
-
Select a Controller for the timeslot: Automatch. Enables the system to allocate an available Controller for the timeslot. Specific. Enables you to select a specific controller for the timeslot.
-
Specific. Enables you to select a specific controller for the timeslot.
-
ID. The controller ID.
-
Name/IP. The name or IP address of the controller.
-
Location. The location of the controller.
-
Purpose. The purpose of the controller host, that is, Controller, Load Generator, Data Processor, or a combination of these.
-
Reserve as C + LG. Allows the selected host to serve both as a Controller and as a load generator (enabled when Specific is selected).
Note: If you select a Controller host that has multiple purposes (Controller, Load Generator, and/or Data Processor), it is recommended to dedicate the host for Controller functionality, and not to select it for other functionality as well (such as to run Vusers), to avoid performance issues during runtime.
-
 Remove
Removes the selected load generators.
Note: You can change the selected Controller, but you cannot delete it.
Post run action The action to be taken when the test run is complete.
If the system administrator has set the post-run action, the selected action will be set as the only option for all tests across the project, and you will not be able to change the setting.
If the system administrator has not set the post-run action, select one of the following the actions:
-
Collate. When the run has finished, the run results are collected from all the load generators. This is recommended because collation of results takes only a few minutes, and can prevent loss of or inaccessibility to results in case any of your load generators becomes unavailable. For details, see Collate run data.
-
Collate and Analyze. When the run has finished, the run results are collected and analyzed. Data analysis requires some time, depending on the size of the results file. If there is no timeslot available to include the data analysis, then select the Collate option instead, and run late Analysis when a data processor becomes available. You run late Analysis from the Results tab. For details, see Manage test results.
-
None. Frees the machines immediately after the performance test ends. When the run has finished, the run results are left on the load generators. You can analyze the results at a later stage from the Results tab.
Note: This option is not available when the collate at runtime option is selected in Test Options. For details, see Configure general test options.
Note:
-
This feature controls the action performed immediately after the run ends. It does not prevent collating or analyzing results from the Test Runs page at a later time.
-
If you have reserved timeslots and the administrator subsequently changes the post-run action to one that conflicts with your post-run action setting, LoadRunner Enterprise will not enforce or modify the setting in these timeslots.
-
-
-
Verify availability of requested resources
Do one of the following:
-
(Recommended) Click Calculate Availability. The system checks the availability of the requested resources. The results of this calculation are displayed in the Timeslot Status tab and graphically on the resource availability timeline.
If the timeslot cannot be reserved, consider the reasons displayed in the Timeslot Status tab when reselecting your resources. See the Pool and Project tab for pool details and project limits related to the timeslot.
-
Click Submit to save the timeslot. The system calculates the availability of the requested resources during the selected timeslot. If all of the resources are available, the Add New Timeslot dialog box closes and the timeslot is reserved and displayed in the Timeslots page. If the timeslot cannot be reserved, the reasons are displayed in the Timeslot Status tab.
-
Create a recurring timeslot
A recurring timeslot repeats on a regular basis (for example, on a daily or weekly basis).
-
Prerequisites
Recurring timeslots must be enabled by the administrator in LoadRunner Enterprise Administration. For details, see Enable recurring timeslots.
-
Create a recurring timeslot reservation
-
Create a timeslot as described in Create a timeslot.
-
After entering the details of a timeslot, click
Recurrence to open the Timeslot Recurrence dialog box. -
Select the frequency — Daily, or Weekly — that you want the timeslot to recur, and then select the number of occurrences (between 2 and 30).
-
Click OK.
-
-
LoadRunner Enterprise generates a report showing the occurrences that were successfully created, and any that failed to be created due to a timeslot conflict.
For any failed occurrences, you can adjust the start/end time, frequency, and occurrences of the recurring timeslot reservation, or manually create new timeslot reservations.
When deleting a timeslot that belongs to a series of recurring timeslots, choose whether you want to delete the selected occurrence or the entire series.
Change timeslot duration
If you see that a performance test will reach the end of its timeslot before it completes, you can manually extend it while the test is running to allow your tests to finish running.
To extend or shorten the current timeslot:
-
During runtime, on the Performance Test Run page, click
 Timeslot Duration.
 -
Select Prolong/Shorten Timeslot by X minutes and enter the number of minutes by which to extend or shorten the timeslot.
Note:
-
If the Vusers are in the process of stopping gradually, the system will prolong the timeslot automatically for 15 minutes, provided the resources are still available.
-
To extend a timeslot, all necessary testing resources must be available during the extension time. If any of the testing resources are reserved for a different timeslot immediately following yours, you cannot extend the timeslot and tests stop without completing properly.
View or edit a reserved timeslot
This section describes how to view or edit reserved timeslots.
-
Create a timeslot as described in Create a timeslot.
-
In the Timeslot module, select a view:

Calendar view. Enables you to view the timeslots in a calendar view (default view).
The Calendar view is time-oriented. It allows you to view your timeslots scheduled for the same day, and to get a visual indication of overlapping timeslots.
The timeslots in the calendar view are color-coded as follows:
-
 Performance timeslots
 -
 Maintenance timeslots
 -
 Data processing timeslots
 -
 Read only timeslots, reserved in other project

Grid view. Enables you to view timeslots in a flat, non-hierarchical view.
Each line in the grid displays a separate timeslot. This view is useful for filtering the timeslots and for viewing the details of multiple timeslots simultaneously.
-
-
To filter the reserved timeslots:
-
From the calendar view, use the date navigator to select the day/week to display, or select Today/Day/Work Week/Week. Toggle All Projects / Current Project to display timeslots for all projects or just the current project.
-
From the grid view, click Add Filter and select the criteria for filtering the information being displayed in the timeslots grid.
-
-
The following timeslot information is displayed:
-
To delete or abort a timeslot, select the timeslot and click Delete/Abort Timeslot.
 See also: