
Share this page


Set up self-service portlets
This topic provides details on how to set up a self-service portlet.
Overview
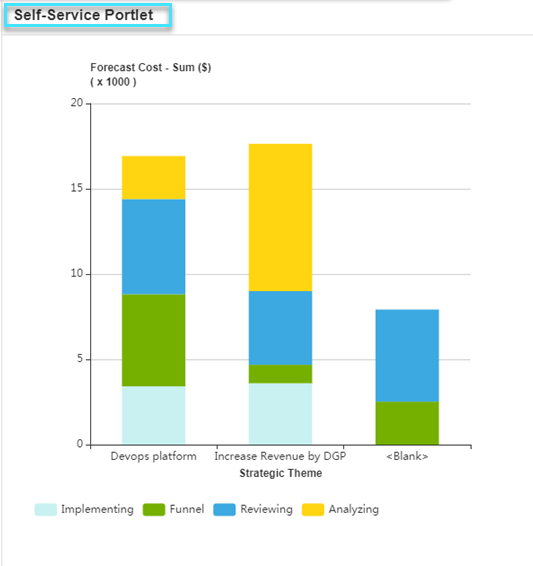
Self-service portlets provide you with the flexibility to define what data to present and how the data is presented. Anyone with the required access grant can set up a self-service portlet without any pre-configuration.
Self-service portlets can be added to and edited from the following areas:
-
Portfolio Type Settings page
-
Portfolio Overview tab
-
Project Type Settings page
-
Project Overview page
-
PPM Dashboard pages
-
Request Dashboard
-
Team's Overview tab
-
Program Dashboard

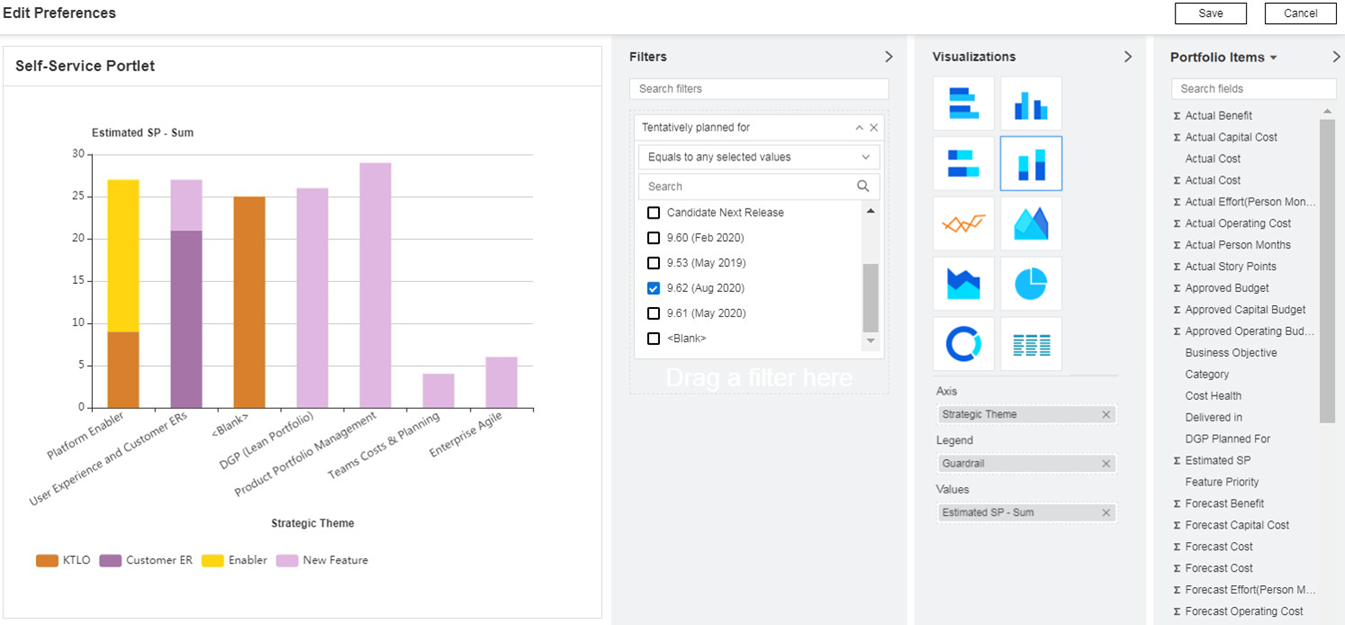
Set up display options for a self-service portlet
You can define a display type and configure the display options for a self-service portlet.
To set up display options for a self-service portlet:
-
Click the Edit
 button on a self-service portlet to open the Edit Preferences page.
 -
On the right side of the Edit Preferences page, select a data source for the self-service portlet.
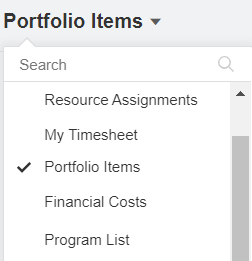
PPM provides the following self-service portlet data sources ready for use: Portfolio Items, Financial Costs, and KPIs. For details, see Preconfigured self-service portlet data sources.
You can also create you own self-service portlet data sources. For details, see Self-service portlet data sources.
-
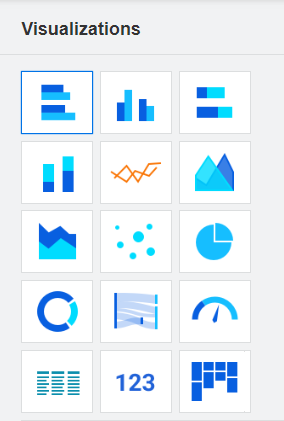
From the Visualization pane, select a display type for the self-service portlet and configure the display options.
 For chart display type
Follow the options described in the table below to set up display options for the following chart display types:
- Clustered bar chart
- Clustered column chart
- Stacked bar chart
- Stacked column chart
- Line chart
- Area chart
- Stacked area chart
- Pie chart
- Donut chart
Option Description Axis Select the source column for the information to be displayed on the axis.
Choices are limited to the columns defined in the self-service portlet data source.
Legend (Optional) Select the source column for the bar legend.
This option is only available for the following chart types:
- Clustered bar chart
- Clustered column chart
- Stacked bar chart
- Stacked column chart
- Line chart
- Area chart
Choices are limited to the columns defined in the self-service portlet data source.
Values Select an aggregable source column (marked with
 ) for the information to be displayed on the value axis.
 Choices are limited to the columns defined in the self-service portlet data source.
You can select more than one value if no legends are specified.
The value is calculated using the "Sum" aggregation function.
Show Values Available in 24.3 and later versions
If you want to show the data values outside the bar ends, turn on the switch.
This option is only available for the following chart types:
- Clustered bar chart
- Clustered column chart
- Stacked bar chart
- Stacked column chart
For grid view display type
-
Follow the options described in the table below to set up display options for grid view display type:
Option Description Column From the data source area, drag one or more source columns to add them as new data columns in the grid view.
Options are limited to columns defined in the self-service portlet data source.
Display Side Bar To display the side bar in the grid view, turn on the switch.
With this option selected, you can enable the pivot mode.
Display Pivot Row Total To display total for all columns in pivot mode, turn on the switch.
Display Grand Total To display total for all rows, turn on the switch. Conditional Formatting Create conditional formatting to highlight data displayed in the grid:
- Click Conditional Formatting.
- In the Conditional Formatting window, click New Rule to add a new conditional formatting rule.
- Select the cells you want to apply the format rule to.
- Define the condition when the rule is applied.
- Define the background and font color for the cell when the condition is met.
Note: Conditional formatting is not supported in IE browser, nor in pivot mode.
Show Total Number of Records Available in 24.3 and later versions
To display the total number of records in the grid table, turn on the switch. The total number of records appears below the table.
-
In the grid view preview section, set how the data is arranged in grid view.
For details of how to work with grid view, see Grid view.
For Sankey diagram display type
You use a sankey diagram to show a flow (a set of values) from one category to another.
Follow the options described in the table below to set up display options for the sankey diagram:
Option Description From The category where the flow comes. To The category where the flow goes. Size The width of the flow. Sort Alphabetically Select this option if you want to sort the categories in the alphabetical order. For Gauge diagram display type
A gauge diagram can show how a value is read against the colored value range or the target value in the gauge.
Follow the options described in the table below to set up display options for the gauge diagram:
Option Description Value The value to read. You must drag a value from the data source. Minimum Value The minimum value in the value range. Maximum Value The maximum value in the value range. Target Value The target value in the gauge.
You can drag a value from the data source or enter a target value manually.
Color Scales Configure the coloring of the value range (the gauge axis):
-
Select how to divide the value range into different colored sections.
-
Define what color a certain set of values are displayed in.
Note: The configuration of color scales is not supported in IE.
For Bubble chart display type
You use a bubble chart to display three dimensions of data.
Follow the options described in the table below to set up display options for the bubble chart:
Option Description Label What each of the bubbles presents. Horizontal Axis What the horizontal axis presents. Vertical Axis What the vertical axis presents. Color of the bubble indicates What the various colors of the bubbles present.
Size of the bubble indicates What the various sizes of the bubbles present.
Select a numeric source column from the data source.
For Card display type
A card can display a single aggregated value from a data field. You can use cards to highlight grand totals or values to represent the overall state of your data.
From the data source field, select an aggregable source column (marked with
). For Board display type
The Board view provides a dynamic way to present and interact with data. You can configure the board columns and swim lanes, and configure data to be visually represented as cards on the board.
Follow the options described in the table below to set up display options for the board:
Option Description Column Required.
Select the field to be used as the board's column.
Swim Lane Optional.
Select the field to be used as the board's swim lane.
Card Required.
Select the information to be displayed on a card. You can select multiple fields, and the first field serves as the title with the complete information displayed on the card.
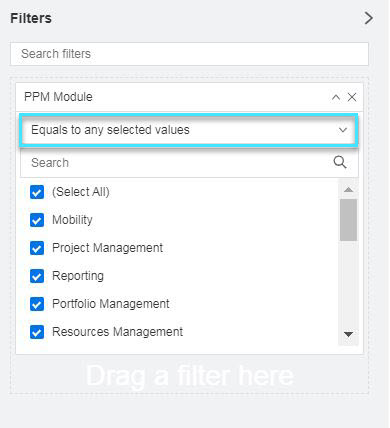
-
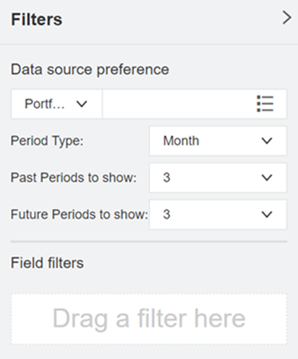
In the Filters pane, set filters for the self-service portlet.
-
In the Data source preference section, set data source preferences for the self-service portlet.
The fields in the Data source preference section change dynamically, depending on the data source you selected. Initially, all the data source preference fields are mapped from the self-service portlet data source. The preference fields indicate the name of the filed and any default value.
-
In the Field filters section, drag and drop a filter field.
-
Select a filter condition, and then provide a value in the Filter field.
-
Repeat these steps to apply another filter.
-
-
To change the self-service portlet name, in the top left side of the Edit Preferences page, enter a new name for the portlet.
-
Preview the portlet on the left side of the Edit Preference page. Make extra changes if needed.
-
Click Done.
Manage favorite views for a self-service portlet
Favorite views enable you to use a single portlet to analyze the same data from various perspectives, and present them in different forms. After you set up display options for a self-service portlet, a favorite view named Default Portlet View is automatically added for this portlet. You can add a new favorite view, update, or delete an existing view.
To add a favorite view:
You add a new favorite view by copying an existing favorite view.
-
At the top of a self-service portlet Edit Preferences page, click the Manage Views button
 .
. -
Click the Copy View button
 of an existing view.
 -
In the Copy View dialog box, enter a name for the new view and click OK.
The new view has the same display settings as the view it is copied from and is automatically selected for edit.
-
Edit the display options for the new view.
-
Click Done to save the new view.
The favorite view saves these settings: data source, display type, display options, and filters.
To update favorite views:
-
In the top left side of a self-service portlet's Edit Preferences page, click the Manage Views button
to expand the favorite view list. -
Select the view you want to update. The view currently selected for edit has a check mark
 before it.
 -
Make necessary changes in the Edit Preferences page.
-
Click Done to save the changes.
Which view is displayed when viewing a self-service portlet
When you view a self-service portlet, it is displayed in the view that was last saved.
You can switch to a different view. In the top right corner of the self-service portlet, click the Switch views button  , and select the view you like.
Restore grid view display type to default settings
If a self-service portlet favorite view uses the grid view display type, when viewing the portlet, you can rearrange the data in the way you prefer.
If you then want the portlet to use the display settings saved in the favorite view, click Restore to default in the top right corner of the portlet.
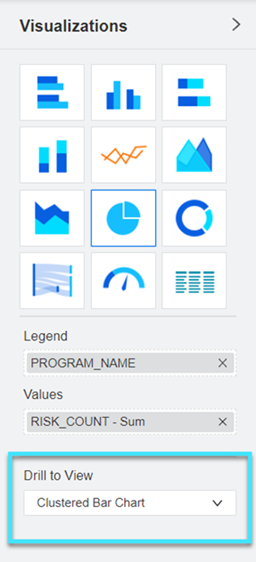
Define a drill-to view for a favorite view
You can define a drill-to view for a favorite view. A drill-to view offers more details.
Consider the following before you define a drill-to view for a favorite view:
-
The favorite view from which the drill-to view is accessed is referred as the drill-from view.
-
The drill-to view must use the same data source as the drill-from view.
To define a drill-to view for a favorite view:
-
Open the Edit Preferences page of a self-service portlet.
-
At the top of the page, click the Manage Views button
. -
From the favorite view list, select the favorite view for which you want to define a drill-to view.
Note: You cannot define a drill-to view for favorite views that use the Grid View or Gauge Diagram display type. However, these favorite views can be selected as drill-to views.
-
In the Drill to View section of the Visualizations pane, select the drill-to view for this favorite view.
-
Click Done to save the changes.
 See also:


