
Share this page


Prioritize contents within a scenario
Prioritizing the contents within a scenario helps your organization make optimal allocation of the budget and resources.
Overview
A prioritized list, with a higher ranking for the most important items, helps your organization to make optimal allocation of budget and resources. Organizing scenario content into a prioritized list may involve adding or removing items, and changing the rank order.

Considerations before prioritizing
Consider the following factors before prioritizing the contents:
| Factor |
Description |
|---|---|
| The content's strategic theme or business objective |
See Strategic planning. |
| The content's financial metrics, such as forecast cost and forecast benefit |
Such financial data provides insight on demand versus capacity, and whether a content is worth investing. The Strategic Prioritization View provides quick access to the financial metrics in the content list table. To display the financial metrics you are concerned about:
|
| Dependencies between contents |
If a content is to be invested, its predecessor content is supposed to be invested too. For details, see View dependencies. |
Add contents to a scenario
When you create a what-if scenario for a portfolio, the
- Have both start and end dates specified
- The time periods fall in the scenario's time range.
You can manually add other
To manually add contents to a scenario:
-
From the What-if Analysis page, click the scenario to open the details page.
-
Select a layout template with Board View, Gantt View, or Rank View.
Tip: To add content to a scenario, you need a layout template with Gantt View, Board View, or Rank View component type. Predefined templates, Planning Board Quarterly View, Strategic Planning Gantt View, and Strategic Prioritization View have the required component type. Alternatively, you can include the required component type in your customized layout template.
-
Expand the Candidates pane on the right to display the portfolio
-
To add an
The
-
To adjust the
- Select a layout template with Gantt View.
- Hover over the left or right end of the Gantt chart until the
 icon appears.
 -
Click and drag the icon to the desired time period on the timeline to adjust the
-
To reschedule the
- Select a layout template with Gantt View or Board View.
- Move the
-
To restore an
- Click the
- Click Restore to Candidates.
- Click the
-
Repeat these steps as necessary to add all the desired contents to the scenario.
-
-
Click Save and Apply to apply the changes made to the scenario.
Move contents out of a scenario
If you do not plan to start or continue a portfolio content, move the content out of the scenario. The budget
To move a content out of a scenario:
-
From the What-if Analysis page, click the scenario to open the details page.
-
At the top-right of the scenario details page, select a layout template with the Ranking View content view type.
Tip: You can use the predefined Strategic Prioritization View layout template, which includes the Ranking View content view type. Alternatively, you can incorporate the Ranking View content view type into your customized layout template. For details, see Configure content view types in a template.
-
To move a content out of a scenario, from the content table, click the content and drag it below the content list table.
A new table appears below the content table. It lists the moved-out contents.
-
To return content back to a scenario, from the moved-out content table, click the content and drag it back to the content table.
-
-
To save the changes made to the scenario, click Save.
-
To discard the changes made to the scenario, click Restore.
View dependencies
You should understand the dependencies between scenario content before prioritizing. If an item requires investment, its dependent item should be invested as well.
Overview of dependencies
An item in a scenario can have relationships with items in the same scenario. The relationships between the scenario content include the following:
- Informational. The two items are related to each other.
- Predecessor. Action is not allowed on one item until the referenced item is closed.
- Successor. Action is not allowed on a referenced item until the current item is closed.
- Finish/Finish predecessor. The two items must complete at the same time.
An item's relationships with other items are defined in the References section of the item. For details, see Add references to requests.
In 24.1 and earlier versions, all these relationships are considered dependencies in scenario. In 24.2 and later versions, only the Predecessor and Successor relationships are considered.
To view dependencies between scenario content:
-
Open the scenario details page and select a layout template with the Board View, Gantt View, or Ranking View content view type.
-
The actions to view dependencies vary based on the content view type of the scenario:
Content view type Details Board View
Gantt View
Turn on the Dependencies
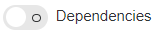 switch.
 - Dependency icon
 . If an item has dependent items, a Dependency icon appears on the item's Gantt or card. Clicking this icon opens the Dependency map, from which you can view dependency details. For details, see Dependency map.
 - Blue lines with arrows
- Blue lines (Available in 24.1 and earlier versions). Represent a relationship between the connected scenario contents.
Ranking View
See the following columns to learn about the dependencies of a scenario content:
- The Has Dependency column. Scenario content having dependent contents has a dependency icon in the Has Dependency column. Clicking this icon opens the Dependency map, from which you can view dependency details. For details, see Dependency map.
- The Predecessors column
- The Dependencies column (available in 24.1 and earlier versions). Lists the dependency items of a scenario content.
- Dependency icon
Add dependencies
If you discover missing dependencies in scenario content, you can add them.
- From a project or proposal to a program, project, or proposal
- From a program to a project or proposal
The dependencies added represent a predecessor-successor relationship in 24.2 and later versions, and an informational relationship in 24.1 and earlier versions. For details, see References and relationships.
Add dependencies
The steps to add a new dependency vary depending on the scenario's content view type:
| Content view type | Details |
|---|---|
| Board View |
|
| Gantt View |
|
| Ranking View |
|
 .
.Apply new dependencies
You can apply the newly added dependencies to the scenario content.
To apply new dependencies:
-
Click Apply.
-
The Dependencies area on the Apply preview for scenario page displays the newly added dependencies.
-
Review the new dependencies and select the portfolio contents where you want to add the dependencies.
-
Click Apply.
Assign priorities to contents
Contents in a scenario are by default listed in the alphabetical order of names.
To adjust the ranking of a scenario content:
-
Open the details page of a scenario and select a layout template with the Ranking View content view type.
-
In the content table, click the Rank column to make sure the contents are sorted by rank.
-
Drag and drop a scenario content to the target location in the table. The ranking of the content is updated.
-
-
Click Save to save the changes.
 Next steps:

