
Share this page


Add tasks
After creating a work plan, you should fill it with tasks required to complete the project. This section includes the actions you might need to do when adding tasks to the work plan.
In this topic:
- Choose a task planning approach
- Add a task
- Upload work plan from Microsoft Excel
- Import a work plan
- Import a template
- Assign roles, skills, and resources to tasks
- Set a task as milestone
- Build task relationship
- Build task dependency
- Set up task notifications
Choose a task planning approach
Choose a task planning approach before adding tasks to a work plan:
| Task planning approach | Details |
|---|---|
| Top-down |
|
| Bottom-up |
|

Add a task
After creating a work plan, you should fill it with tasks required to complete the project.
To add a task to a work plan:
- Open the project.
- In the Summary tab, from the Work Plan portlet, click Edit Work Plan.
- Select a task in the work plan. If this is the first time you add a task, select the root task.
-
To add a task in the Quick view, click
 to add a task above the selected task, or
  to add a task below the selected task.
 -
To add a task in non-Quick views, click Add Task to open the Add Tasks page to add a task above the selected task.
-
Give the task a name, specify the Scheduled Start and Scheduled Finish dates, and provide other necessary information for the task.
Note: A task's Scheduled Finish date cannot be later than the project end date if your administrator has turned on the Prevent Task Scheduled Finish Dates Extending Beyond Project End Date feature toggle. For details, see Use feature toggles to turn on/off features.
- To save the newly added tasks, click Save in the Quick view, or click Done in the Add Tasks page in the other views.
You can also add a task by copying and pasting an existing task.
Upload work plan from Microsoft Excel
If your task breakdown work is done in Microsoft Excel, and then want to use PPM to track the progress of the tasks, you can upload tasks from Microsoft Excel to the PPM project work plan.
This feature is available only in the work plan Quick view. If the project is integrated with Microsoft Project, this feature is available only in the PPM-control mode.
To upload work plan from Microsoft Excel:
-
Prerequisites:
- The ENABLE_IMPORT_EXPORT_EXCEL_IN_WORK_PLAN parameter is set to true.
- To download a work plan as Excel, you should have the access grant to view the work plan.
- To upload work plan from Excel, you should have the access grants to edit and synchronize the work plan.
-
In the work plan Quick view, click the Download Work Plan as Excel button to obtain the Excel template.
Only the ID, Name, Scheduled Start, Scheduled Finish, Resources, Predecessors, Milestone, Scheduled Effort, and Scheduled Duration columns are downloaded to Excel.
-
Add tasks in the downloaded file.
Make sure the following:
- All the tasks added should be under the root task. Use Group in Excel to indicate the task relationship. Only the root task can be at the outermost level of the Excel group.
- The Unique IDs of the added tasks are required. The IDs can be number, character, string, or anything, as long as they are unique.
- Scheduled Start and Scheduled Finish columns should use the Excel date format.
-
The Predecessors column should follow the format:
<Unique_ID><Dependency_Type>+<Lag_Days>. For example,45001FS+0.5.For information about dependency types and lag days, see Add predecessors from the work plan page
- The Resources column should use the resource full name.
- If the task is a milestone, type
Yin the Milestone column.
-
In the work plan, click the Upload Work Plan from Excel icon and select the Excel file to update the work plan with the Excel file, except the actuals data.
PPM automatically calculates Scheduled Duration if Scheduled Start and Scheduled Finish are defined.
PPM uses the Scheduled Effort defined in Excel even if the "Automatically calculate Scheduled Effort" option is selected in the project settings. If Scheduled Effort is not defined, PPM automatically calculates the value based on the Scheduled Duration.
Note: We recommend that once you upload work plan from Excel, you use PPM work plan to track and edit tasks.
Import a work plan
You can import a work plan from another project to add tasks for the current work plan. You can do this in any non-Quick view.
To import a work plan from another project:
-
Select a non-root task in the work plan.
-
In the toolbar, click Actions > Import another Work Plan.
-
In the Copy Work Plan from Another Project window, select a project and select the information to be copied.
See Create work plan from another project for details about the information to be copied.
-
Click Copy.
The work plan tasks are imported above the selected task.
Import a template
You can add all the tasks of a template to the current work plan. You can do this in any non-Quick view.
To import a work plan template to the current work plan:
-
Select a non-root task in the work plan.
-
In the toolbar, click Actions > Import a Template.
-
In the Import Work Plan Template window, select a template and click Import.
All the tasks in the specified template will be added above the selected task in the current work plan.
Assign roles, skills, and resources to tasks
You can assign a skill set or role to any task with or without specifying a resource. This allows you to create a work plan that identifies the roles or skills needed to complete its tasks without necessarily pinpointing the specific resources that will ultimately do the work. Additionally, capturing roles or skills required to complete tasks provides a more detailed estimate of the project cost; this helps make sure the forecast cost is correct and the right resources are allocated.
To assign a role or skill to a task:
- Edit the Role column for the task in the work plan, or
- In the Task Details > Resources tab, edit the Assigned Role field or click Add Skill.
To assign resources to a task:
- Edit the Resource column for the task in the work plan, or
- In the Task Details page > Resources tab, click Add Resource.
Resources available for a project manager to assign include:
- The resources that are in the resource pools managed by the project manager.
- The resources that have been assigned to the project's staffing profile.
Set a task as milestone
Milestones are used to mark significant events in the execution of a project, often the completion of a deliverable or arrival of a deadline.
To set a task as milestone:
-
Double-click the task to open the Task Details page.
You can only set a leaf task as milestone.
If no task can work as a milestone, add a task first.
-
Do either of the following.
-
Select the option Mark task as milestone.
- In the Schedule tab, change the task scheduled duration to 0. Then the option Mark task as milestone is selected automatically.
Tasks that are set milestones do not have duration or effort by default. However, if you change their duration to a value greater than 0 and thus giving them effort, they are still milestones.
-
-
(Optional) This is a major milestone: If you want to set the task as a major milestone, select this option.
Milestone automatically completes: If you want the milestone to automatically mark itself as complete when all its predecessors are complete, select this option. When all predecessors are complete, the actual start and finish dates of the milestone are automatically set to the actual finish date of the predecessor that completes last. This option is enabled only for the milestones whose duration are 0.
If you do not select the Milestone automatically completes option, the progress and status of a milestone, when all its predecessor are complete, is decided by SET_SUCCESSOR_MILESTONE_PERCENTAGE parameter. For details, see Server parameters.
- Click Save or Done.
Build task relationship
By indenting and outdenting tasks, you build a parent-child relationship between tasks and create a hierarchy in the work plan.
Task categories
Work plan tasks are classified into the following categories:
- Root task: the top-level task in the work plan, with the same name as the project name. It is the highest level summary task.
- Summary task: any task that has child tasks. A summary task can be the child task of another summary task.
- Leaf task: any task that does not have child tasks.
Both scheduled and actual data of leaf tasks are rolled up to their summary tasks. Scheduled and actual data of summary tasks are rolled up to the root task.
Indent or outdent a task
To indent or outdent a task:
Select the task and click the Indent or Outdent button in the toolbar, or use the keyboard shortcuts.
|
Keystroke |
Action |
|---|---|
|
Shift + Alt + Left Arrow |
Outdents a task. |
|
Shift + Alt + Right Arrow |
Indents a task. |
Move a task up or down
To move a task up or down:
| Work plan view | Details |
|---|---|
| Quick view |
|
| Non-Quick view |
|
Build task dependency
A dependency means one task is forced to start or finish after another task starts or finishes. You add predecessors to a task to build dependency between tasks.
Supported predecessor type and dependency type
The predecessors of a task could be tasks in the current work plan, tasks in another project, or requests. They are used by the scheduler to determine when the task will be scheduled.
|
Predecessor type |
Supported dependency type |
|---|---|
|
A task in the current work plan |
You can also define lag or lead time for predecessor relationships by typing a positive or negative number in the Lag (Days) field, if desired. When adding a summary task as a predecessor, only relationships of the Finish-Start or Finish-Finish type are allowed. When adding a predecessor to a summary task, only relationships of the Finish-Start or Start-Start type are allowed. |
|
A task from another project |
Same as a task in the current work plan. |
|
A request in Demand Management |
Request relationships are managed from the References tab of the Task Details page.
|
Add predecessors from the work plan page
To add an internal predecessor:
- Select the task.
-
In the Predecessor column, type the sequence of the task to be added as the predecessor, for example, "2".
PPM imposes Finish-Start dependency type by default: the task starts after the predecessor finishes.
- If you want the task to finish after the predecessor finishes, add "FF" after the task sequence, for example, "2FF".
- If you want the task to start after the predecessor starts, add "SS" after the task sequence, for example, "2SS".
- If you want the task to finish after the predecessor starts, add "SF" after the task sequence, for example, "2SF"
- If you want the task o finish or start specific days after the predecessor starts or finishes (the lag days), add the number of days after the dependency, for example, "2FS+0.5"
To add an external predecessor:
- Select the task.
- In the work plan toolbar, click the External Predecessor button to open the Task Details window.
- Click Add External Predecessor.
- Search for the target task from another project and click Add.
- Click Save or Done.
Add predecessors from the Task Details page
- Double-click the task to open the Task Details page.
-
In the Predecessors section, click the Add a predecessor drop-down list.
You can select a task within the work plan, a task in another project, or a referenced request of the task as the predecessor.

- After selecting a predecessor, select the dependency type in the Relationship field.
- (Optional) In the Lag (Days) field, specify the days that the task can lag to start or finish.
- Click Save or Done.

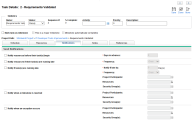
Set up task notifications
You can set up notifications for a task to specify when and to whom to send emails during the project execution.
To set up the notification for a task:
-
Open the Task Details page, and go to the Notifications tab.
-
Select the check boxes of the appropriate notifications.
When no check box is selected in a leaf task, PPM sends emails for the leaf task according to the notification setup in its summary task.
When at least one check box is selected in a leaf task, PPM sends emails for the leaf task according to the notification setup in the leaf task.
Notification
Description
Notify resources before their task(s) begin
Notifies the resources before their tasks begin.
You can set the number of days in advance of the start date from which to send the notification.
Notify resources if their task(s) are running late
Notifies the resources that their tasks are running late.
You can specify the frequency with which this notification is sent.
Notify if task(s) are running late
Notifies a wider range of users of tasks in the work plan that are running late.
You can specify:
-
The number of late days required to trigger the notification
-
The frequency with which the notification is sent
-
Sets of users to send the notification to
Notify when a milestone is reached
Notifies a set of users when the task has been reached, if it is a milestone.
You can specify sets of users to send the notification to.
Notify when an exception occurs
Notifies a set of users when the task has triggered an exception.
You can specify sets of users to send the notification to.
-
-
Click Save or Done.
 See also:

