Share this page


Set up an MCP Server
Use this topic to set up and configure Model Context Protocol (MCP) connectivity for PPM Aviator.
Start the PPM server
Start the PPM server using your standard process.
Configure the MCP server
The MCP jar comes with the installation and is located under <PPM_HOME>/MCP.
In the same folder, update the application.yaml file with the required details:
server:
  port: <Optional. If this is set to anything other than 8082, update server.conf; otherwise, no update is required.>

ppm:
  baseurl: <IP address of baseURL>
Optionally update the MCP server URL in configuration
-
Open server.conf.
-
Update the following property:
com.kintana.core.server.MCP_SERVER_URL = http://localhost:8082/mcp
Start the MCP server
Run the following command from the MCP folder:
java -jar ppm-mcp-server-0.0.1.jar --spring.config.location=application.yaml
- Note:
-
MCP server is required only when using PPM Aviator with latest AI enablement.
-
For existing/old AI features, MCP server is not required.
-
Ensure that application.yaml is in the same folder as the MCP jar. If it is in a different location, specify the full path to application.yaml in the MCP jar startup command.
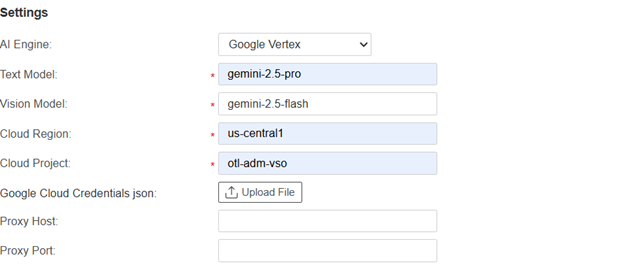
Configure LLM Parameters
To configure the selected LLM provider:
-
Navigate to Administration > Integrations > AI Model Config.
-
For each supported provider (for example, Google Vertex and OpenAI):
-
Enter required model parameters.
-
Upload JSON (for Gemini) OR provide API key (for OpenAI).
For example:
-
- Note:
-
You can choose the latest model, the most powerful model, or the model best suited for your use case.
-
Configure proxy settings if required for network connectivity.
Enable PPM Aviator Feature
-
Navigate to Administration > New Features > Feature Toggles.
-
Find the toggle named PPM Aviator.
-
Enable it by switching to ON.