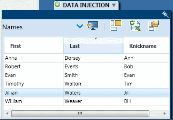
Data Injection sidebar
 Relevant for Power Mode only
This sidebar enables you to automatically enter data into forms in desktop applications or Web pages.
User interface elements are described below (unlabeled elements are shown in angle brackets):
|
UI Elements |
Description |
|---|---|
| <Data set list> |
A drop-down list of the data sets associated with your application. |

|
Inject Data. Injects the data from the selected row of the data table into the fields in your application. |

|
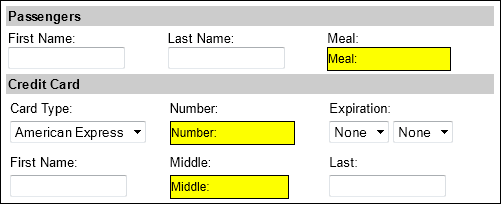
Display Field Mapping. Highlights and labels the fields in the application that match the column headings in the data set. The column headings in the data set are displayed in the highlighted fields in the application. Click again to turn off the highlighting.
|

|
Refresh Data. Reloads the data from the data set source into the Data Injection sidebar. |

|
Manage Fields. Opens the Manage (& Map) Fields dialog box, enabling you to define the fields to inject, the fields to which they should be mapped, and the mapping order. . |
| <Data injection status> |
The Data Injection sidebar displays an icon in its tab indicating the success
|


 and expand the Data Injection section.
 icon. To reposition the sidebar, click and drag on the sidebar header.
 , partial success
 , or failure
 of data that was most recently injected. For details, click the icon to open the Data Injection Status window.


