Share this page


Tenant management assets
The Tenant management > Assets area lets admins manage the assets in LoadRunner Cloud projects. Currently, the assets include load generators and agents.
Load generator management
Admins can share load generator assets—on-premises load generators, with multiple projects. In addition, admins can delete on-premises load generators that are shared by several projects.
To manage your load generator assets, expand your user name, select Tenant management > Assets and click the Load Generators tab.
The following actions are available for managing load generators:
| Action | How to |
|---|---|
| Share |
Share a load generator with multiple projects:
|
|
Delete |
Delete a load generator that has been shared with multiple projects:
|
| Search | In the right pane, use the search box to find load generators in the grid. |
| View the projects sharing a load generator | Select a load generator from the grid and view the right pane. The Projects section shows which projects use the selected load generator. |
 Share to open the Share load generator: <LG_name> dialog box.
 Delete.
Older versions of on-premises load generators
For best results, use an on-premises load generator of the same version as your current LoadRunner Cloud tenant.
Beginning with OPLG version 2021.04, unsupported on-premises load generators are automatically disconnected.
LoadRunner Cloud supports up to two versions back. For details about supported versions, see On-premises load generators (OPLGs).
-
An old, but supported version, is indicated by a warning icon
 .
. -
An old, and no longer supported version is indicated by an error icon
 .
.
For information about downloading and installing a newer version, see Update an on-premises load generator.
Agent management
Admins can share agent assets with multiple projects or delete agents shared by several projects.
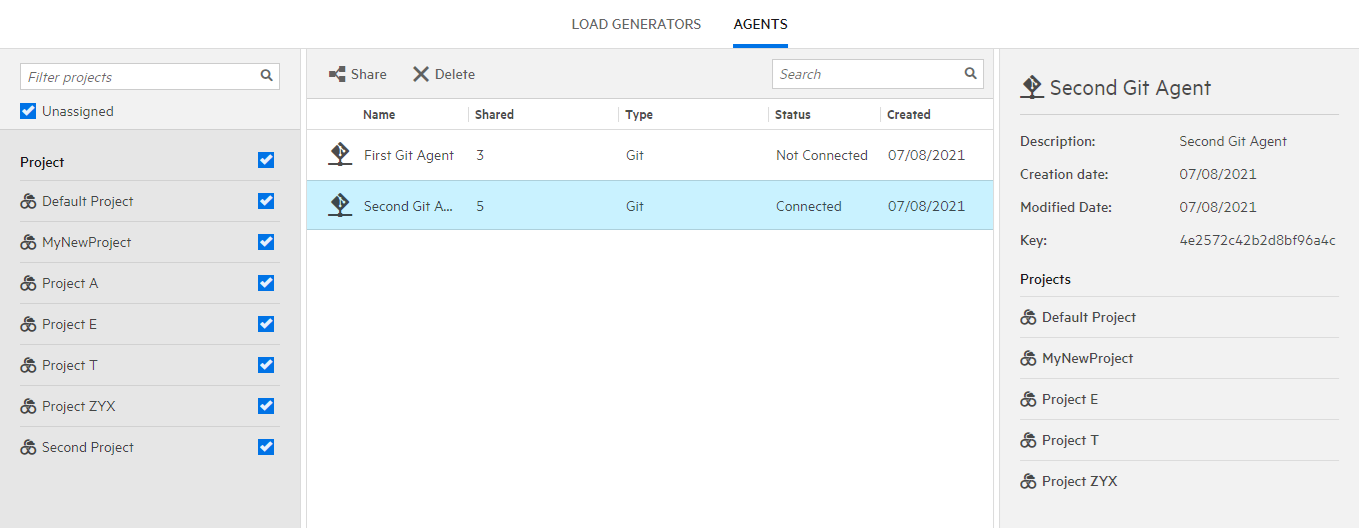
To manage your shared agents, expand your user name, select Tenant management > Assets, and click the Agents tab.
The following actions are available for managing shareable agents:
| Action | How to |
|---|---|
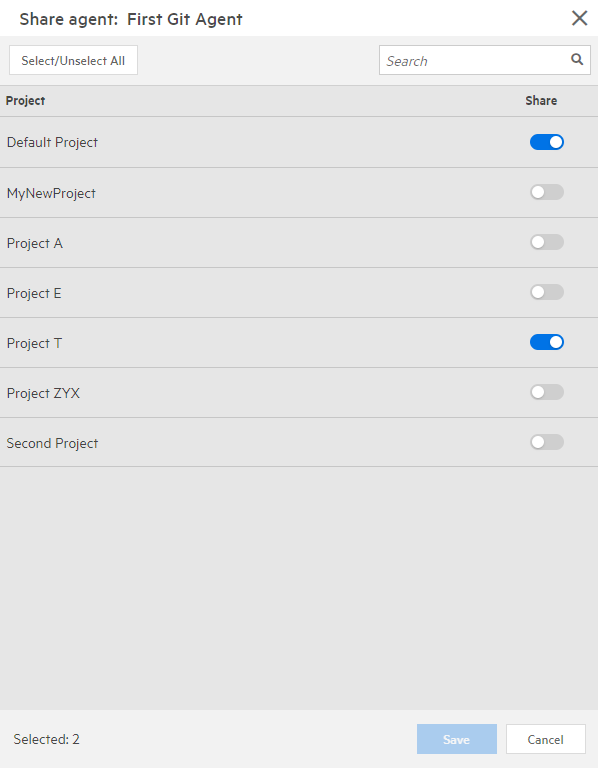
| Share |
Share an agent with multiple projects:
Note:
|
|
Delete |
Delete an agent that has been shared with multiple projects:
|
| Search | In the right pane, use the search box to find agents in the grid. |
| View the projects sharing an agent |
Select an agent in the grid. The Projects section in the lower part of the right pane, shows the projects that use the selected agent.
|
 See also: