Share this page


Scripts
Scripts contain the actions of a business process and form the backbone of your performance test. Your test definition can contain one or multiple scripts.


Create a script
A script is the recorded actions of a business process in your application. Your load test can contain one or more scripts. You can access downloads to supported script tools from the LoadRunner Cloud banner > Tools and Integrations > Scripting tools area.
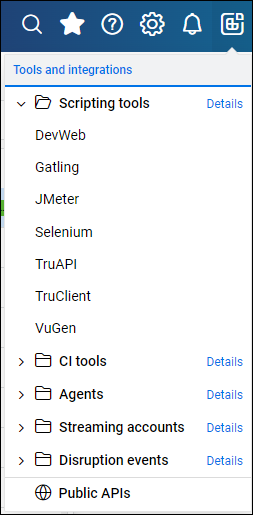
For details of the tools you can use to create scripts for your load tests, see Scripting tools.

Manage scripts
You manage your scripts in one of the following places:
-
Assets > Scripts tab
-
Load tests > Load profile pane
Use the Assets area to manage scripts globally in the LoadRunner Cloud repository, and make them available to all tests in your project.
Use the Load tests area to manage scripts for a specific test, without affecting the global script asset.
The Scripts tab and Load profile pane show all of the scripts that exist in the LoadRunner Cloud repository.
The scripts list contains the following columns:
- Name. The script's name.
- Modified. The last time the script was modified.
- Author. The user who added the script to the LoadRunner Cloud repository.
- Usage. The number of load tests using the script. For a list of the tests, open the Related tests tab in the right Details pane.
- Type. The script's protocol, such as Web HTTP, DevWeb, and TruAPI.
- Labels. All of the labels assigned to the script. For details, see Assign labels.
- Auto sync. For scripts that were uploaded or reloaded from a Git repository, this column contains a toggle switch that enables you to create a permanent link to the repository. When selected, LoadRunner Cloud automatically synchronizes the script's contents with the latest version in the Git repository before running the script. For details, see Add and manage scripts in a Git repository.
You can attach any of these scripts to a load test, upload new scripts, or reload existing ones. The following table describes the available actions:
| Action | How to |
|---|---|
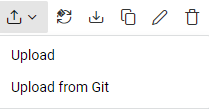
| Upload |
You upload a script in the form of a .zip file. The TruClient extension automatically saves the script as a .zip file. For VuGen scripts, select File > Manage Zip Files > Export to Zip File. To upload a script, do one of the following:
The following guidelines apply to the allowed number of scripts and their size:
Note: This button is inactive if manual script upload/reload is blocked in the current project. Blocking manual upload/reload is only supported using the LoadRunner Cloud Public API. For details, see Public API. |
| Reload |
Click Note: This button is inactive if manual script upload/reload is blocked in the current project. Blocking manual upload/reload is only supported using the LoadRunner Cloud Public API. For details, see Public API. |
| Download | Click |
| Duplicate | Click |
| Edit | Click |
| Delete | Click |
| Runtime settings |
Click For further details, see Open the runtime settings. Note: When editing runtime settings in the Assets > Scripts page, the changes are saved as global. This means that the settings apply to the script in any load test in which it is included, provided that the script is set to global mode for that specific load test. |
| Copy runtime settings |
Copy runtime settings from one script to another:
Note:
|
| Data files | Assign data files to a script. For details, see Assign data files below. |
| Keys | Assign a script key to a DevWeb script. For details, see Assign a script key below. |
| Assign labels |
You can assign a label to a script automatically when uploading the script, or manually after the script has been uploaded. For details, see Assign labels below. |
The load test's Load profile page shows all of the scripts that were added to current load test.
The following table lists the available actions:
| Action | How to |
|---|---|
| Add from Assets |
Click |
| Upload |
Click The following guidelines apply to the allowed number of scripts and their size:
Note: This button is inactive if manual script upload/reload is blocked in the current project. Blocking manual upload/reload is only supported using the LoadRunner Cloud Public API. For details, see Public API. |
| Download | Click |
| Duplicate | Click |
| Delete | Click |
| View/Edit | Click |
| Copy scheduling |
Click |
| Runtime settings |
Click For further details, see Open the runtime settings. Note: When editing runtime settings in this Load tests page, the changes are not applied globally. |
| Configure multiple script settings | Click |
| Copy runtime settings |
Allows you to copy runtime settings from one script to another:
Note:
|
| Assign data files to scripts | Click |
| Set prefix |
Lets you add a prefix to a script name.
This is useful if you want to run multiple instances of the same script and present their results separately in the dashboard, reports, and logs. Duplicate the script and add a unique prefix. Note: Prefixes can contain numbers, letters, hyphens, or underscores. |
Reload scripts
In the Assets > Script area, you can reload scripts to make sure that your test is using its latest version.
You can reload a script from the file system or from a Git repository. You can reload an existing script from Git, even if it was originally uploaded from the file system.
Note: If manual script upload/reload is blocked in the current project, the Reload button is inactive. Blocking manual upload/reload is only supported using the LoadRunner Cloud Public API. For details, see Public API.
To reload a script from another file on the file system:
-
Click
 .
. -
If a Git agent is connected to the project, expand the Reload dropdown and click Reload.
To reload a script from a Git repository:
- Make sure a valid Git agent is connected to the project. For details see Add and manage scripts in a Git repository.
- Expand the Reload dropdown and click Reload from Git.
- In the Reload script from Git dialog box, select an agent, repository and branch.
- Select the script you want to reload. Only select one script.
- Select Auto sync to instruct LoadRunner Cloud to keep the script up to date from the Git repository.
- Click Reload.
Manage runtime settings
After you click Reload in the previous section's Reload script from Git dialog box, the Reload script dialog box opens. To manage the runtime settings, select an option:
-
Do not keep runtime settings. Instructs the reload not to keep the existing script's runtime settings. Instead, it uses the new script's runtime settings.
-
Keep runtime settings. Instructs the reload to keep the existing script's runtime settings and not use those included with the new script.
-
Include Run Logic. Retains the Run Logic customizations of the existing script. If you do not select this option, when you reload a new script, the Run Logic properties of the new script are used.
Note:
- You can only keep runtime settings for scripts of the same type.
- The option to keep runtime settings is not available for scripts uploaded from a Git repository.
- If you want to retain the run logic, it must be compatible between the new and existing scripts. If it is not compatible, the run logic from the new script is used.
Runtime setting scenarios
Scenario 1
- The existing and new scripts are of the same type and Keep runtime settings and Include Run Logic are both selected. Result: All runtime settings are kept as they were in the existing script, including the runtime settings mode—global or local.
Scenario 2
- The existing and new scripts are of the same type and Do not keep runtime settings is selected. Result: All runtime settings are updated from the new script. The run logic is reset to the default value, local.
Scenario 3
- The existing and new scripts are of different types. Result: The Do not keep runtime settings and Keep runtime settings are ignored and all runtime settings are reset to their defaults from the new script. The runtime settings modeis reset to the default value, local.
View script details
In the Script Details pane within the Assets > Script area, you can learn more about the selected script. This expandable pane is located to the right of the grid. It displays additional information about the script and a list of tests and data files associated with the script.
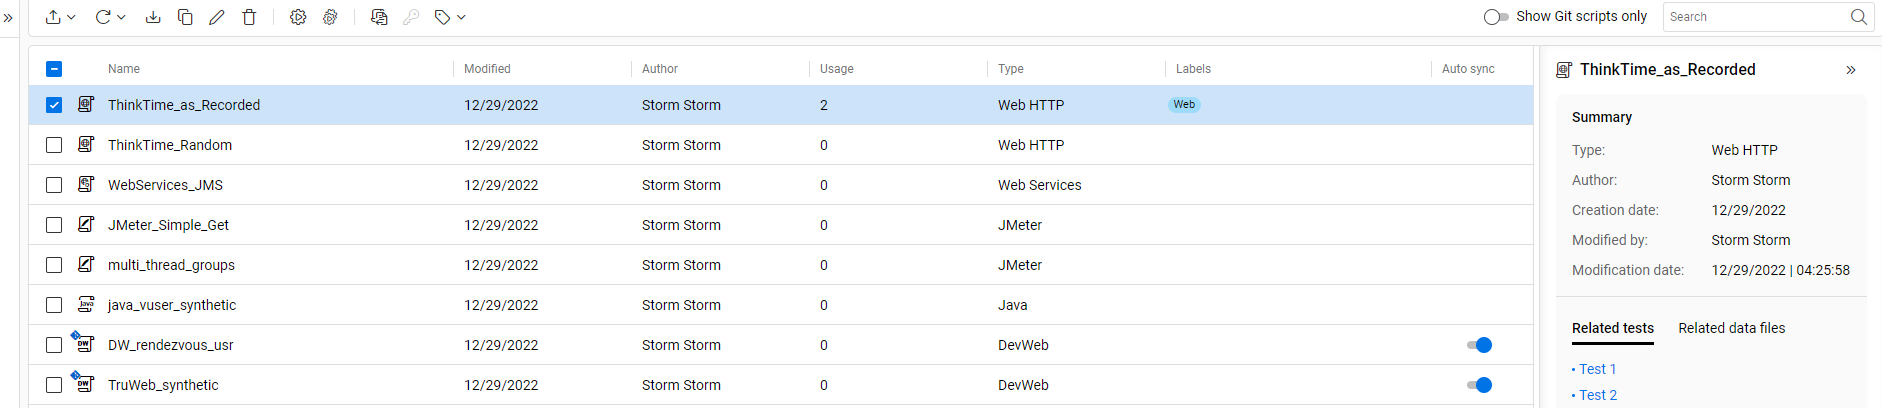
Script Details pane
The Script Details pane, only available when a single script is selected, displays the following information:
| Section | Description |
|---|---|
| Summary | Displays general information about the script, such as script type, by whom and when the script was created, and by whom and when the script was modified. |
| Git |
If the script was uploaded from a Git repository, the pane displays general information about the relevant repository and branch. Click Commit history to view details of the last 10 commits on the script. Note:
|
| Related tests | Displays all load tests that use this script. |
| Related data files | Displays all data files used by this script. |
Upload Silk Performer scripts
To use Silk Performer scripts in your load test, you need to upload them through the Silk Performer Workbench.
To upload Silk Performer scripts:
-
In the Silk Performer Workbench window, select File > Upload Project to > LoadRunner Cloud.
-
In the Login step, enter the tenant and login information.
-
In the Project step, select the LoadRunner Cloud project into which to upload the script.
-
In the User Types page, select the user types to upload. Click Finish.

For details on working with Silk Performer, see the Silk Performer Help Center.
Add and manage scripts in a Git repository
You can connect to an existing Git script repository and add those scripts to your LoadRunner Cloud load tests.
For details, see Git integration.
Do the following to add or update scripts from your Git repository to LoadRunner Cloud:
| Action | How to |
|---|---|
| Access the Git repository |
Click
Note: For shared Git agents, if multiple users upload or synchronize scripts using the same agent simultaneously, the uploading or synchronizing time increases. |
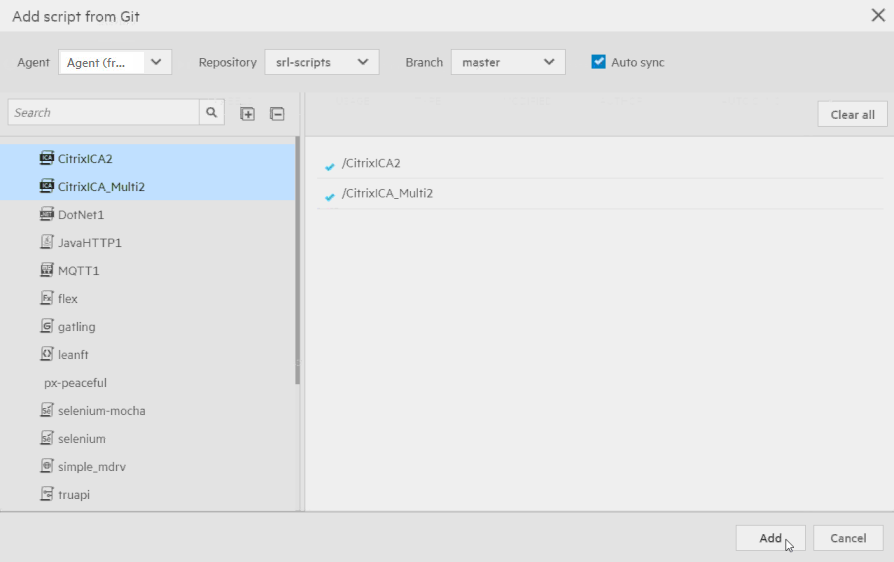
| Select an agent |
From the dropdown menus, select the agent, repository, and branch that connect to the script repository you want to use.
For details on managing your Git agents, see LoadRunner Cloud agents. If you want all the scripts that are uploaded from the repository to be configured for auto sync, select the Auto Sync check box. You can also individually configure scripts for auto sync. For details, see Sync Git scripts. |
| Select a script |
Select one or more scripts from the Git repository. Click Add.
|
| Sync Git scripts |
You can sync Git scripts both manually and automatically. To sync Git scripts manually:
Note: When you manually sync a Git script, runtime settings configured for the script in LoadRunner Cloud are retained. To sync Git scripts automatically: Toggle the Auto sync switch for the scripts you want to be synced automatically.
When a change to a script is made in the repository and the script is automatically updated in LoadRunner Cloud, a message is added in the notifications area in LoadRunner Cloud. Note: When you automatically sync a Git script, the runtime settings configured for the script in LoadRunner Cloud are retained. |

 to sync your scripts with the Git repository.
Tip: To see a list and view the status of your uploads and syncs, click the Notification button ![]() in the top banner. The Notification pane provides a time stamp and other relevant information for each event. If you have new notifications, the Notification button indicates the number of unread items
in the top banner. The Notification pane provides a time stamp and other relevant information for each event. If you have new notifications, the Notification button indicates the number of unread items ![]() . To delete an upload notification, hover over it and click x.
. To delete an upload notification, hover over it and click x.
Edit and view scripts in LoadRunner Cloud
You can edit or view the script's files in a text editor from within LoadRunner Cloud.
Caution:
- There is no option to revert to the former version of your script—version control is not supported.
- If you modify transaction names, your changes are not reflected in the load test's SLA page.
- Syntax validation is not supported. We recommend that you validate your code in an external script editor.
The following guidelines apply to the editor and viewer:
- Editing is supported for all script types with the exception of TruClient, Selenium JUnit, and JMeter.
- .NET scripts can only be viewed—not edited.
- The editor/viewer can show up to five levels in the script's folder structure.
- The editor/viewer may not display files that are humanly unreadable or exceedingly large.
- Changes to Git scripts are not retained if you perform a sync.
Note: To allow script editing, submit a service request to enable script editing for your tenant. If editing is not enabled, you are only able to view the supported scripts.
To view and edit the contents of a script:
- In the Load Tests tab, choose a test.
- Click
 to open the load test's Load profile page.
 - Select the check box of the script that you want to edit. You can only make one selection at a time.
- Click
 .
. - In the left pane of the Edit script window, select the script file you want to view or edit.
- Click a page thumbnail in the right pane to scroll to the section of the script that interests you.
-
View or edit the script.
Tip: Auto-completion is supported for DevWeb scripts.
- Click Save to save your changes. Your changes are saved globally—all tests that use this script are affected. The Details pane shows the modification date and time.
Note: You can also edit script files from the Assets section. Go to Assets > Scripts, select the check box for a supported script, and click ![]() .
.
Assign labels
Use labels to help you organize scripts in your repository, or to organize your load tests in the Load tests and Results pages. The labels you create are common to both scripts and load tests.
Labels can be nested in sub-categories:
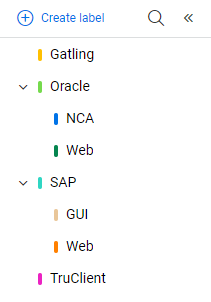
The expandable labels pane is located to the left of the grid. Click the left or right double arrows at the top to show or hide the pane.
You can perform the following actions for labels:
| Action | How to |
|---|---|
|
Create a label
|
|
| Edit a label |
From the Labels pane, highlight a label. Click the vertical ellipsis |
| Delete a label |
From the Labels pane, highlight a label. Click the vertical ellipsis Removing a label also removes any sub-labels. |
| Assign a color to the label |
From the Labels pane, highlight a label. Click the vertical ellipsis |
| Add a sub-label |
From the Labels pane, highlight a label. Click the vertical ellipsis |
| Manually assign a label |
You can assign a label to a script manually after the script has been uploaded.
Use the Search box |
| Automatically assign a label |
You can assign a label to a script automatically when uploading the script. To assign a label to a script automatically, select the required label before uploading the script's .zip file or before dragging and dropping the script into the Assets > Scripts page. Note: To assign a label to a script uploaded from a Git repository, you must use Git agent 2022.10 or later. |
| Filter by a label |
You can filter scripts, load tests, and results by a specific label. In the Labels pane, highlight a label or sub-label to filter the displayed items.
Use the Search box |
 to select a label color.
 and select Edit.
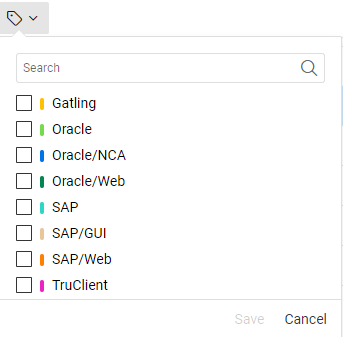
 to find a label name.
 to find a label name.
Assign a script key
A script key contains an encryption key for an encrypted DevWeb script. By assigning a script key to a script, you can run the script without having to expose the encryption key within the script itself.
You create and manage script keys in Assets > Script Keys. For details, see Script keys. When assigning script keys, you can also create a new key by clicking  Create a key.
To assign a script key to a DevWeb script, select the script and click ![]() . Select the script key you want to assign and click OK. The name of the assigned script key appears in the right pane as part of the summary script information.
. Select the script key you want to assign and click OK. The name of the assigned script key appears in the right pane as part of the summary script information.
Note:
- You can only assign a script key to a DevWeb script.
- You can only assign one script key to a script.
To remove an assigned key, select the script, click ![]() and then click Clear and OK.
and then click Clear and OK.
Assign data files
A data file contains information used by scripts. By assigning a data file to multiple scripts, you can manage the data in one location rather than having to update multiple scripts for each change.
You can assign multiple data files to a script. Save the data files in zip format, as described in Prepare data files.
Before assigning data files to scripts, upload the files to LoadRunner Cloud from the Assets > Data Files tab. For details, see Upload and manage data files.
To assign data files to scripts:
-
Open the Scripts page from one of the following tabs:
-
Click Assets > Scripts.
-
Click Load tests, select a load test, and click
Load profile.
-
-
Select a script and click
 . The Assign data file(s) to scripts dialog box opens. By default, you can assign up to five data files to a script.
Note: To view Git data files only, select the Show git data files only check box.
-
Select the data files to assign to the selected script and click OK.
-
To remove a data file assignment, repeat step 2, and clear the check box for that data file.
Note: By default, the total number of the data files that can be assigned to a single script cannot exceed 5, and the total size of the data files assigned to a single script cannot exceed 50 MB. If you need to change the default settings,submit a service request.
 See also: