Set up UFT One and create your test structure
Configure your UFT One machine for running web tests. Then, create a new test structure to test the Advantage Online Shopping site.
Add the UFT One browser extension
Before testing a web app, you must enable the UFT One Agent or Extension relevant for the browsers you want to test.
This tutorial uses the Chrome browser to create and run your test. Add and enable the Micro Focus UFT Agent Chrome extension before continuing. For details, see Enable the Micro Focus UFT Agent extension on Google Chrome.
Once enabled, you'll see the Micro Focus UFT Agent icon in your browser toolbar:

Define your Internet options auto-complete settings
Define your Windows Internet options to disable autocomplete for forms, usernames and passwords.
Do the following:
-
Open your Windows Internet Options dialog box.
-
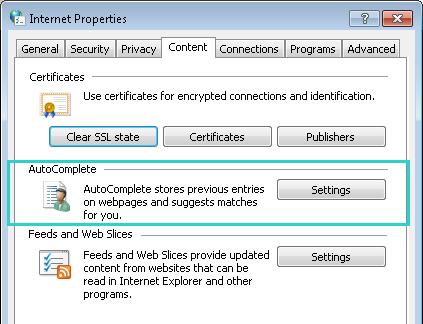
On the Content tab, in the AutoComplete area, click Settings.
-
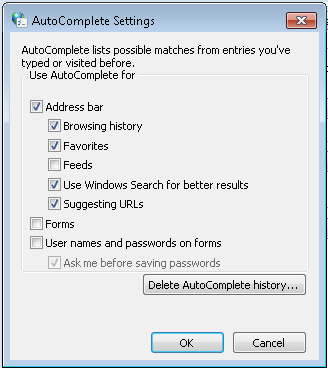
Clear the checkboxes for Forms and User names and passwords on forms.
For example:
- Close the dialog boxes when you're done.
Create a new UFT One solution, test, and actions
UFT One actions are the building blocks of your test. This exercise describes how to create separate, modular actions to represent each of the steps in the following user flow on the Advantage Online Shopping site:
- Logging in to the site
- Selecting a laptop, and adding it to the cart
- Checking out and paying for the laptop
- Logging out of the site
Start UFT One
First, close your browser window. UFT One will only recognize and record on browser windows opened after UFT One has been opened.
Then, click the UFT One shortcut  from your desktop, or access it from the Windows menu.
After the splash screen closes, in the Add-ins Manager, confirm that the Web Add-in is selected, and clear all other Add-ins.
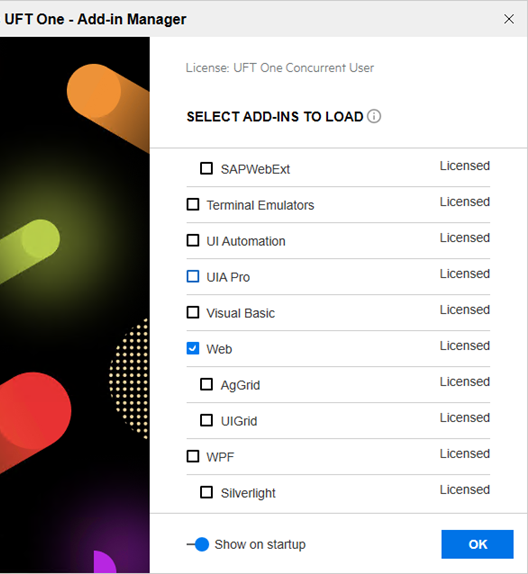
Tip: We generally recommend loading only the add-ins required for your test. This keeps your test lean and simple, and also enhances UFT One performance.
Create a new test
Click the New![]() button, and confirm that GUI Test is selected.
button, and confirm that GUI Test is selected.
Enter the following details:
| Name | AdvantageDEMO |
| Location |
Keep the default: C:\Users\<username>\Documents\UFT One |
| Solution Name | WebTutorial |
Ensure that the Create directory for solution checkbox is selected, and then click Create.
Tip: UFT One solutions enable you to group your tests according to functionality, and open and edit multiple tests or other documents in the same UFT One session.
Solutions also enable you to share resources across tests.
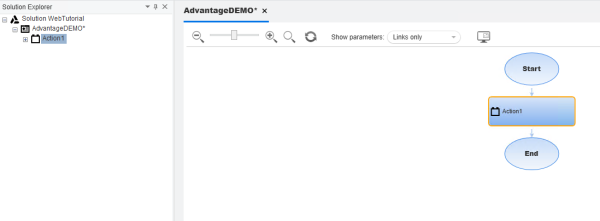
Your test appears in the Solution Explorer and the canvas with a default action:
Create actions
Do the following:
-
Rename Action1 to Login.
In the canvas, right-click the Action1 box and select Action Properties.
- In the Name field, enter Login.
- In the message that opens about this action being a reusable action, click Yes.
For details, see More about reusable test actions.
-
Create a new action called SelectLaptop. To do this, click anywhere in the canvas, and select Call to New Action.
- Name your new action SelectLaptop.
- Ensure that both Reusable Action and At the end of the test are selected.
-
Repeat the previous step to create additional actions, named Checkout and Logout.
Save your test when you're done.
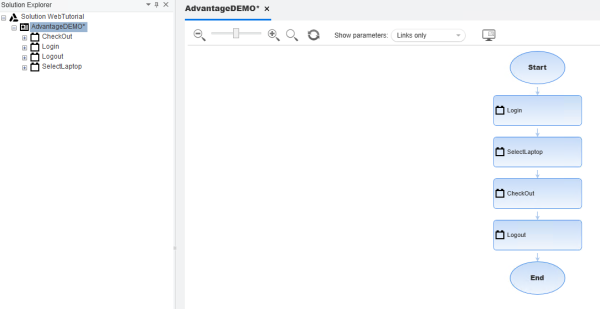
Your test should look like this:
 Next steps:


