Relevant for: GUI tests and scripted GUI components
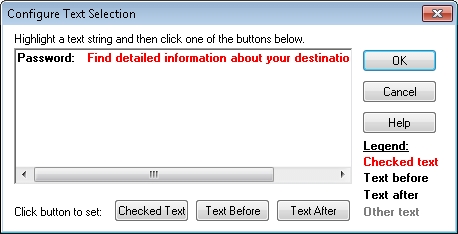
What is the Configure Text Selection dialog box? This dialog box enables you to specify the checked text, the text before, and the text after, for a text checkpoint.
When should you use the Configure Text Selection dialog box? Use this dialog box to specify exactly what text you should use for a text or text area checkpoint.
| To access |
In the Checkpoint Summary Area of the Checkpoint Properties dialog box, click the Configure button in the Checkpoint Summary area. |
What do you want to know?
To instruct UFT One to check specific text, select the text in the edit window, and click Checked Text. The text to check turns red while all other text remains black.
If you want to specify the text before and after the checked text, you can also specify this by highlighting the necessary text and clicking Text Before and Text After. These text selections are displayed in black after you specify the necessary text.
No - you can only select one string as Checked Text. If you need to check multiple parts of a string, you need to add multiple checkpoints.
- UFT One displays the checked text in red and the text before and after it in black (as indicated in the Legend displayed in the dialog box).
- To remove text from the current text selection configuration, highlight only the text you want included as the before or after text and click the appropriate button. Any text that is not selected as Checked Text, Text Before, or Text After is displayed in gray. The gray text is not displayed the next time the Configure Text Selection dialog box is opened.
You may also want to learn:


