Share this page


Developing a New Support Set
The first step in creating support for a custom control is to create a new Custom Server project. This project will create support for the TrackBar control.
To create a new Custom Server project:
Open Microsoft Visual Studio.
Select File > New > Project. The New Project dialog box opens.
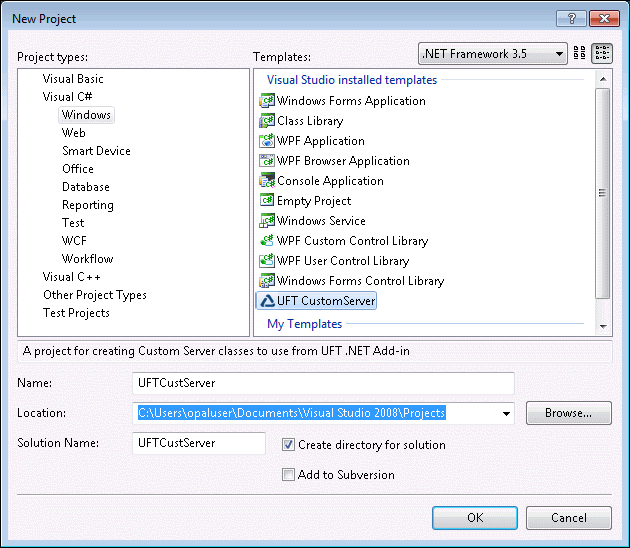
Specify the following settings:
Select the Visual C# > Windows node in the Project types tree. (In Microsoft Visual Studio versions other than 2008, the UFT CustomServer template may be located in a slightly different node in the tree.)
Select UFT CustomServer in the Templates pane.
In the Name box, specify the project name
UFTCustServer.Accept the rest of the default settings.
Click OK. The OpenText Functional Testing Custom Server Settings wizard opens.
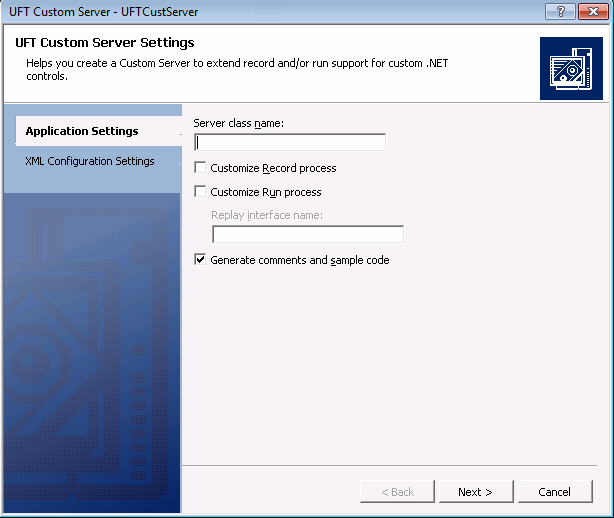
In the Application Settings page, specify the following settings:
In the Server class name box, enter
TrackBarSrv.Select the Customize Record process check box.
Select the Customize Run process check box.
Accept the rest of the default settings.
Click Next. The XML Configuration Settings page opens.

In the XML Configuration Settings page, specify the following settings:
Make sure the Auto-generate the XML configuration segment check box is selected.
In the Customized Control type box, enter
System.Windows.Forms.TrackBar.Accept the rest of the default settings.
Click Finish. In the Class View window, you can see that the wizard created a TrackBarSrv class derived from the CustomServerBase class and ITrackBarSrvReplay interface.