Share this page


Use Digital Lab with LDAP
If your organization uses LDAP, you can integrate Digital Lab with your LDAP server. Users can then access Digital Lab with their LDAP credentials, without the need for the administrator to first add them to the list of authorized users. This topic is relevant only for UFT Digital Lab and UFT Digital Lab Managed SaaS.
Enable LDAP on the Digital Lab server
In the Digital Lab console, in Administration  , select the Settings tab and in the left panel, click LDAP Integration. Enable LDAP mode, and add at least one LDAP server configuration. For details, see settings.

Add and assign users
Only authorized users, who are included in the LDAP directory and in the Digital Lab list of users, can work with Digital Lab. Users can be added to the list of users and assigned to workspaces in the following ways:
| Login |
The first time that an LDAP user logs in to Digital Lab, they are added to the list of users. If a workspace has a server/ group assignment, users included in the server/groups are automatically assigned to the workspace whenever they log in. For details on server/group assignment, see Assign LDAP server or groups to workspaces. When the Assign users to default workspace setting is enabled in Administration settings, a user is assigned to the Default workspace:
|
| Import | Use the import users file option, in the User Management script. The script assigns user roles and can also be used to assign users to workspaces. |
| Manually |
Provided that no server or group has been assigned to the workspace, add an LDAP user (using the LDAP username) in the Users section and assign them access to the required workspaces. You can also assign an existing user to a workspace, by selecting the user from the full list of users under Lab management. For details on server/group assignment, see Assign LDAP server or groups to workspaces. |
| Synchronization |
Perform a sync to add the relevant users to the list of users. Then, provided that no server or group has been assigned to a workspace, you can manually assign users to a workspace. For details on server/group assignment, see Assign LDAP server or groups to workspaces. For details on defining the filter for synchronizing users, see LDAP settings. To perform a sync:
Note: Adding up to 5000 LDAP users is supported.
|
 . New users are added to the users list.
 When users are added by first login in or via synchronization, the user receives a User role. After the initial login, an administrator can change the role to Admin or Workspace admin.
Assign LDAP server or groups to workspaces
Instead of having to manage permissions for each user separately, the administrator can grant an entire LDAP group access to relevant devices and applications in the organization. If you have enabled LDAP mode, you can assign an LDAP server or groups to specific workspaces. For example, you can configure Digital Lab to allow all users from the QA Europe LDAP group to use the QA Europe workspace.
Note: Server/group assignment is not supported when shared spaces are enabled.
To assign LDAP groups to workspaces, either the User Group membership attribute, or the Group membership attribute must be specified in the LDAP server configuration in the administration settings. For details, see Administration settings.
To assign a server or group to a workspace:
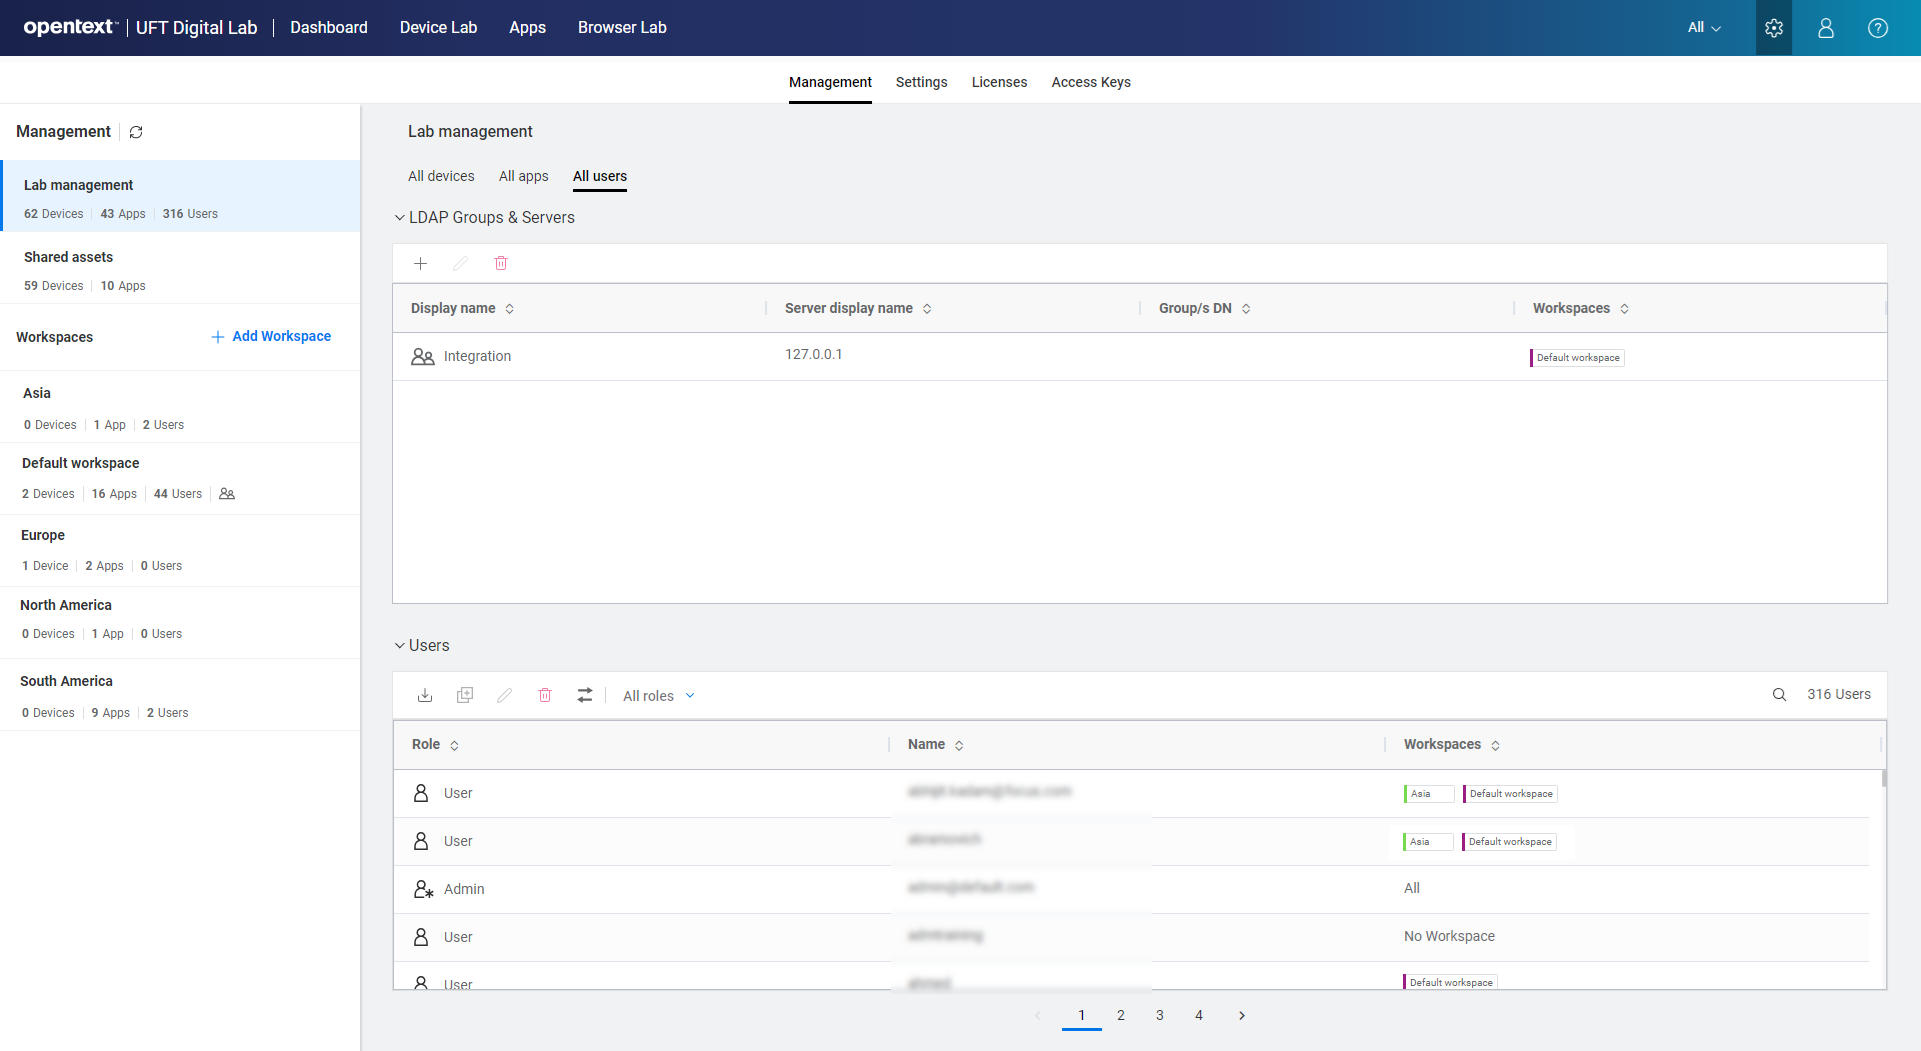
- In Administration , click the Management tab.
- Select Lab management in the left panel, and click the All users tab. Alternatively, to assign an LDAP server or groups to a specific workspace, select the workspace in the left panel, and then click the Users tab.
- In the LDAP GROUPS & SERVERS section, click + to assign an LDAP server or groups to workspaces:
- Provide a display name so that you can identify the group or server assignment. For example, QA Europe.
- Select the LDAP server to be assigned.
- Provide the LDAP Group DN (optional). For multiple groups, use a semi-colon to separate the entries. If left empty, all users included in the server are able to access the workspace.
- Select the workspace/s to which to assign the server or groups.
Tip: If there is a group hierarchy in the LDAP server, you can assign the parent group. All nested sub-groups are included.
Users are automatically be added to the table in the Users section after first login. The workspaces to which they are assigned are synched with each login, and displayed in the Users section. For details, see Add and assign users. If there are server or group assignments, users cannot be manually assigned or unassigned to workspaces.
To edit LDAP server or group assignments:
Edit an LDAP group, for example to change the workspace assignment, or to delete the server/ groups assignment completely.
|
Edit |
In Ldap Groups & Servers, select an item and click the Edit button |
| Delete | In Ldap Groups & Servers, select an item and click the Delete button  . Note that the server/groups assignment to the workspace are removed. Users included in the server/groups no longer have access to the workspace. . Note that the server/groups assignment to the workspace are removed. Users included in the server/groups no longer have access to the workspace. |
 . Edit the details as needed.
Considerations when using LDAP Users
Note the following considerations regarding users when you enable the LDAP integration:
| Change the LDAP setting | All existing users, excluding admin@default.com, are deleted when you enable or disable the integration with LDAP. |
| Passwords | You are not able to change an LDAP user's password from Digital Lab. |
| Delete users | Deleting a user removes the user from the list of the Digital Lab list of users. However, if the user is included in an LDAP server or group that is assigned to a specific workspace, the user is added again when they log in. |
| Assign LDAP servers or groups to workspaces |
If a workspace has one or more LDAP servers or groups assigned to it:
|
| Change LDAP server | If you change LDAP servers, the users from the original server are still be displayed in the Digital Lab user list. However, if they are not included in the new server, they are not able to access Digital Lab. To remove users from the original server from Digital Lab, you delete them manually. Alternatively, if the Remove users when syncing option is enabled in Administration settings, perform a sync to remove the users. Note that synchronization also adds all new LDAP users. |
| Appium | Appium anonymous access is not supported with LDAP. |
| Max number of users | Adding up to 5000 LDAP users is supported. |
| Shared spaces/ Digital Lab as a managed service | When using Digital Lab as a managed service provided by an MSP or when shared spaces are enabled: If the Allow access to all users option was enabled at the global level in the LDAP integration settings, the Remove button is not displayed and you are not able to remove users from the Users page. (The deletion of users is disabled, because the removal of users would only be effective until the next log in.) |
Use secure LDAP on the Digital Lab server
To use Digital Lab with secure LDAP (SSL), you need your LDAP certificate. The section below is relevant for UFT Digital Lab. For UFT Digital Lab managed SaaS, open a service request to install your LDAP certificate on the server. For details, see Check the LDAP configuration and obtain a certificate.
- Copy the certificate to the Digital Lab server machine. Obtain your certificate from your IT administrator or use a third-party tool to obtain a certificate. For details, see Check the LDAP configuration and obtain a certificate.
-
Import the LDAP certificate to the truststore on the server machine. The following is a sample keytool command for importing the certificate file:
keytool -import -trustcacerts -keystore "C:\Program Files\UFT Digital Lab Server\server\Security\keystore\trustStoreHpmc" -storepass password -alias myCA -file c:\hpldapsec.der
- Upload the certificate to your machine by running the
uploadCertificates.bat/shscript from the /Security folder. - Restart the Digital Lab server.
- In the Digital Lab console, select Administration settings in the Administration page, and scroll down to the LDAP Integration section. Enable the SSL Mode setting.
- Restart the Digital Lab server.
Check the LDAP configuration and obtain a certificate
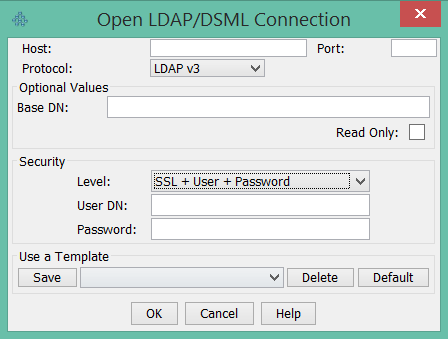
You can verify the LDAP configuration and obtain your LDAP certificate by using a third-party LDAP browser tool, such as JXplorer.
- Download JXplorer.
- In JXplorer, select File > Connect. Enter the details for LDAP host, port, security level for connection, User DN, and password. Click OK.

- Add the certificate to your trusted keystore.
- Select Security > Trusted Servers and CAs. Select the certificate and click View Certificate. Click Copy to File.
If you encounter errors, there is either a problem with the parameters that you provided for the connection, or with the LDAP configuration itself.
 See also: