
Share this page


Dynamic labels
Create dynamic labels to apply custom labels to entities. You can apply a custom label to all items of a specified entity, or to a subgroup of items. For a subgroup of items, you define a condition in which the label is applied.
Apply a dynamic label
In the entity settings, create a dynamic label and define the condition under which the label is applied.
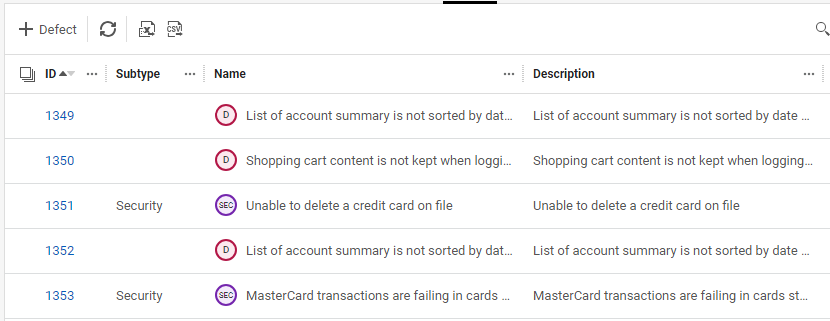
Example: A dynamic label is applied to defects with the subtype Security. All defects with the subtype Security are now displayed with a custom label and icon.
To apply a dynamic label:
-
Open the Settings menu
 , click Spaces, and select a space or a workspace.
 -
Click the Entities tab and select the entity to which you want to apply a dynamic label.
Note: Dynamic labels are supported for the following entities: Defect, Feature, Requirement Document, Application Module, Epic, User Story, Quality Story.
-
Click the Dynamic Labels tab.
-
Click the Dynamic Label button
 to create a new dynamic label.
 -
Enter a name for the label.
-
Click the Change entity color button
 to select a color for the entity icon.
 -
Enter up to 3 characters in the Initials box. The initials are displayed in the entity icon.
-
(Optional) Enter a description for the label.
-
(Optional) Define a condition in which the label is applied. If you do not define a condition, the label is applied to all items of the selected entity.
-
Click Add. The label is added to the list.
If you are working with multiple labels, the order of the labels in the list defines the hierarchy by which the labels are applied. For details, see Hierarchy of dynamic labels.
Hierarchy of dynamic labels
If an item meets the condition of more than one dynamic label, the following hierarchy applies:
- A label defined at the workspace level overrides a label defined at the space level.
-
Within a list, a label positioned lower in the list overrides a label positioned higher in the list.
Tip: You can drag and drop labels in the list to reorder them.


