
Share this page


Snapshots contain the data generated by the traffic between the client and the server, and are captured when a script is recorded and when the script is replayed. Typically, these snapshots are used to synchronize playback of the script.
There is a dedicated snapshot viewer pane for DevWeb. The snapshots display all HAR data associated with a specific web request step in the script.
Activate snapshots during replay
You can set DevWeb scripts to always create snapshots during replay, or to create snapshots only for errors that occurred during the replay of a script.
To activate snapshots during replay, in Runtime Settings > DevWeb Settings > Replay > Create snapshots during replay, select Always or On error. The default setting is Never.

View DevWeb snapshots
The DevWeb snapshots work somewhat differently from the standard VuGen snapshot feature:
- DevWeb snapshots are displayed in the DevWeb Snapshot pane, not in the VuGen Snapshot pane.
- There is no Step Navigator for DevWeb, so you cannot use it to access snapshots.
To view snapshots for DevWeb scripts:
- Open the DevWeb script in the Editor pane.
-
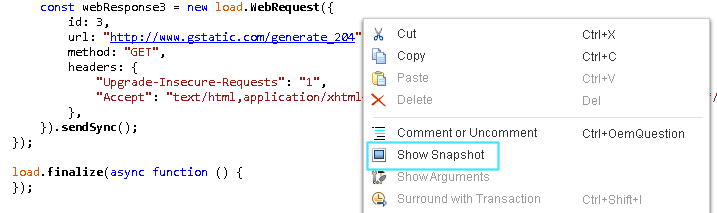
To open a snapshot for a WebRequest step, do one of the following:
- Select View>DevWeb Snapshot. Then click a WebRequest step (containing a step ID argument).
- Right-click within a WebRequest step. Select Show Snapshot.
-
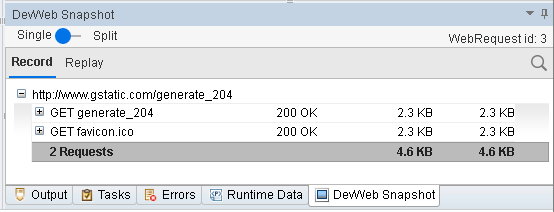
The DevWeb Snapshot pane opens, displaying the snapshot information for the request. The WebRequest ID for the snapshot is displayed in the top-right corner.
-
To view snapshots for other requests, click on the relevant step in the Editor.
Working with DevWeb snapshots
|
UI Element
|
Description
|
|---|---|

|
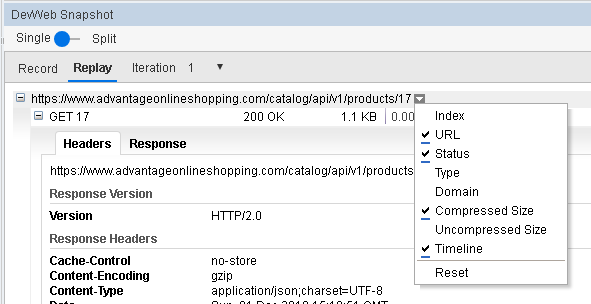
Use to toggle between Single and Split view. In Split view, you can compare the snapshots for the record and replay stages, or compare different replay iterations. |

|
Use to toggle between the snapshots for the record and replay results. |
|
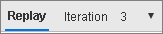
Select the replay iteration to display. Note: If you move to the snapshot for a different step, the selected iterations revert to 1. |

|
Use to search all tabs in the snapshot. When in Split view, there is a search option for each view. |
The body of the snapshots contains a standard HAR viewer format, and includes Headers and Response tabs. Additional tabs such as Params or Post are also displayed where relevant. Use the dropdown menu to filter the displayed information.
Actionable snapshots
From the snapshot pane, you can generate extractors directly into the web request step in the script. The following extractor options are available:
- Text check. Use to search for, and validate the existence of, specific text in the server response.
- Variable. Use to search and save a variable in the server response. The saved variable is then available for later reference.
- Correlate. Use to correlate a value, and add appliers for each additional instance of the value in the request and subsequent requests.
The snapshot actions are available for the response header and response body of the main web request (not for resources).
For general information on the extractor properties, see the Extractors section in the JavaScript SDK.
To add a Text Check extractor:
- Open the snapshot for the relevant web request step, and highlight the text to use for the extractor.
-
Select Add Text Check from the right-click menu.
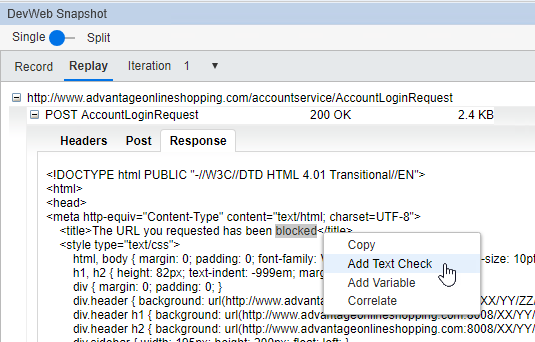
- The Add Extractor dialog box opens. Type a name for the extractor in the Extractor name field.
-
Click OK. The extractor is added to the web request step, using the selected text.
For example:

- If required, change the failOn value for the extractor to
trueand edit the scope.
- Open the snapshot for the relevant web request step, and highlight the value.
- Select Add Variable from the right-click menu.
- The Add Extractor dialog box opens. Type a name for the extractor in the Extractor name field.
-
Click OK. The extractor is added to the web request step, using an appropriate extractor type for the content. The original value is added in a comment.
For example, for a boundary extractor, the boundary strings to the left and right of the selected text are used for the extractor:
Edit the extractor properties as required.
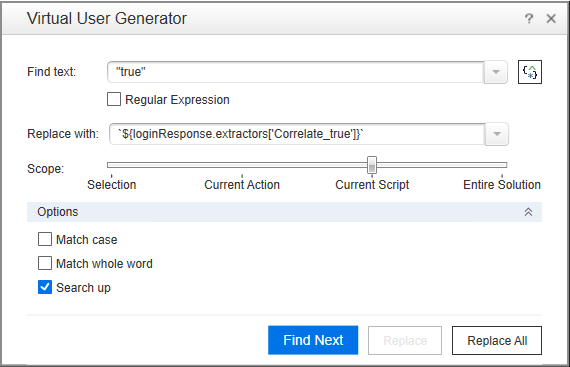
To correlate a value:
Note: The Correlate option will give an error if it is not relevant for the current web request.
- Open the snapshot for the relevant web request step, and highlight the value to correlate.
- Select Correlate from the right-click menu.
- The Add Extractor dialog box opens. Type a name for the extractor in the Extractor name field.
-
Click OK. The extractor is added to the web request step, using an appropriate extractor type for the content, and a dialog box opens:
-
Use the dialog box to find and replace other usages of the correlation value. You can refine the search options, including using a regular expression, editing the replacement parameter, and defining the scope for the search.
 See also:


